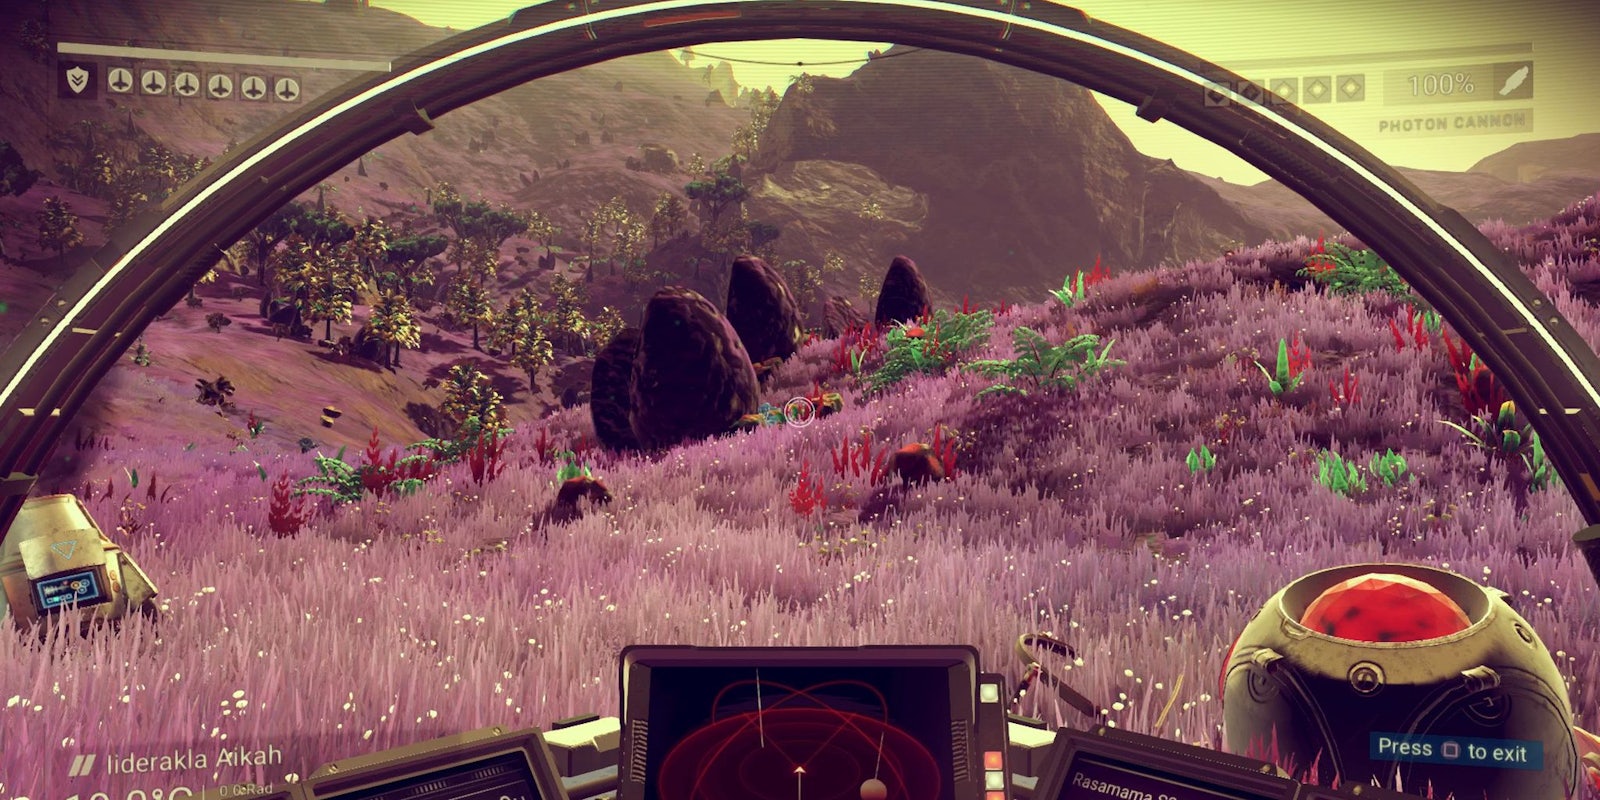
You’ve listened for years to the hype about No Man’s Sky, the space exploration game set in an unfathomably large alien galaxy. What no one told us is that No Man’s Sky is also a game about resource management and crafting. The first hour of the game is about carving up rocks and making repairs to broken gear. Managing the game’s resource and crafting systems may turn out to be the most important skills you need master.
Each planet in No Man’s Sky offers a selection of base elements you can mine from rocks or collect from fauna. You use these elements to build things and recharge your technology, or you can sell them on the galactic market for credits.
Your inventory space is extremely limited. You’ll be prompted to gather certain elements when they are required to fulfill your priority objectives, but otherwise, you’re on your own to figure out what is or isn’t worth carrying in those precious inventory slots.
There’s a lot to learn, very quickly, and we’re here to help you with this illustrated beginner’s guide to No Man’s Sky.
Note: As this guide was written based on a PlayStation 4 copy of No Man’s Sky, all controller directions are referring to the DualShock 4 controller.
How to repair your gear
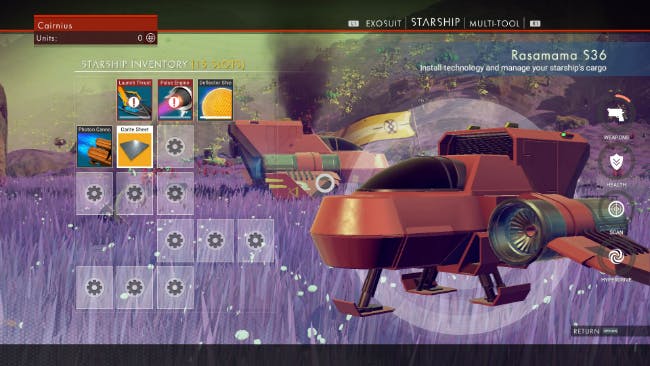
Press the controller’s touchpad to access the inventory screen. You can switch between your exosuit, starship, and multitool by pressing the L1 and R1 buttons.
The multi-tool’s inventory slots are reserved for base technologies like the mining beam, or for improvements to the multi-tool you can craft once you discover the blueprints.
The exosuit and starship inventory slots can be used to hold items. They also hold the technologies installed in the exosuit and starship. These technologies can run out of power and need to be recharged often. Many of them also need to be repaired at the beginning of the game.
Read More:
- No Man’s Sky is a lonely sci-fi adventure
- This is how No Man’s Sky creates over 18 quintillion planets
Anytime you want to review an exosuit, starship, or multi-tool technology, just place your cursor over the technology. If the technology is in working order you’ll see what kind of elements or items you need to recharge the tech and keep it functioning.
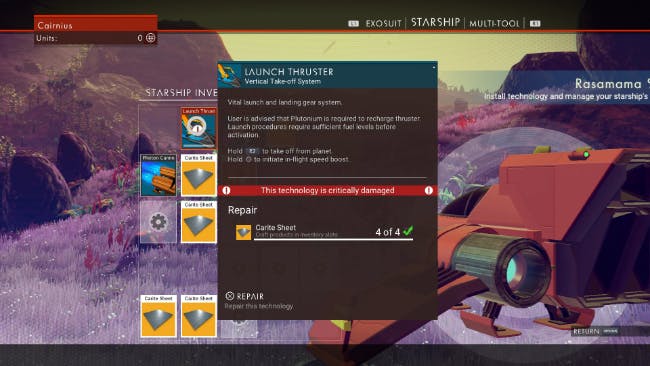
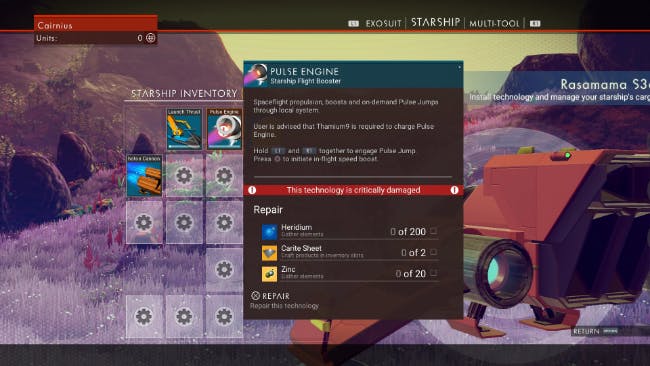
If the tech is broken, you’ll see a prompt that tells you what elements or items you need to make the repairs. Your launch thruster, for instance, is one of your components that is broken at the beginning of the game, and it’s an essential technology you need to get your starship off the ground.
If you hold your cursor over the launch thruster tech, you’ll see that you need four carite sheets to make the repair. That means you need to make the carite sheets.
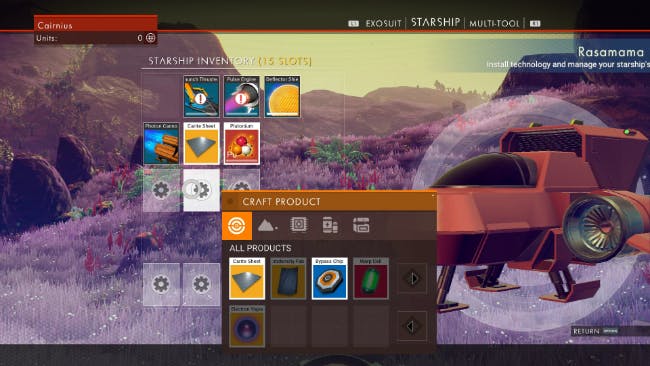
To craft an object, place your cursor over an empty inventory slot on either the exosuit or the starship, and then press and hold the square button. The “Craft Product” window will show you all the item recipes you own. This will include carite sheets.
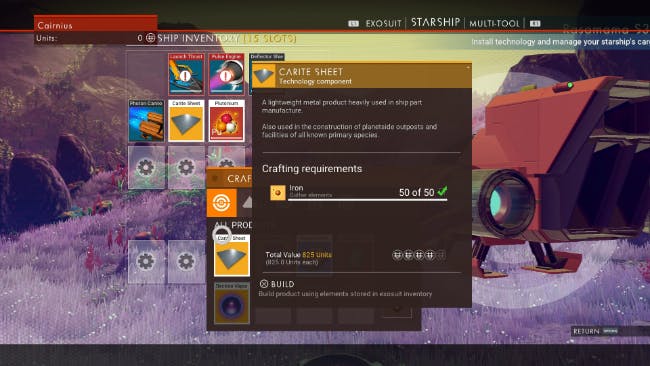
Place your cursor over the carite sheet in the Craft Product window to see what the crafting requirements are. You need 50 iron to build one sheet. Luckily, iron ought to be a plentiful element near your starship.
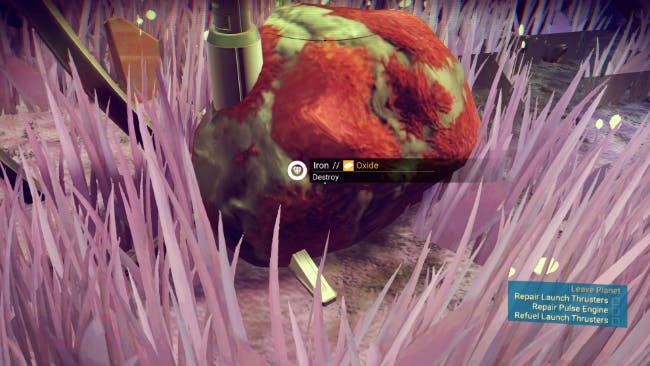
To see if any object in the environment contains an element you can collect, place the cursor over that object.
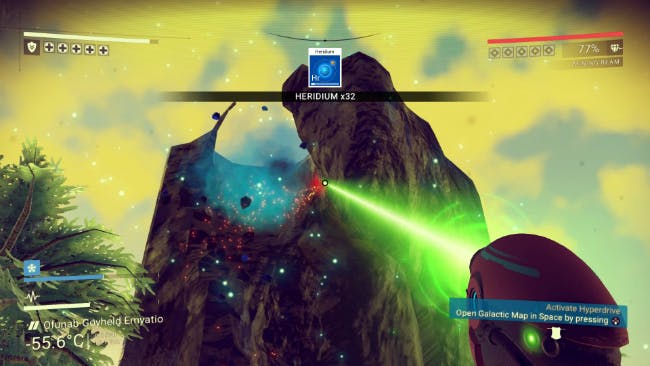
Your multi-tool is equipped with a mining beam. Just aim at the object you want to mine and pull the trigger. Any elements will be automatically collected by the multi-tool. To gather the most of any element out of a rock, make sure you destroy the rock completely.
Once you’ve collected 200 Iron, go into your inventory screen and craft one carite sheet in each of four empty inventory slots. Then hover your cursor over the launch thruster in your starship. You’ll see that you’ve met the requirements for making the repairs.
Just press and hold the X button, and you’re almost good to go. You still need to refuel the launch thruster. That will require some exploring. And before you do any exploring, it’s good to know which of the elements you may encounter on a planet are the most valuable, and why.
Know your table of elements
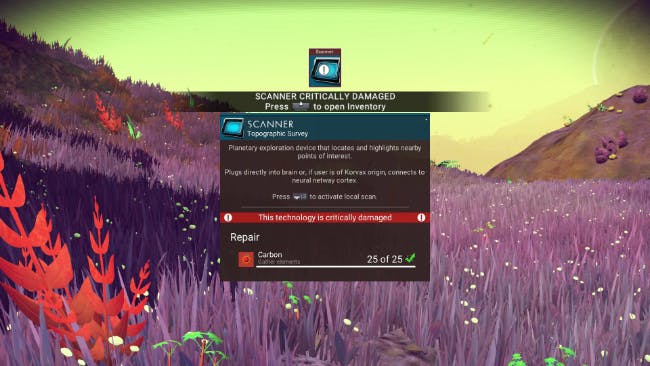
Before you go exploring, you want to fix the Scanner on your multi-tool because you need the scanner to locate elements.
Luckily, this is an easy fix. You only need 50 Carbon to make the repairs, and carbon may be the most common element in the game. One of the easiest ways to gather Carbon, for instance, is to use your mining beam to burn down plants.
Once the Scanner is repaired, if you press L3 (click down on the left joystick) you can scan the immediate area. You will see yellow, red, and blue icons denoting different types of resources picked up by the scan.
Each color stands for a different category of element. Oxides, like Iron and Zinc, are yellow; Isotopes, like Carbon and Plutonium, are red; and Silicates, like Platinum and Heridium, are blue.
If while gathering elements you run out of inventory space in your exosuit, you can teleport items from your exosuit inventory to the starship inventory if you are in range of your starship. You can also teleport items from your starship to your exosuit.
Open your inventory, put your cursor over the item you want to move, and press and hold the triangle button to teleport the item. This only works if you have an empty inventory slot in the place you’re trying to teleport the item to.
In addition to using elements for crafting, you also need elements to recharge your technology. Some pieces of tech can use any element of a certain type to recharge.
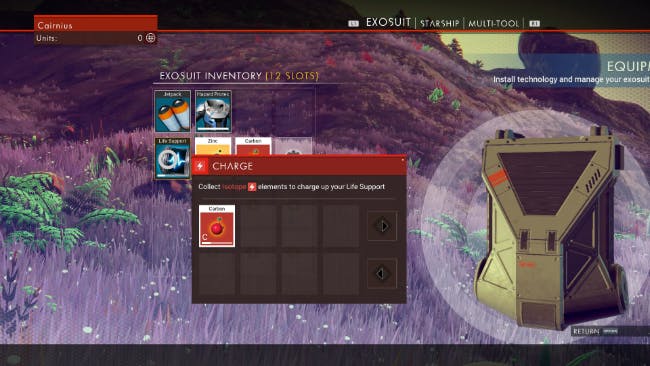
For instance, your life support component on your exosuit can be charged with any form of isotope. Carbon is an isotope, so unless you are on a planet with no flora recharging your life support is easy. Just burn some plants down.
To recharge any piece of tech, hold your cursor over the tech. The “Charge” window will pop up. It will be color-coded to the type of element you need, and all the various forms of that element you own will appear in the window. Put your cursor over the element you want to use to recharge the tech, press and hold X, and you’re done.
A full stack of the required element will usually charge a tech to 100 percent. Be aware that small stacks may not fully recharge the tech.
The more you use common elements to recharge your tech, the less you have to worry about using elements that either sell for a lot of money or have very specific and important uses.
Where to find Plutonium
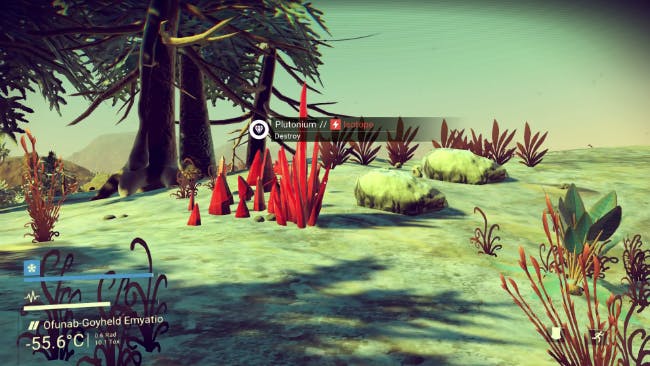
The isotope Plutonium is the only element that may be used to recharge the launch thruster on your spacecraft, and you cannot take off from the surface of a planet without an operational launch thruster.
Plutonium is also a key component in the production of electron vapor, which in turn is a key component in the production of the warp cells that power your faster-than-light drive.
Plutonium also sells for a moderate price on the galactic market, and because the element is relatively plentiful, you can make a lot of money very quickly by selling Plutonium.
Plutonium appears in the environment as red crystals growing out of the ground. Try looking for Plutonium in caves. You may also find Plutonium in supply caches scattered across planets.
Go for Gold
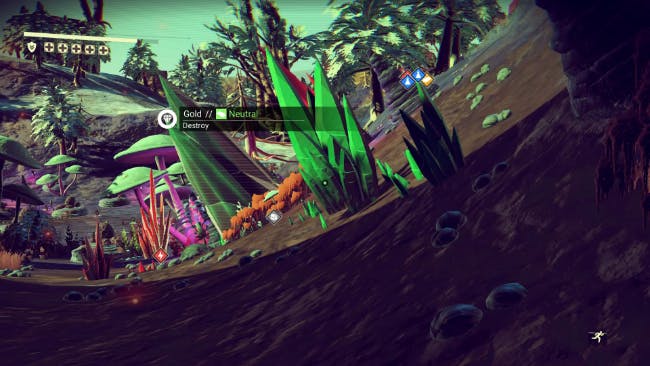
The other reason to keep an eye out for Plutonium crystals is that where you find Plutonium you will usually find Gold, and so far Gold seems to be the most valuable metal you can sell on the galactic market.
The average price we’ve sold Gold for is 220 units (units are the form of currency in No Man’s Sky) for each individual piece. The next, highest average price we’ve seen for a mineral on the galactic market is around 80 units per piece.
Gold is a “neutral” element, which means it is denoted by your scanner with a green symbol. Gold appears in the environment as green crystals growing out of the ground.
Recharge with Thamium9
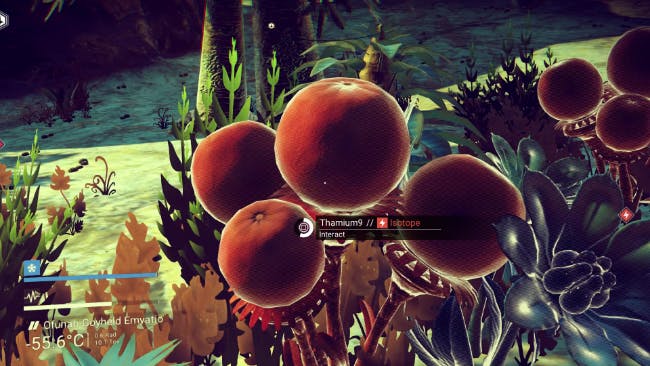
The isotope Thamium9 is the only element you can use to recharge your spaceship’s pulse engine, which you need to quickly travel long distances within a star system.
Thamium9 is also another key component in the construction of the warp cells that power your hyperdrive, the tech that allows you to travel faster than light and move between star systems.
Red-colored plants are your primary source of Thamium9.
When to use Zinc
The oxide Zinc is a key component in the production of antimatter, which is another component required to craft a warp cell.
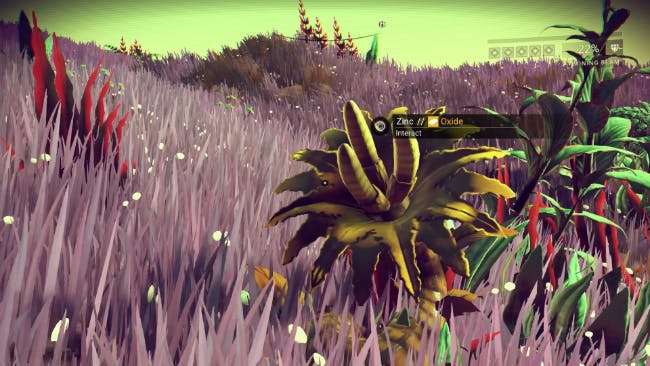
Zinc is also one of only two elements that can be used to recharge the hazard protection component of your exosuit, and you need hazard protection to survive on planets that are extremely cold or extremely hot.
Yellow-colored plants are your primary source of Zinc.
Heridium is rare
Heridium is a silicate used in the production of antimatter, which again is a key component in the construction of the warp cells you need to power your hyperdrive.
The one, major source of Heridium we discovered was a large, rectangular rock. Heridium has been difficult enough to come by that we’ve had to purchase decent amounts of the element on the galactic market.
Using the galactic market
Sometimes it’s not worth trying to pore over the surface of a planet just to grab the one element you need to craft an item or make a repair. If you’ve been judicious in stockpiling elements that sell for a healthy amount of units, it might be easier to just make some money and buy the element you need.
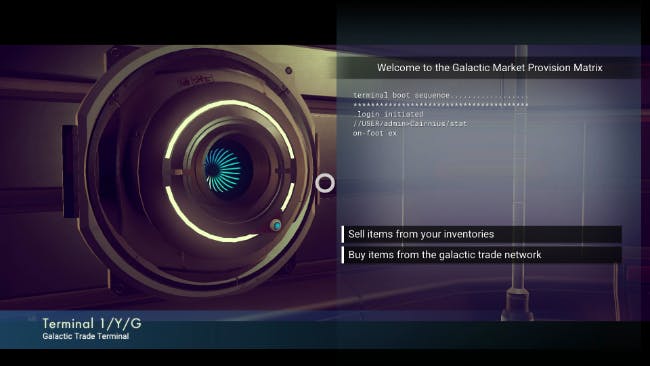
Galactic trade terminals look a bit like personality cores from the Portal games. Step in front of a terminal and press and hold the square button to access the marketplace, and then choose the menu option for selling or for buying.
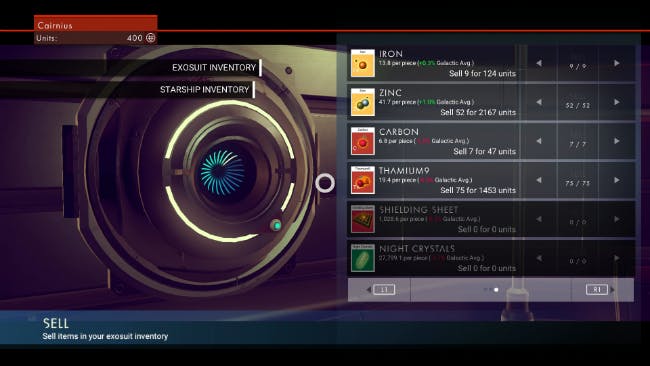
The sales menu will tell you how many credits the market is paying for each piece of whatever you are selling, how this price compares to the galactic average, and how much money you will make if you sell all of those items in your inventory.
If you only want to sell some but not all of a particular item, use the arrows on the right side of the menu to increase or decrease the number of items you want to sell.
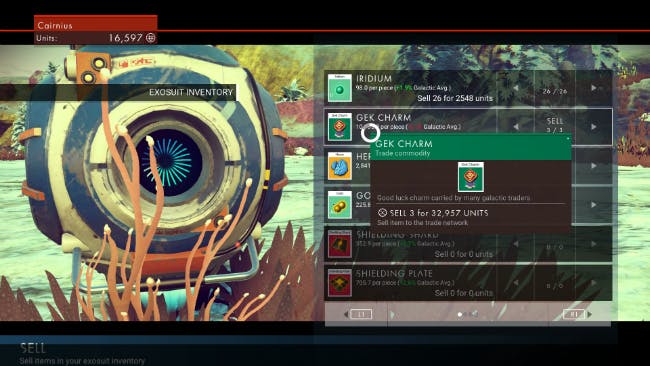
You will find loot containers while exploring planets in No Man’s Sky, and many of them will contain objects whose images are placed on a green background. Some elements, like Gold and Iridium, also appear on green backgrounds.
Green elements can be used to make alloys if you have the right crafting recipe. Early in the game you’re likely not going to have those recipes. Green elements are also very profitable to sell. Green items seem to have no purpose other than to be sold.
The “Buy” window has all the same elements as the Sell window, only the default setting will be to purchase only one of the item in question. Use the arrows on the right side of the screen if you want to purchase more than one of that item.
Starship piloting basics
Galactic market terminals aren’t just lying around anywhere on a planet. You can sometimes find them at save points. You can usually find them at settlements. And the way to find either of those most efficiently is to take to the sky.
Stand next to your spaceship and press and hold the square button to hop in, then press and hold the R2 trigger to take off, provided you’ve charged up your launch thruster.
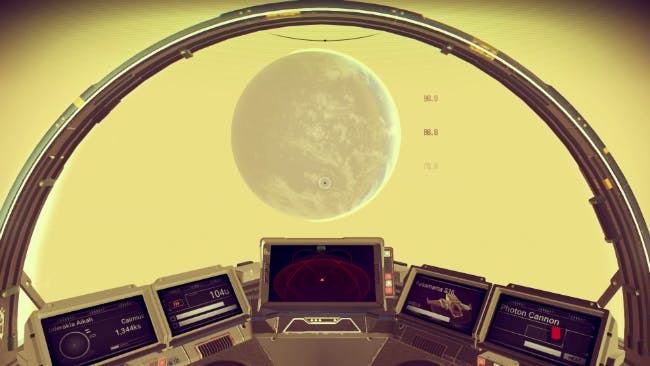
Your left joystick controls your pitch and yaw, or what direction you are facing and your altitude. The L1 and R1 buttons make the starship roll left or right. You can move the right joystick to take a look around you.
Directly in front of you in the cockpit is your radar. Anyone who’s played Wing Commander or X-Wing or Freespace or any other space combat flight sim knows how this works. It’s not terribly important if you’re just exploring a planet. You can tell where the ground is. Don’t crash into it.
Your speed readout, however, is important no matter where you’re flying. You speed is measured on the screen directly to the left of your radar. 20u is a slow speed, and 150u is the limit of what some engines can handle.
Press the R2 button to speed up, press the L2 button to slow down, and press the circle button to activate your booster.
Just like you press L3 to scan things on the ground, you do the same thing in the air. And if your scan picks up anything noteworthy, a symbol denoting the object will appear on your ship’s heads up display.
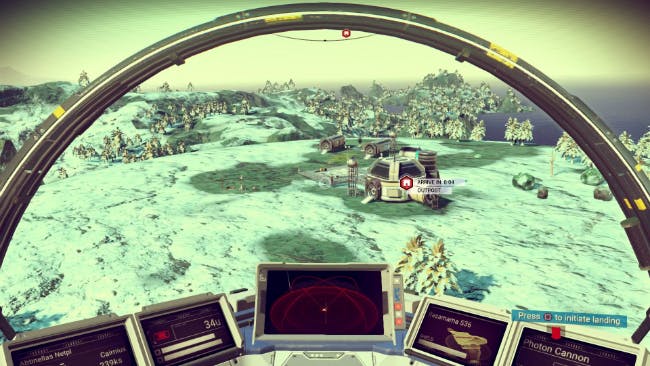
Buildings are denoted by red hexagonal icons, and if you point your starship’s reticle at the icon you should see text describing what the building is, like a trading post or outpost. Green circles with a question mark represent an unknown ground contact, and chances are it’ll be a save point.
To land anywhere in No Man’s Sky, press the square button while in your starship. Your landing will be automatic. If you don’t want to have to walk a good distance between your starship and your target, try to make sure you’re as close to directly above the target as possible before you hit the square button.
If you’re having trouble finding a galactic trade terminal on a planet, you might want to see if there’s a space station nearby.
Prepare yourself for the vast beyond
You want to be absolutely sure you’ve repaired your starship’s pulse engine before leaving a planet. The pulse engine allows you to cover great distances very quickly. You may as well not bother flying into space without one.
The repair requirements for the pulse engine are a little more complicated than the repair requirements for your launch thruster. Heridium may wind up being the item you purchase on the galactic market if it’s as challenging for you to find as it was for us.
If you’ve fixed the pulse engine, you are ready to break atmosphere. While flying, literally point your ship straight up into the sky and activate your booster. It should only take a few seconds to escape the planet and be in space.
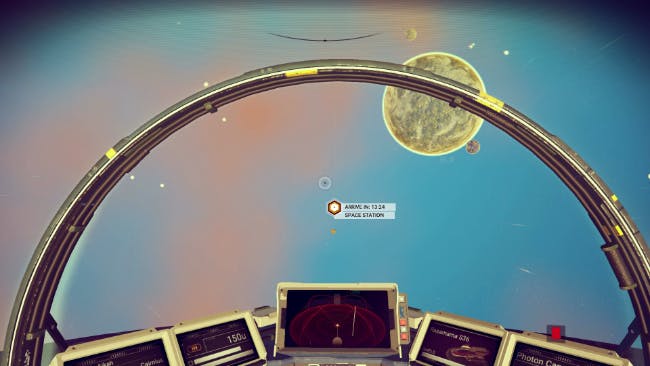
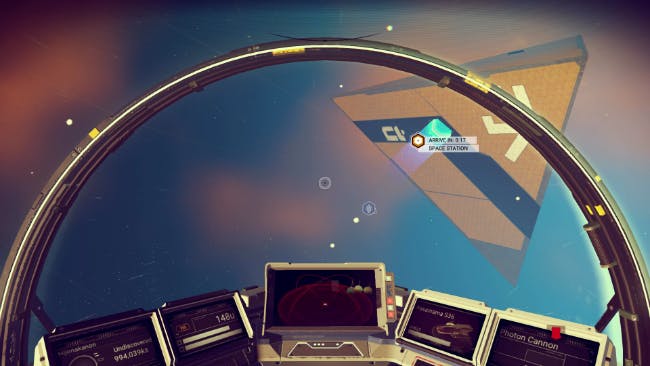
Again, press L3 to scan the area. Space stations appear as yellow hexagons on your heads up display. Chances are it’s going to be a hefty distance from you, which means you’re going to want to use your pulse engine.
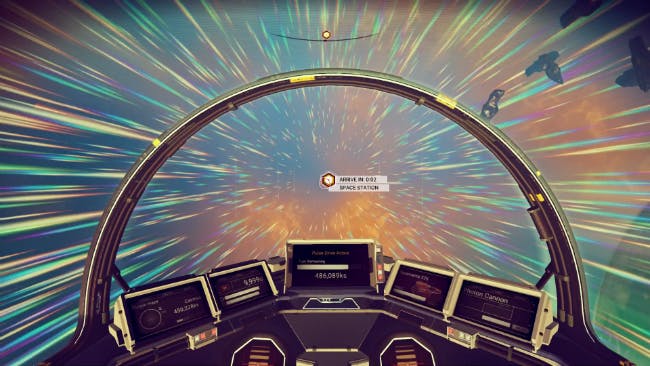
Press and hold L1 and R1 simultaneously to activate the pulse engine. You don’t need to worry about running into space debris while using the pulse engine. When you’re a second or two away from your destination, press L2 to return to normal propulsion.
To dock with a space station, you only need to get close to the entrance. An automatic docking system will take over from there.
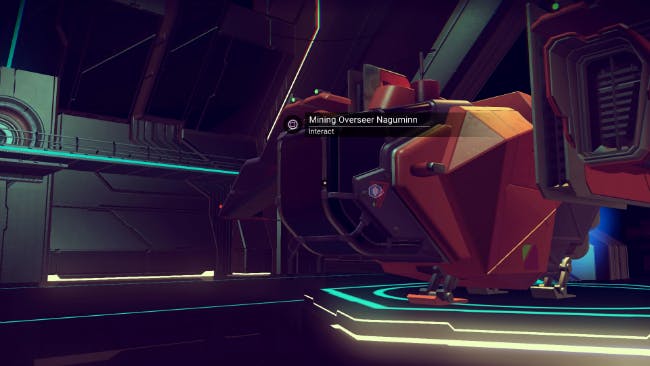
If there are other ships on the landing pads inside the station, you can approach them and press and hold the square button to attempt to trade with their pilots. Otherwise, you ought to find a galactic trade terminal somewhere in the station.
Exploring literally pays off
The other way to make money in No Man’s Sky is to discover and name things like plants, animals, planets, moons, and star systems. You’ll make a few credits for the discovery and even more money if you upload your discovery to the galactic database.
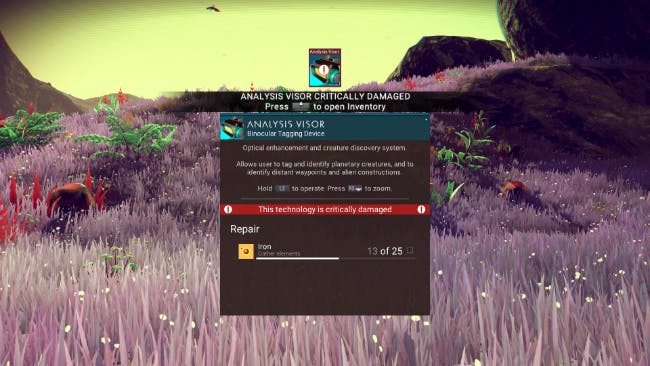
The key to discovering things on the ground is your analysis visor, which of course is broken at the beginning of the game. It also only requires iron to repair, which makes this a quick fix.
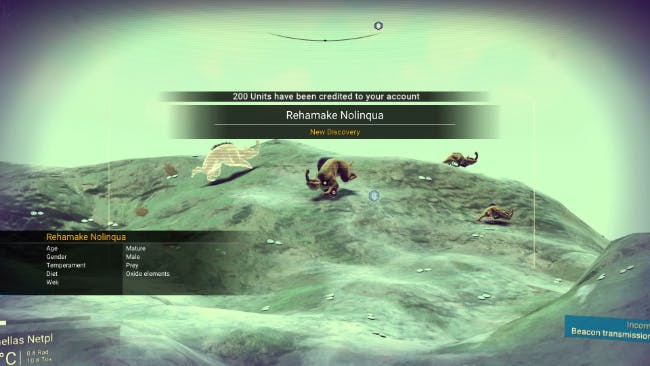
Let’s say you see some cute little creature stumbling around a planet. Press and hold the L2 button to activate the analysis visor, and an oval-shaped scanning reticle will appear on the screen. You can click the R3 button if you want to zoom in.
If the animal is something you haven’t discovered yet it will be marked with a red circle. Just keep the reticle centered on the animal and the scan will activate automatically. The animal’s name and some basic information about the species will pop up in the lower-left-hand corner, and you’ll make a few credits.
Naming plants works the same way. Just sweep your analysis visor around you whenever you find plants that you don’t recognize. If a plant is eligible for discovery the scan will again activate automatically as long as you keep the targeting reticle centered on the plant.
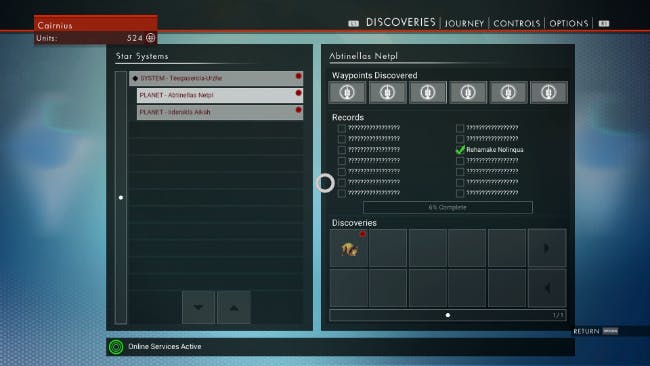
Press the Options button to access the Discoveries screen and see everything you’ve discovered.
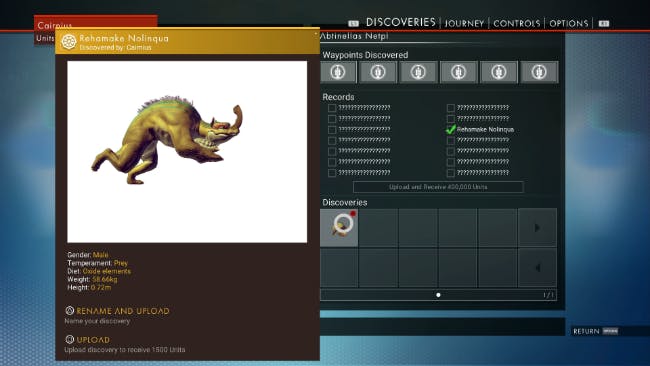
To upload a discovery to the database, hover your cursor over it and then press and hold the square button. You’ll make a decent amount of units every time you upload a discovery.
You can also rename the discovery before uploading it. Just press and hold the triangle button, instead of the square button.
Other tips
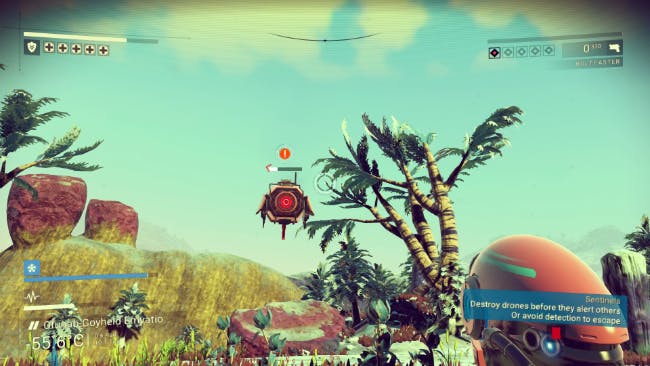
Sentinels are little, floating robots that you’ll find near save points, settlements, or other signs of civilization. We’re not entirely sure what sets them off into attack mode. We’ve had Sentinels come after us just for mining rocks near a Sentinel’s search area.
If you see a Sentinel scanning you or the area around you—you can’t miss the blue scan beams emitted from the Sentinel’s eyes—just run (click the R3 button) until you’ve put some distance between you and the Sentinel.
Otherwise, if the Sentinel decides to turn hostile on you, you’ll probably have to destroy at least a pair of them in short order before they call in reinforcements. Or, if Sentinels turn hostile, you can again just run away. They’ll search for you a bit, and then wander off.
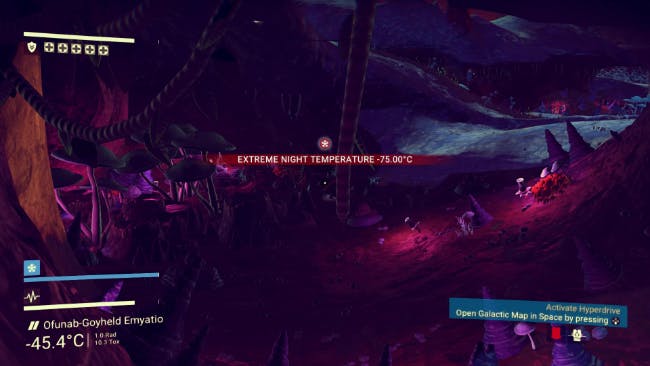
Several of the early planets we discovered were cold enough to pose an environmental hazard. Your exosuit will display warnings if the atmosphere gets dangerously cold.
The temperature protection gauge is the top item in the UI elements in the lower left-hand corner. The icon tells you what sort of temperature you are being protected against, and the length of the bar tells you how much protection you have remaining.
If you enter your starship or a settlement your exosuit’s temperature will return to normal. If you’re going to be outside in a hostile environment for an extended period of time, make sure you keep recharging your exosuit’s hazard protection tech when its charge gets low.
Again, this is why you want to always keep your eye out for zinc. It is only one of two elements that can recharge your hazard protection, and it’s the easier of the two elements to find.
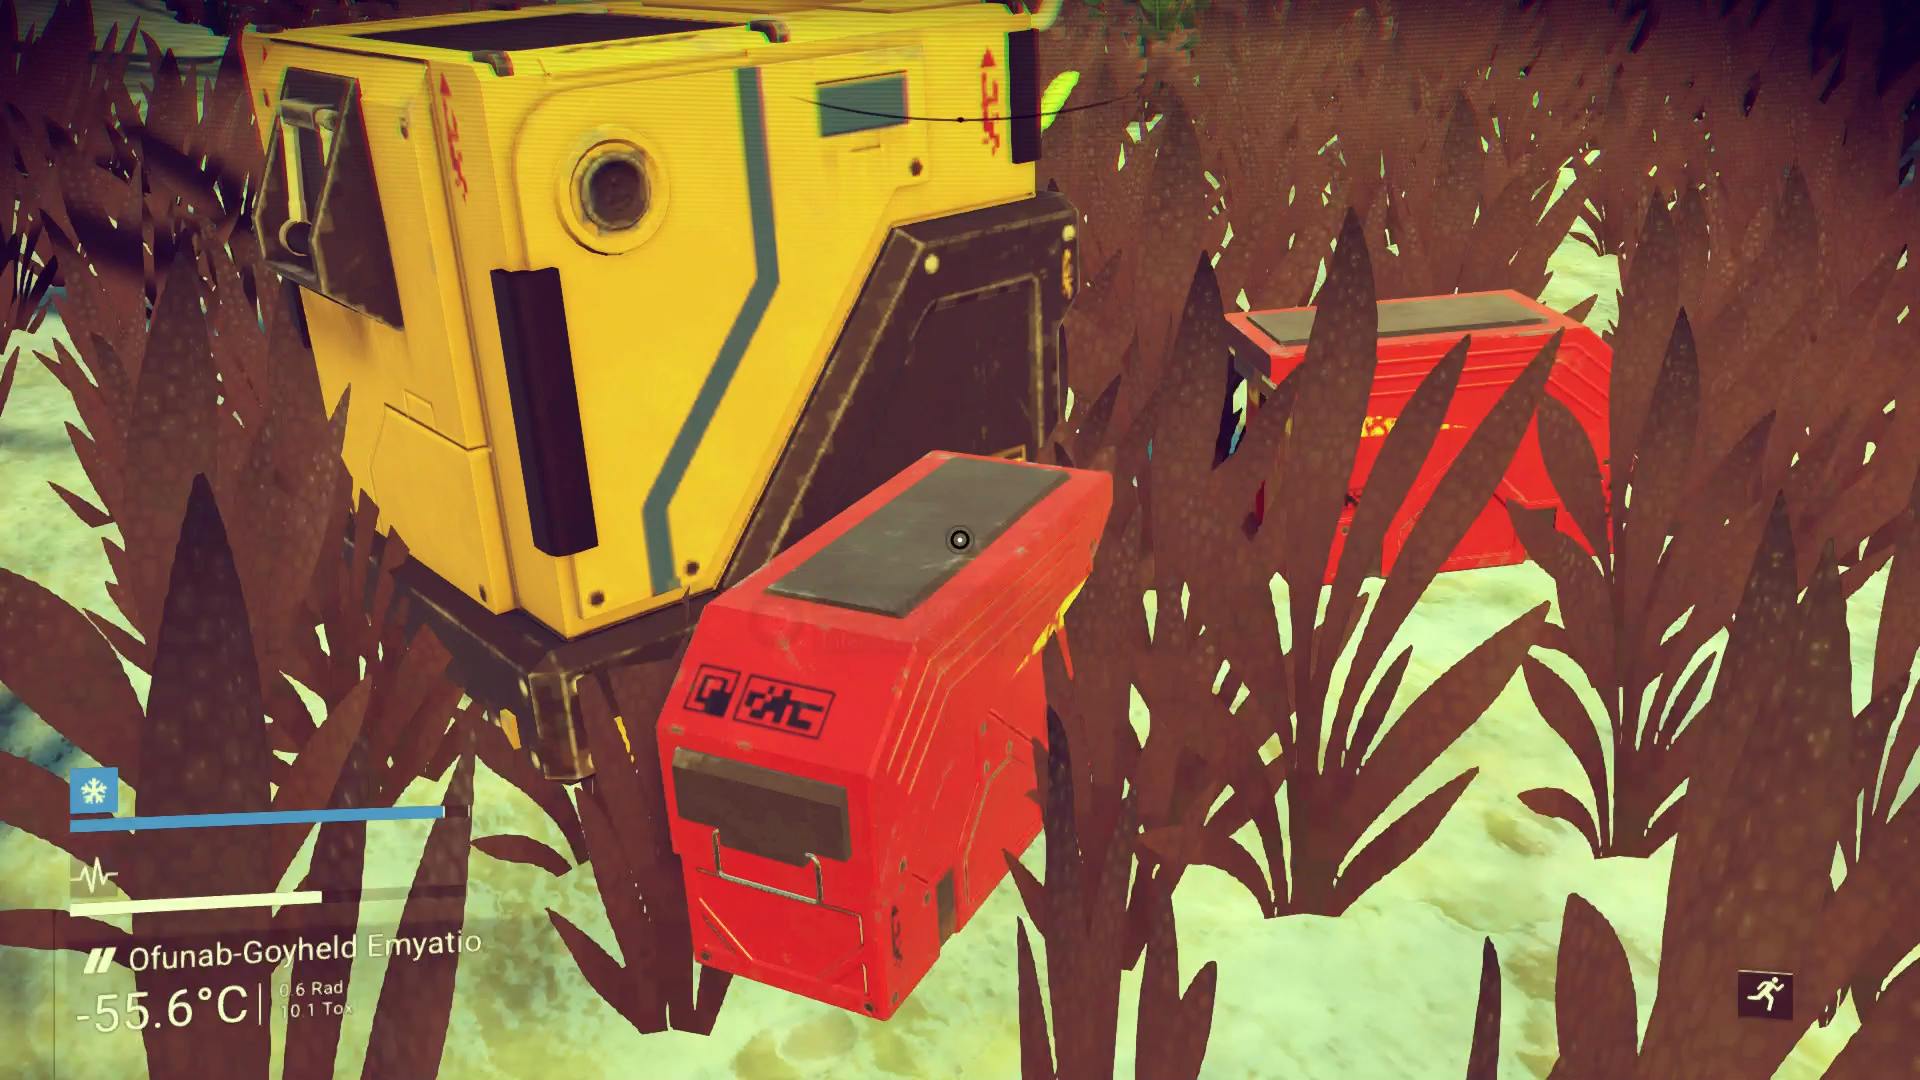
Keep an eye out for item caches when exploring planets. They will show up as gray icons after a scan and can contain elements and green items you can sell in the galactic market among other things.
Hyperdrive navigation basics
Finally, when it’s time to move on to another system, if your ship’s hyperdrive is powered up and ready to go, you need to access the galactic map by pressing the down face button.
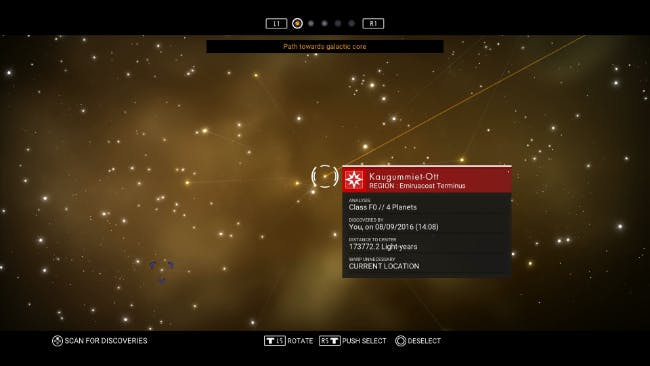
The galactic map is where you can view all the surrounding star systems and choose your next destination. Your beginning hyperdrive can only make a jump to a neighboring star system, but more advanced hyperdrives will allow you to warp through multiple systems in a single jump.
Each route you can take is represented by a line that adjoins two star systems on the map. There are several pre-set filters you may use to review those routes by using the L1 and R1 buttons. The number of available filters is illustrated by the number of gray circles at the top of the map.
The leftmost option will show you the next system that lies on the path toward the galactic core. Reaching the core is one of the ultimate goals of No Man’s Sky. This navigational path will appear as a yellow line.
The middle option will highlight a path towards your next quest objective—if you have one. This navigational path will appear as a blue line. The second filter from the left is free navigation mode, where you can look around at all the neighboring star systems.
If you press and hold the right control stick in the direction of a navigation path, the path will slowly light up and then your view will switch to the star system on the other end of the path.
Press the triangle button if you need to return to the system in which you are currently present. When you’ve decided where you want to go, make sure the correct system is selected on the map, and hit the X button to activate your hyperdrive and warp to that system.
Then it’s time to begin exploring the millions of planets and moon that comprise the Euclid Galaxy in No Man’s Sky.

