You can turn your living room into a holodeck, but it isn’t simple and it certainly isn’t cheap.
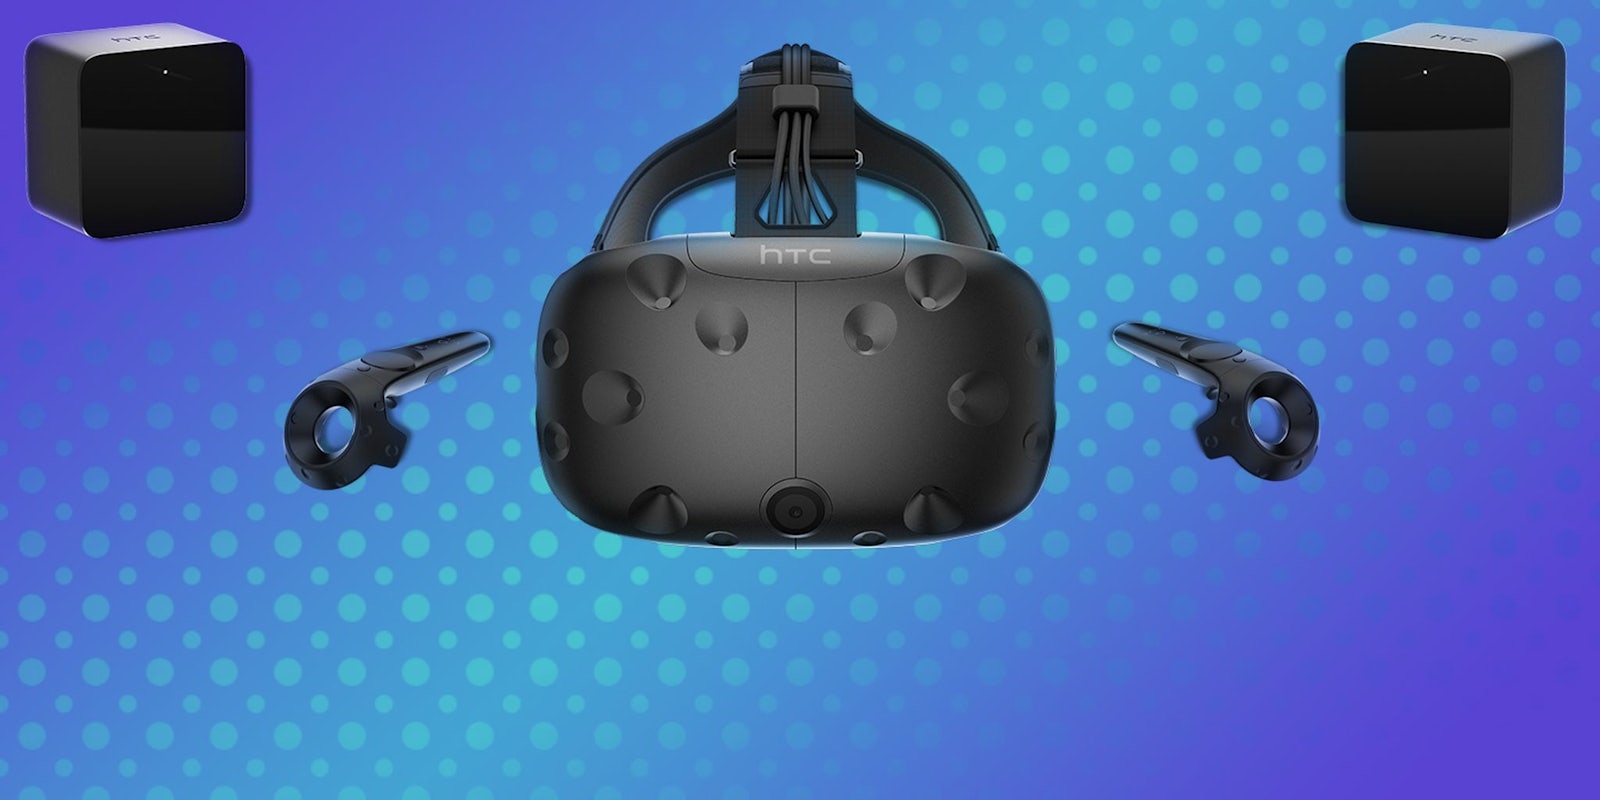
Pre-orders for the HTC Vive begin shipping today. We’ve had a few weeks to test out the Vive, and we’ve learned there’s a lot you need to consider before making this $799 purchase.
The chief concerns we wanted to figure out included the strain on your PC hardware, the living room space required, hardware installation, and best practices for regular use. The good news is you’ll have plenty of games to play on the Vive, if and when you buy it. We’re drowning in games right now, and some of them are excellent.
We’ve also learned to better understand the degree to which room-scale VR—in which you stand and have some degree of free movement—is fundamentally different technology than seated VR like Oculus Rift, and that comes with unique challenges. Even if you’ve thought long and hard about whether you’re interested in getting into VR, you may not have considered all the issues involved with going room-scale.
Do you have enough space?
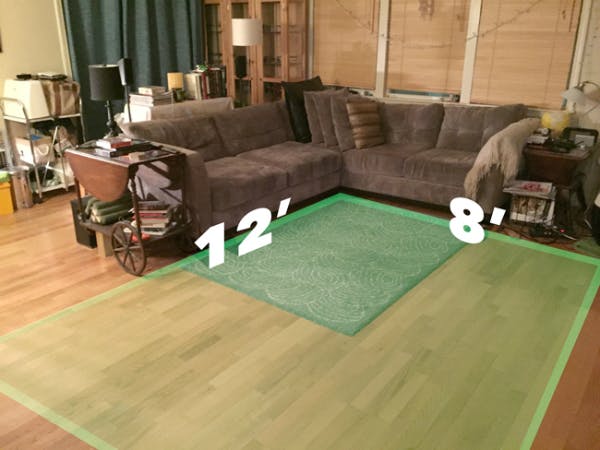
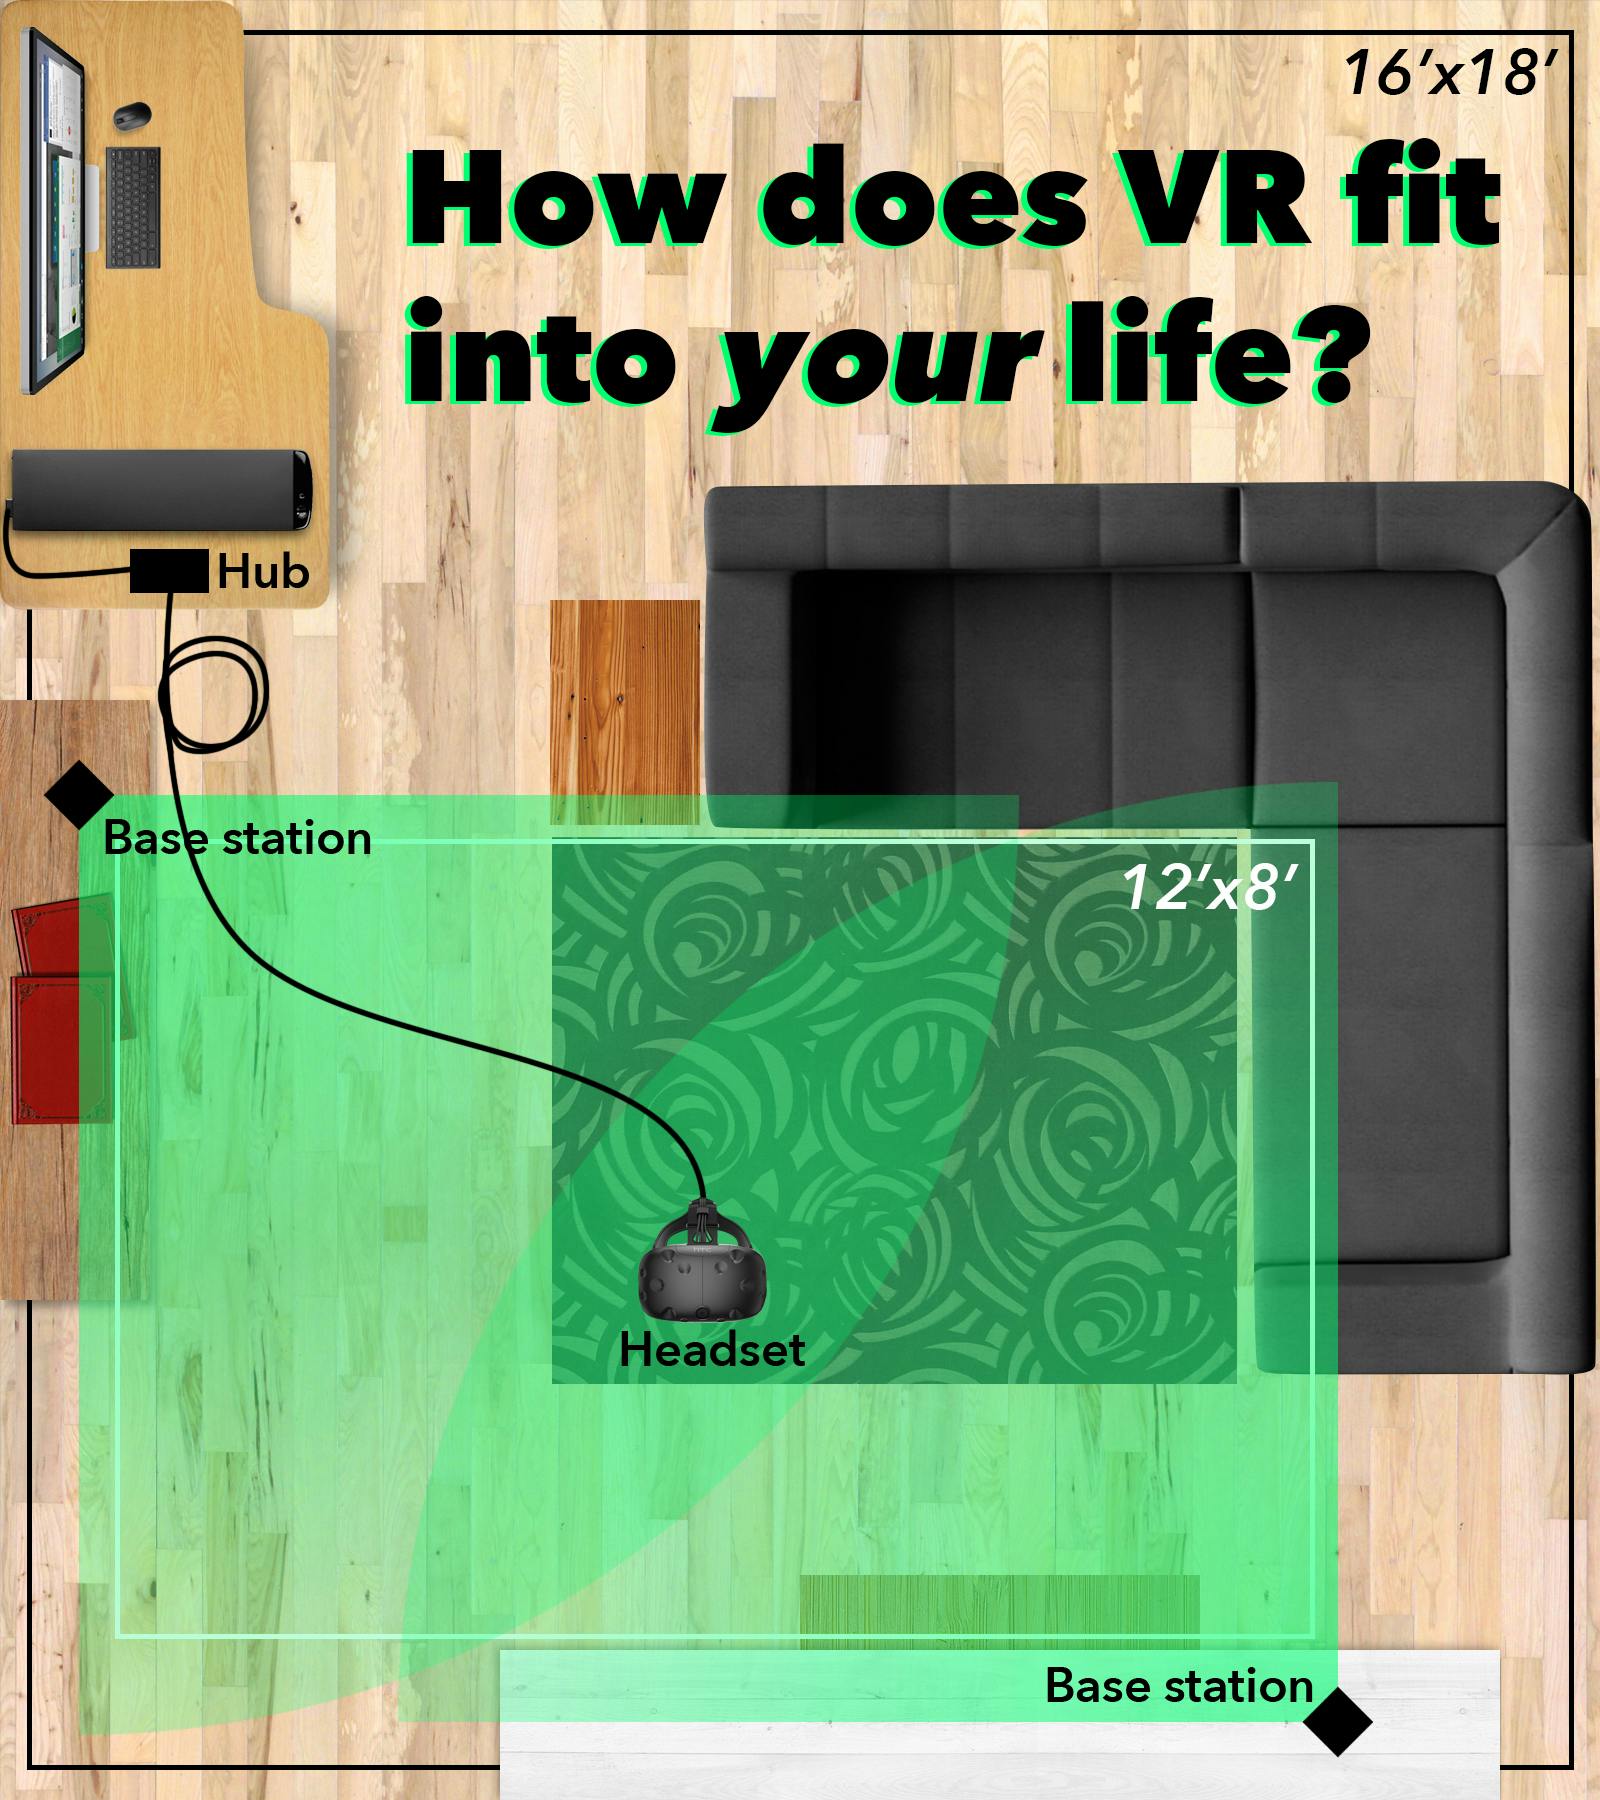
The minimum play space for the Vive is a 2m x 1.5m space (6 feet 6 inches by 5 feet), and the maximum size is 5m by 5m (16 feet by 16 feet). I can free up a 12-foot by 8-foot rectangle in the middle of my living room. It’s OK, but the space feels only adequate owing to a key function of the Vive called the Chaperone system.
In order to prevent you from walking into something in the real world, the Vive will project into VR a translucent wall of light that outlines the limitations of the play space that you have set up. You can control the appearance of the wall to make it more or less obvious, and change its color and opacity. The Chaperone wall fades into view any time an object is one foot away from the edge of the play space.
Now consider that the Vive is a VR system where you are walking around freely, potentially swinging your arms around, pretending to throw objects, etc. The Chaperone walls, necessarily sensitive in order to act as an effective safety measure, break the illusion of being in another space.
The Chaperone walls can also be misleading to new users. Your instinct is not to walk through the Chaperone walls, but you might extend your arm past them for just a moment while in the midst of a game and hit the real wall that’s just beyond it. That’s a lesson you may only need to learn once, but breaking one of your Vive controllers is probably an expensive mistake.
If I extend my arm all the way out such that I can swing the controller in full 180 degree arc in front of me with no risk of hitting anything, that represents about 2-feet of space. If I’m showing the Vive off to a brand new user, I’m going to be inclined to set the play space that far away from the walls on two sides of my living room play space, which means my usable area just shrank to 10 feet by 6 feet, and chances are the Chaperone walls will be lit up constantly.
It’s a small price to pay for showing someone room-scale VR for the first time, and I’d bet that they won’t even care, but this gives you some idea as to all the nuances of setting up a room-scale VR space. I’m already considering rearranging my living room, because 8 feet is way too short a distance on one side, even when I set the Chaperone walls to be barely visible.
Installation
What makes room-scale possible for the Vive are a pair of base stations that “paint” the play space in lasers (the base stations are perfectly eye safe—you can stare straight at them with no concerns). The lasers then read the positions of dozens of sensors placed all over the Vive headset and the pair of Vive controllers.
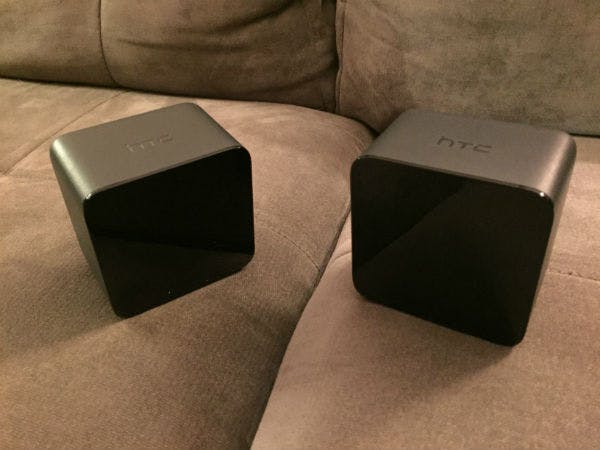
The base stations are small, 3-inch cubes, and each weighs less than a pound. They each have a power cable that needs to be plugged into a socket, and the cord lengths are fairly generous.
Each base station needs to be at an opposite corner of your play space, and optimally placed downward at a 40-degree angle. By setting them up accordingly, every inch of your play space is always being hit with the lasers from at least one of the base stations, and the Vive never loses track of your rig or the hand controllers.
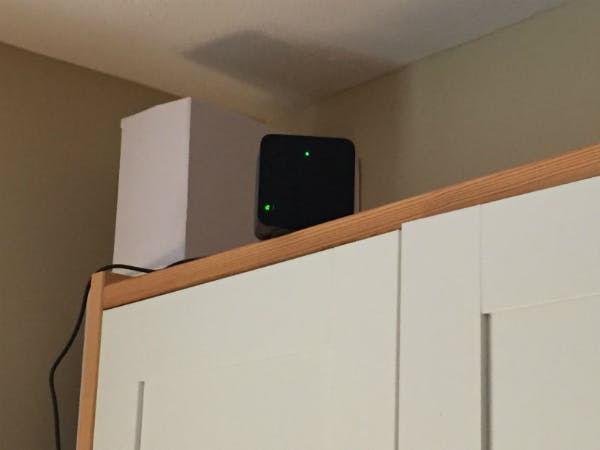
The Vive comes with a pair of hardware mounts you can screw into a wall, or on top of a piece of furniture. I was not in a hurry to screw anything into my walls. I do, however, have a tall piece of furniture near either corner of my place space, and that almost totally worked.
I say “almost” because unless the edge of the furniture is diagonal to the corner of your play space, the edge of the furniture is always going to slightly cut off the base station’s field of view. When I had the base stations set up on shelves, I had small but perceptible issues with the tracking of my headset. Even the tiniest jump of the image breaks immersion and can be disorienting.
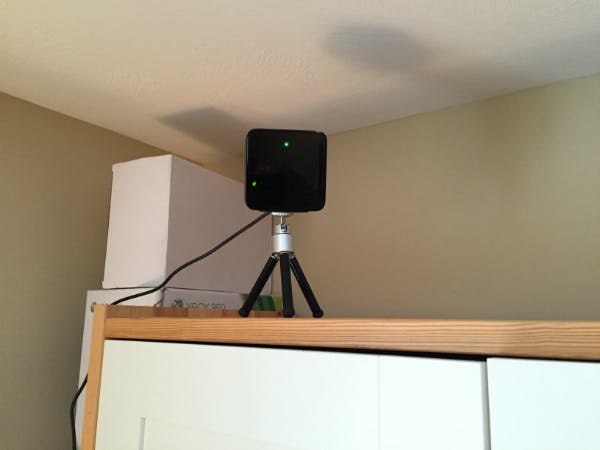
The base stations are compatible with any standard camera mounting gear, however. A small tripod worked perfectly to elevate the base station over that edge, and also to point it down at the recommended 40-degree angle. The difference in tracking quality was immediate. One of these AmazonBasics mini tripods was just $10.
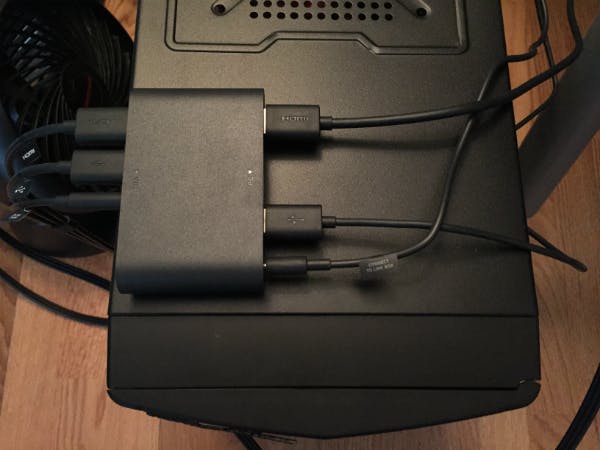
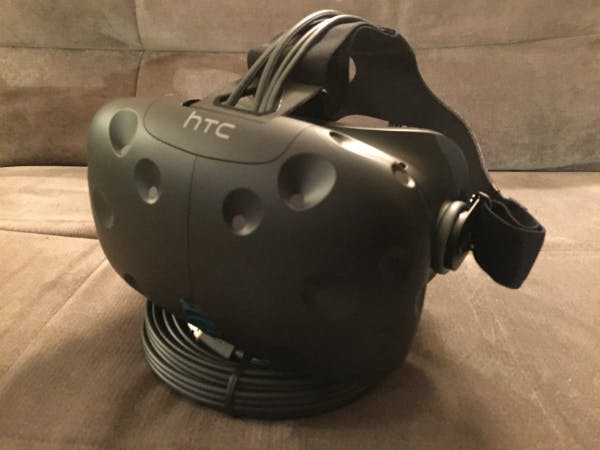
The other thing to consider installation-wise is the junction box for the Vive headset. Three wires—a power cable, an HDMI cable, and a USB cable—are bundled together and run out from the back of the headset. Those three cables then go into the front of a junction box, and three more cables run from the back of the junction box into the PC. You have to plug the HDMI into your graphics card and can use any free USB port.
The junction box comes with a mounting pad that’s sticky on both sides, so you can attach it to any horizontal surface, and it sticks pretty well. I recommend putting the junction box as low as possible. That means the Vive headset cable doesn’t need to stretch upwards before it connects to the junction box, which frees up slack on the cable.
Heat
Even if you’re not already a PC gamer, you basically have to turn your PC into a gaming rig to run VR with a GTX 970 graphics card or higher. That level of power raises the issue of heat.
Even though I’m a PC gamer, I’ve never felt the need to run more power than I absolutely needed to play games at mid- to high-end graphics settings. That means my PC has never generated the kind of heat it was generating when I started using the Vive, and heat is the mortal enemy of the PC. It can break down components and even melt solder.
If you don’t already have a software tool to monitor the heat of your system, Open Hardware Monitor is one free option. My processor tends to run at around 32 degrees Celsius during normal operations. When I was running VR, I was getting temperatures as high as 100 degrees Celsius, and some processors are built to throttle down at 105 degrees Celsius. They may even shut down entirely, to protect themselves and the rest of your PC.
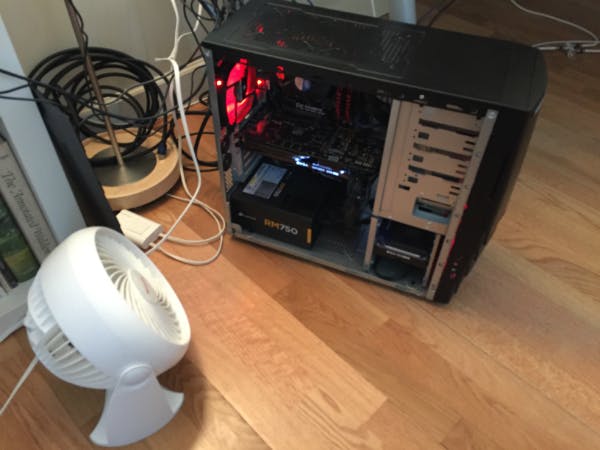
I didn’t want to install a liquid cooling system because I’ve heard too many horror stories about them leaking and destroying components. All you really need for cooling down a PC is good air circulation, so I decided to first put my PC on the ground where the coolest air in the room is, removed one side of the PC case, and pointed a fan at it.
Once I did this, my processor was around 65 degrees Celsius no matter how long I ran the Vive, which is a comfortable temperature. There are some risks here, of course. Dust inside a PC case is also a no-no, so I only remove the case panel specifically when I am using VR, and I replace the panel as soon as I’m finished.
Time for your VR training
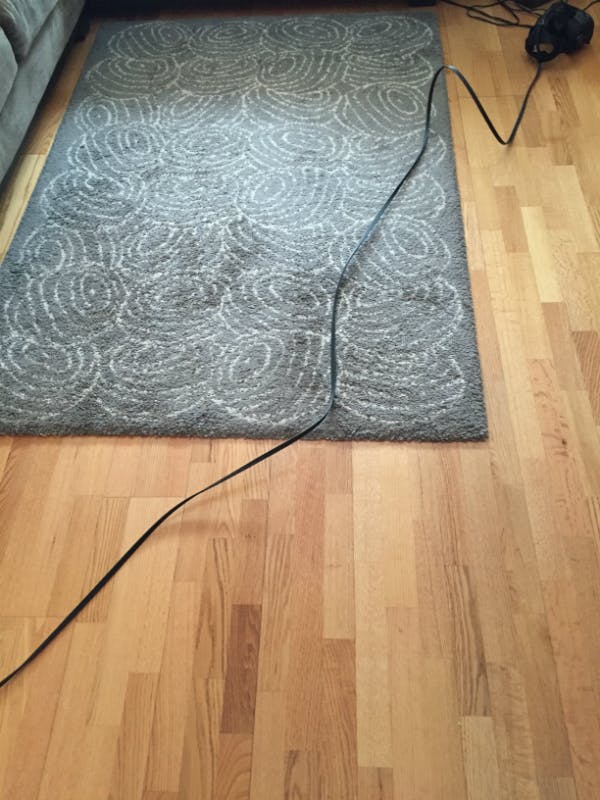
Learning how not to run into objects in the real world while you’re in a room-scale VR simulation is only part of getting your VR legs. There are other physical considerations, not least of all the cord running out the back of the rig. It’s not very heavy, but you can always feel it on your back. What you can’t always feel is precisely where the cord is, and it has to be long in order to afford you the greatest freedom of movement.
Again, the maximum play area the Vive can support is 16 feet by 16 feet, which gives you an idea as to how long the cord is. When you combine this with free movement throughout such a large space, that equates to all sorts of opportunities to trip over the cord, or accidentally yank it out of the junction box, or pull your PC onto its side—another reason why my PC is now on the floor, instead of standing on my desk.
And, of course, you have a VR rig strapped to your head so you can’t see the real-world around you, though the Vive does have a front-mounted camera if you want to rectify this. But constantly stopping your VR to look around the floor breaks immersion.
Right now the only solution to this issue is awareness. I play Vive games with either just my socks on or with bare feet so I’m more aware of the ground underneath me. Also for making sure I don’t accidentally kick my cat with a shoe (Valve recommends escorting cats from the play area, for the record).
Not wearing shoes also helps me register more quickly where the Vive cord is. Usually I know where my PC is, so I push extra cord out of the way and in that direction. This also breaks immersion. And if you’re playing a game that encourages you to move around fairly quickly, it’s very easy to lose track of the cord.
You will eventually get your room-scale VR legs and this will cease to be a problem, but if you demo the hardware to someone new, you will want to pay very close attention to that cord.
Let’s talk about your hands
Being able to stand up and walk around a VR simulation is half of the formula that enables the Vive to create such a compelling illusion of actually standing in a digital space. The other half is that you are constantly projecting your hands into the simulation, which taps into a completely different set of perceptual information that feeds into your brain.
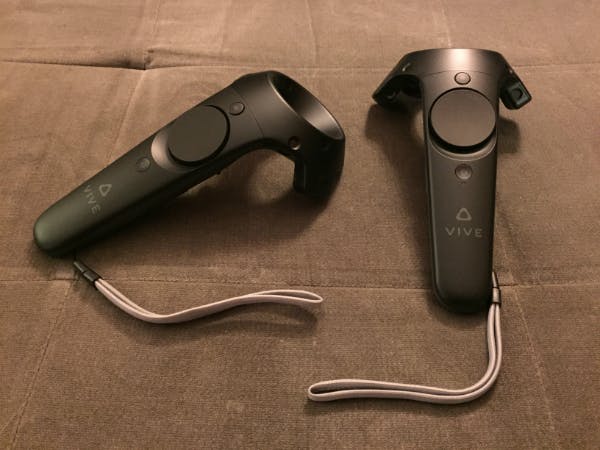
The ergonomics of the Vive controllers is excellent. They have just enough heft that you never forget you’re holding them (and hence risk dropping them) but are not so heavy that they’re distracting. A nice way to test the weight is to wear the wrist strap, and then let go of the controller. There’s only a slight tug on your wrist.
The trigger clicks quietly and registers when it’s pulled all the way back, and feels sturdy. Positioned on either side of the controller is a grip button that will probably rest under your middle finger when you’re holding the controller. It’s textured for ease of feeling where the button is, and also clicks quietly and registers when pressed.
The trackpad under your thumb is similar to the trackpad on Valve’s Steam controllers. It’s extremely responsive and also acts as a button. The trackpad is large enough that you can click on any quadrant to get at least four different buttons in a game, without fear of hitting the wrong button by mistake.
The Menu button is above the trackpad, and is slightly raised from the surface of the controller. The System buttom is beneath the trackpad. They are both easy to find with your thumb while you’re in VR. Both controllers are powered by rechargeable batteries and run via wireless connections.
If you raise your arm straight out in front of you, you will see the Vive controller floating in the simulation precisely where your brain would expect it to be.
If and when a Vive game shows you your hands, the orientation of your palms, whether they are facing the floor or the ceiling, is also perfect. If a Vive game developer has done their job properly, the fingers will flex more towards your palm the more tightly you squeeze the trigger.
If you place the Vive controllers on the ground for a moment to adjust your headset, when you bend down to pick up the controllers you’re not going to have to fumble around to grab them, because the positional tracking on the controllers is that good.
Comfort and eyeglasses
If you wear glasses, you don’t slip the Vive onto your head as much as let your face fall into the Vive, after which you tighten the straps. I also have to put my fingers on the back of my frames, and then push the glasses forward so that my eyelashes aren’t brushing against my lenses. Dirty eyeglasses in VR are the worst.
Depending on the shape of your frames, you might be able to see their edges when you’re in VR. My lenses are rectangular, for example, and I can always see the tops and bottoms in my peripheral vision. I’m going to need to get new frames with circular lenses.
The other issue with wearing glasses in the Vive is lens flare. The reflective coating on my glasses has long since worn off. If I’m in a program that has a really bright light shining down on me, my glasses amplify any lens flare, and the artificiality of the image is more obvious. Scratches on my glasses get in the way, as well.
The good news is my glasses are the only comfort issue I have. The padding around the inside of the rig is sturdy, but soft. I feel a little pressure on my cheek bones when I wear the rig, but that’s about it.
It’s very easy to adjust the rig with the side straps. You can also adjust the strap on top, but that’s better done with the rig off your head. I can barely perceive any light leakage under my nose, and playing in a dark room eliminates that issue entirely.
My only other issues with the Vive headset itself regard audio and field of vision. A wire with a standard 3.5mm headphone jack runs down the back of the Vive headset right next to the other three wires, so you can use whatever headphones you like. I find it easier to ask someone to hand me the headphones once the Vive is settled onto my face. They can make sure the headphones cord is in the least obtrusive position. I’d rather be able to do everything myself. Better yet, I wish the audio was just integrated into the headset.
I can also see the inside of the headset around the lenses. Imagine holding your head close to a window, and still being able to see the wall in which the window sits. It’s kind of like that. You can adjust the lens depth to bring the lenses as close to your face as possible to make the field of view wider, but nothing eliminates this issue for me if I’m not staring straight ahead.
Software
Pressing the Menu button on one of the Vive controllers brings up a panel through which you can access your Steam library. You can play seated-VR games through Steam, as long as you have the correct type of controller hooked up to your system. If not, you’ll see a message that lets you know you need to switch up control schemes. In other words, you can’t play VR games that require a control pad, if you only have the Vive controllers hooked up.
You can also access your desktop from the main SteamVR menu. Watching YouTube in VR is very cool. You can also change around the background you see when you first load in to VR, but rather than spend too much time talking about SteamVR as an operating system, I’d like to get straight to what matters most: games and software.
If you pre-ordered the Vive it includes two games and one art program: Fantastic Contraption, Job Simulator, and Tilt Brush. They are all excellent demonstrations of what VR is capable of. They will continue to be free for a short period after launch, but Valve did not give us a precise date, when we asked. Valve did tell us that its suite of mini-games and demos called The Lab that we saw at GDC this year is likely to remain free.
Even if they’re not free, Fantastic Contraption, Job Simulator, and Tilt Brush should be in your Vive software library. Between these three titles and The Lab, I would be shocked if you can’t find something to impress everyone who tries the Vive for the first time.
Fantastic Contraption is an adaption of the old Flash game, where the goal is to move an object from one place to another using a machine of your creation. In the new VR version the object you have to move is a little pink sphere.
Fantastic Contraption is cute to look at, requires cleverness to beat, and makes smart use of the limitations of the Vive’s play space. For each challenge you are standing on a platform that’s floating in mid air, surrounded by other platforms also floating in the clouds. If you were to walk up to the edges of your play space you’d be walking off the platform, which you could do if you want to be a smart aleck.
Job Simulator continues to be the best VR game I’ve played on any system, in no small part because Owlchemy Labs has mastered the art of keeping the player within a small space without feeling like your movement is limited.
The joke is that it’s the year 2050, and robots have replaced all humans at their jobs, so a robot named JobBot came up with a VR simulation to make sure humans didn’t forget how “to job.” You can be a convenience store clerk, a gourmet chef, an auto mechanic, or an office worker. It’s all tongue-in-cheek humor with cartoon-like graphics and meant to be pure fun.
The physics within Job Simulator are wonderful. Chances are that if you want to do a thing, you can do a thing, because that’s how Owlchemy adjusted the game during testing.
Finally, Google’s Tilt Brush art program may be the fastest way to get to the wonderment that lies at the heart of room-scale VR. Of all the games that the Vive currently ships with, Tilt Brush best captures the sense of raw play. You have a wide palate of different colors and paint brushes and can manipulate the background of your creations. There’s even a dress form if you want to try designing clothes.
Tilt Brush gives you all sorts of toys to play with. It taps into the free-form creation that finger painting or crayons tapped into when you were a kid. I usually advise someone to try writing their name in the air, and then to walk around their name and see it in all three dimensions, just floating there. That usually gets the “Oooooooooo!” reaction I’m looking for when I show someone the Vive for the first time. That reaction tells me, even if only for a few seconds, that person “gets” what room-scale VR is all about.
Should you adopt the Vive?
Wondering whether or not there are enough games to play is an important question before adopting any new gaming platform. There are already dozens of games on Steam that specifically support the Vive. Key titles like Arizona Sunshine and Budget Cuts on the immediate horizon. I think Vive owners won’t have a shortage of things to do in room-scale VR.
Asking whether or not you should purchase a Vive, or any VR system, always feels a little ridiculous to me. If you’re even thinking about purchasing VR you’re either an early adopter who’s used to paying huge sums to try out the newest thing, or you’ve been sold on this new technology and have been saving up specifically for it.
The Vive may admittedly be a curiosity at this point, something cool to show your friends, a novelty, and a conversation piece. Not many people will own a Vive this early. It’s not going to replace my Xbox One in my gaming lineup anytime soon, because no one in my immediate gaming circles will be picking up a Vive. Heck, most of them have never tried VR yet, period.
The Vive is capable of seated experiences like the Oculus Rift, so on that score you’re getting the best of both worlds. Platform exclusives are already a question, when it comes to VR. You’re not going to be playing EVE Valkyrie on the Vive, for example, but you’re not going to get Valve’s The Lab on Oculus. I’ve played Job Simulator on the Vive, and the Rift, and PlayStation VR, and I prefer it on the Vive, because I have things to interact with in 360 degrees, which is a more convincing illusion.
I think room-scale VR does a much better of conveying the sense of immersion that VR offers. Standing up, walking around, and using your hands all tap into more of your senses than sitting down and using a control pad. It’s that simple. Room-scale does a much better job of tricking your brain into thinking you are somewhere else.
I won’t say it’s a superior experience compared to other VR solutions. There’s something to be said for sitting down with the Oculus Rift or PlayStation VR and pretending to drive a battle tank or a giant mech or a race car, and being comfortable the entire time versus feeling the strain of standing, which for some people is not a thing to dismiss, especially as gamers get older.
The Vive is, for the time being, a completely unique experience among the three major players. Oculus is releasing its Oculus Touch hand controllers at some point in the near future, but we’ve heard nothing from Oculus about sensor hardware that could replicate something akin to the Chaperone system. Sony has said that PlayStation VR can support room-scale, but has also said nothing about an improved sensor/camera system that would support it. The PlayStation Move hand controllers are also clearly inferior to Oculus Touch and the Vive controllers.
If there’s a reason to wait for further iterations of the Vive before buying in, it’s the damned cord in the back of the headset. I have no idea when and if the Vive will go completely wireless, but not having the cord to worry about would be such a load off my mind when I’m using the system, not only for the physical safety issues to myself or my gear, but also to the sense of being more immersed in the simulation.

