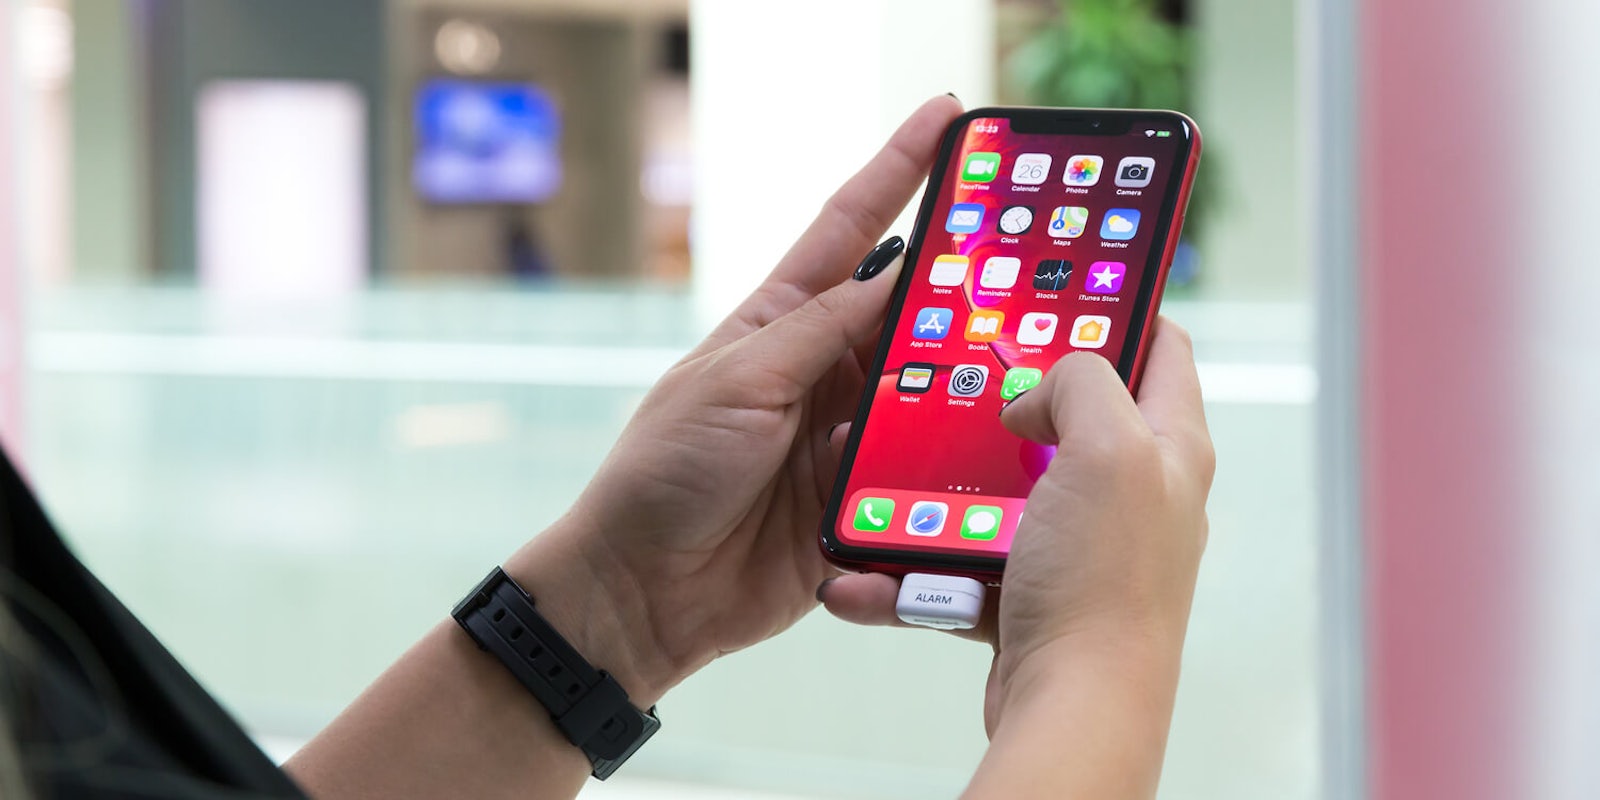
For the longest time, there wasn’t a way to change how text appears on your iPhone or iPad. You could only download third-party keyboard or font apps that allowed you to change typefaces within specific apps, but it didn’t modify the system-wide font included in whatever iOS update you had installed. And if you do come across an app or a service that lets you bypass the system font, it probably involves jailbreaking your phone. That can void your warranty and if done incorrectly, potentially brick your device. Finally, though, iOS 13 fonts can be customized.
The capability is included in the recently released iOS 13. Users can install custom fonts and use true fonts downloaded through the App Store. While that nifty little bullet point included in the iOS 13 update summary may sound promising, based on what we know about Apple’s design aesthetic, the chances of custom font capability being applied to iOS’s system-wide typeface are slim to none. However, the update should at least provide you a lot more freedom in your workflow, especially if you use your mobile device for creative work purposes.
As of this writing, custom fonts seem to only be supported by apps like Pages, Keynote, Numbers, and Mail—but according to Apple, fonts from boutique and major vendors such as Adobe, DynaComware, Monotype, Morisawa, and Founder will be gradually rolled out in the App Store as font customization becomes a better developed, less limited function. Here’s how to get the iOS 13 fonts.
Using apps to install iOS 13 fonts
Exactly how limited is the custom font capability of iOS 13? The font apps we’ll be discussing may or may not work on the supported apps previously mentioned before—when we tested, Adobe Creative Cloud fonts only worked on Pages, Keynote, and Numbers, but not on Mail. So what does this mean for all the font lovers out there? As users wait for apps that they actually care about—such as iOS’s iMessages and popular social media platforms like Facebook, Instagram, Twitter, and Snapchat, to name a few—to update their products and make them compatible with iOS 13’s new custom font feature, all that can be done right now is to start searching for free fonts that are already available for download and have them ready to go when the rest of your apps come to join the party. And yes, you can certainly give the function a whirl on your documents, spreadsheets, and presentations created through the iWork apps, as well as anything you write using the iOS Mail app. New fonts should already work.
Here are a couple of options you can start with to use iOS 13 fonts:
Adobe Creative Cloud
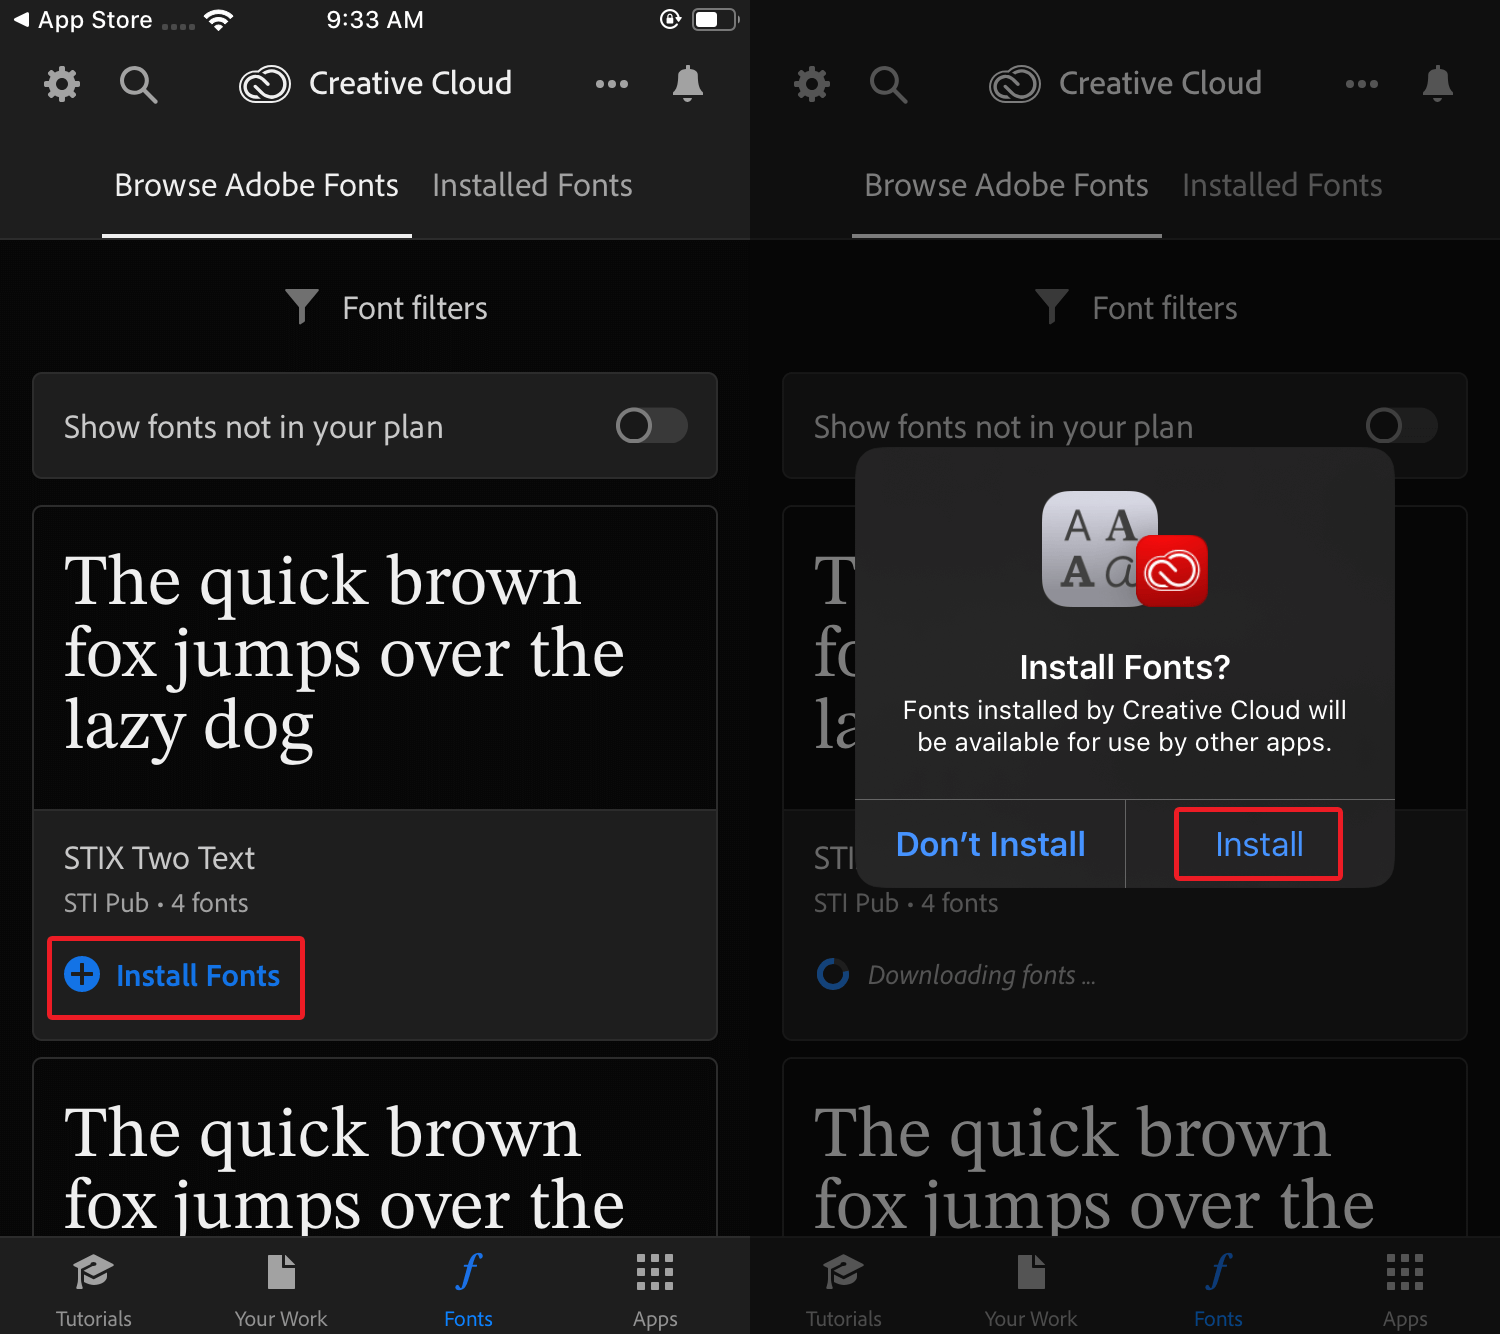
Beginning this month, anyone who downloads the app and creates an account (you can sign in using Google, Facebook, or Adobe ID, if you have one already) can browse and install 1,300 fonts for free. (If you pay a premium for a Creative Cloud plan, you get 17,000 fonts.)
To start building your custom font library, scroll through the many fonts available for installation. When you find one that tickles your fancy, tap + Install Fonts. Then tap Install.
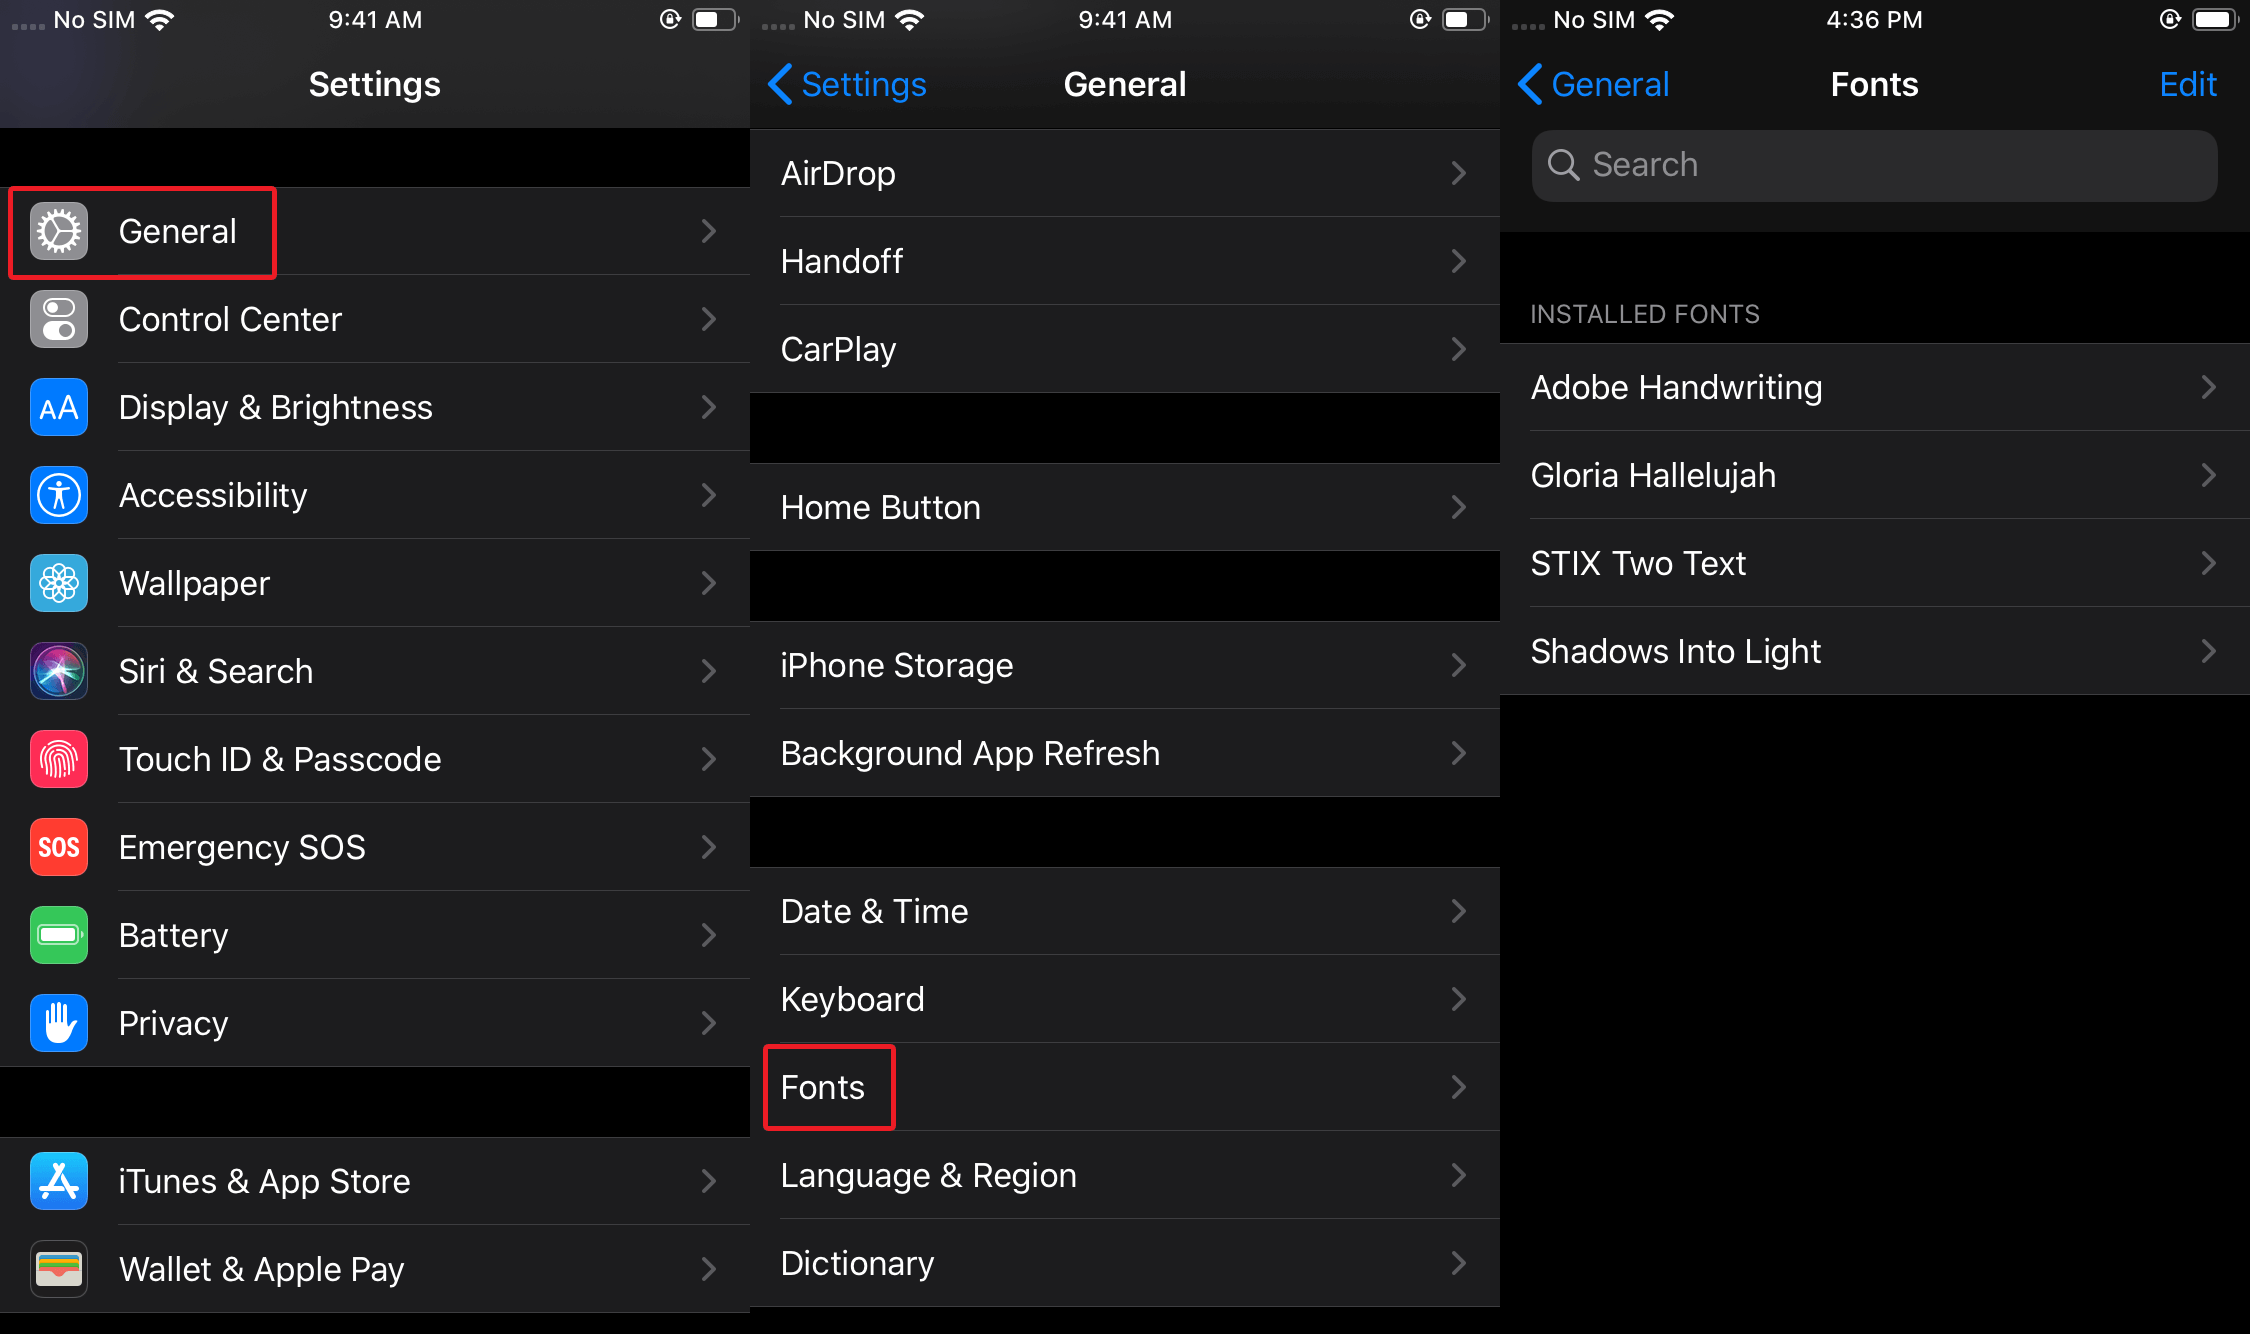
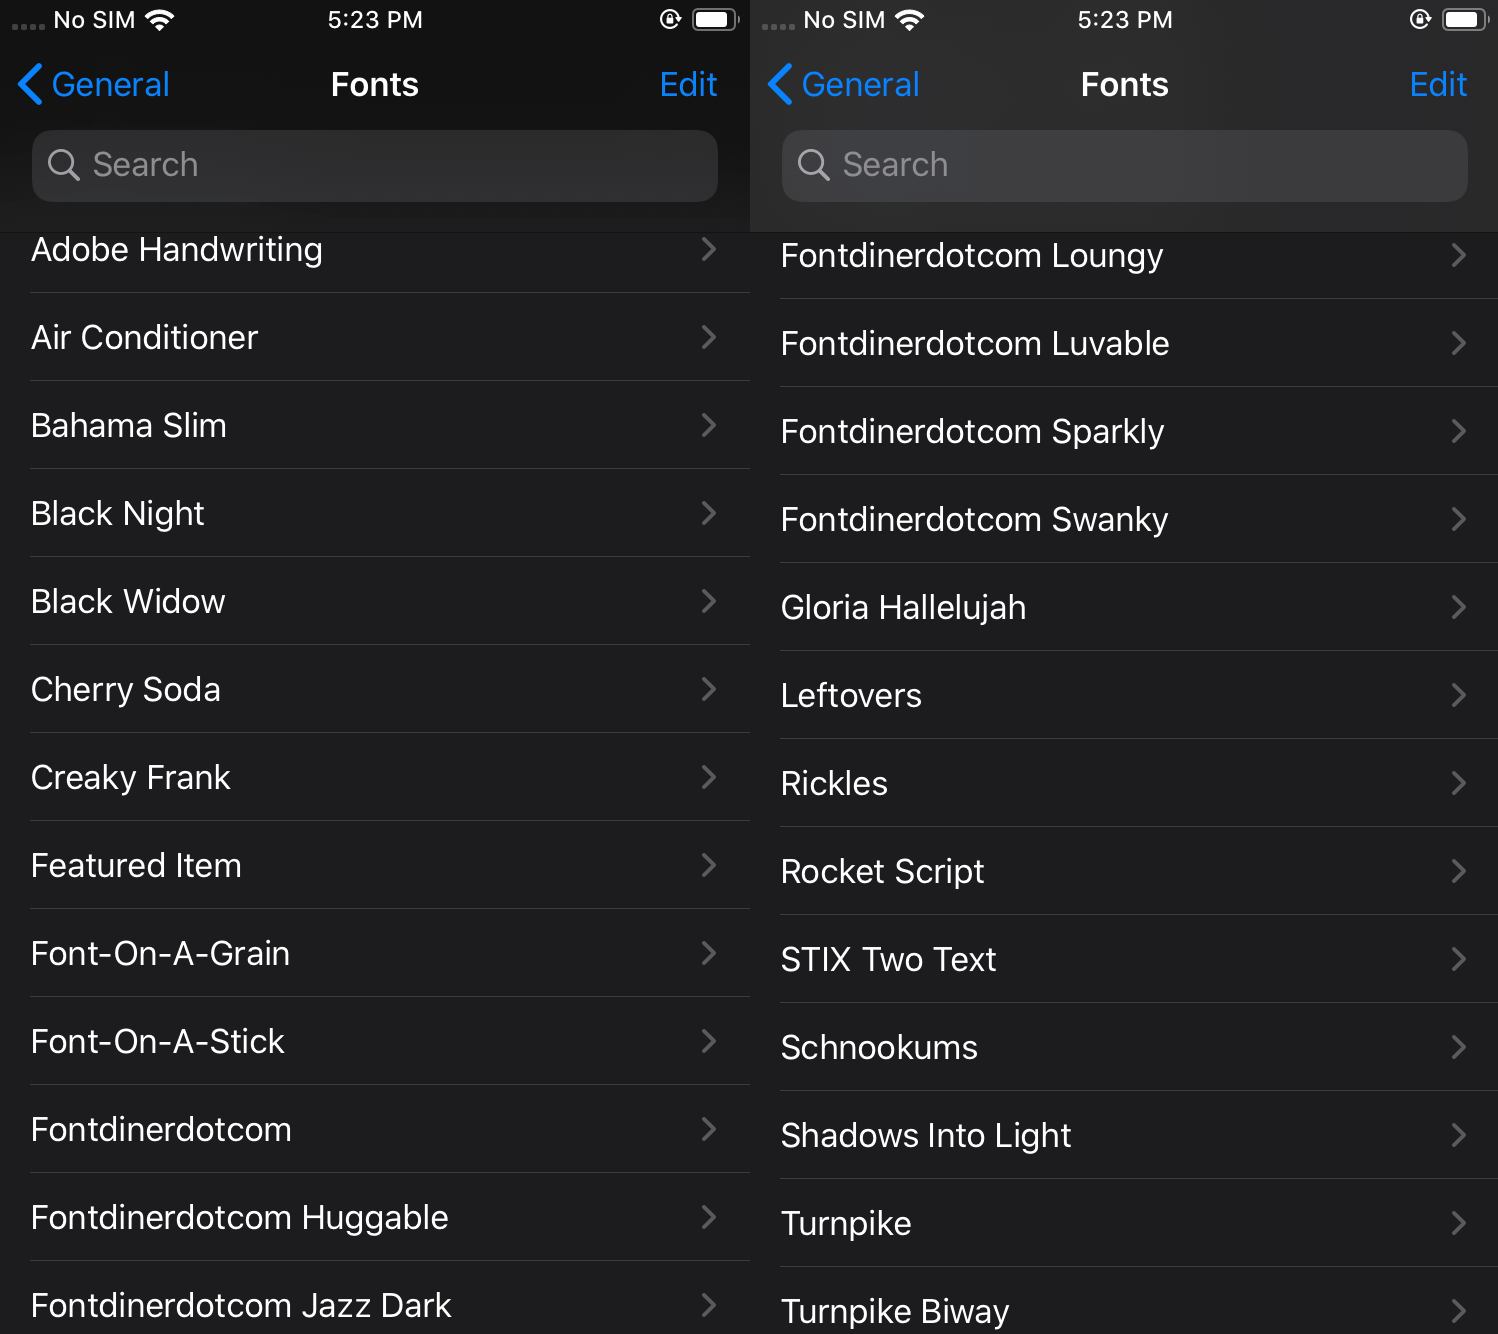
To see the list of fonts you’ve already installed, go to your home screen and then Settings > General > Fonts. In it should be a list of the fonts you’ve already chosen from the previous step.
Font Diner
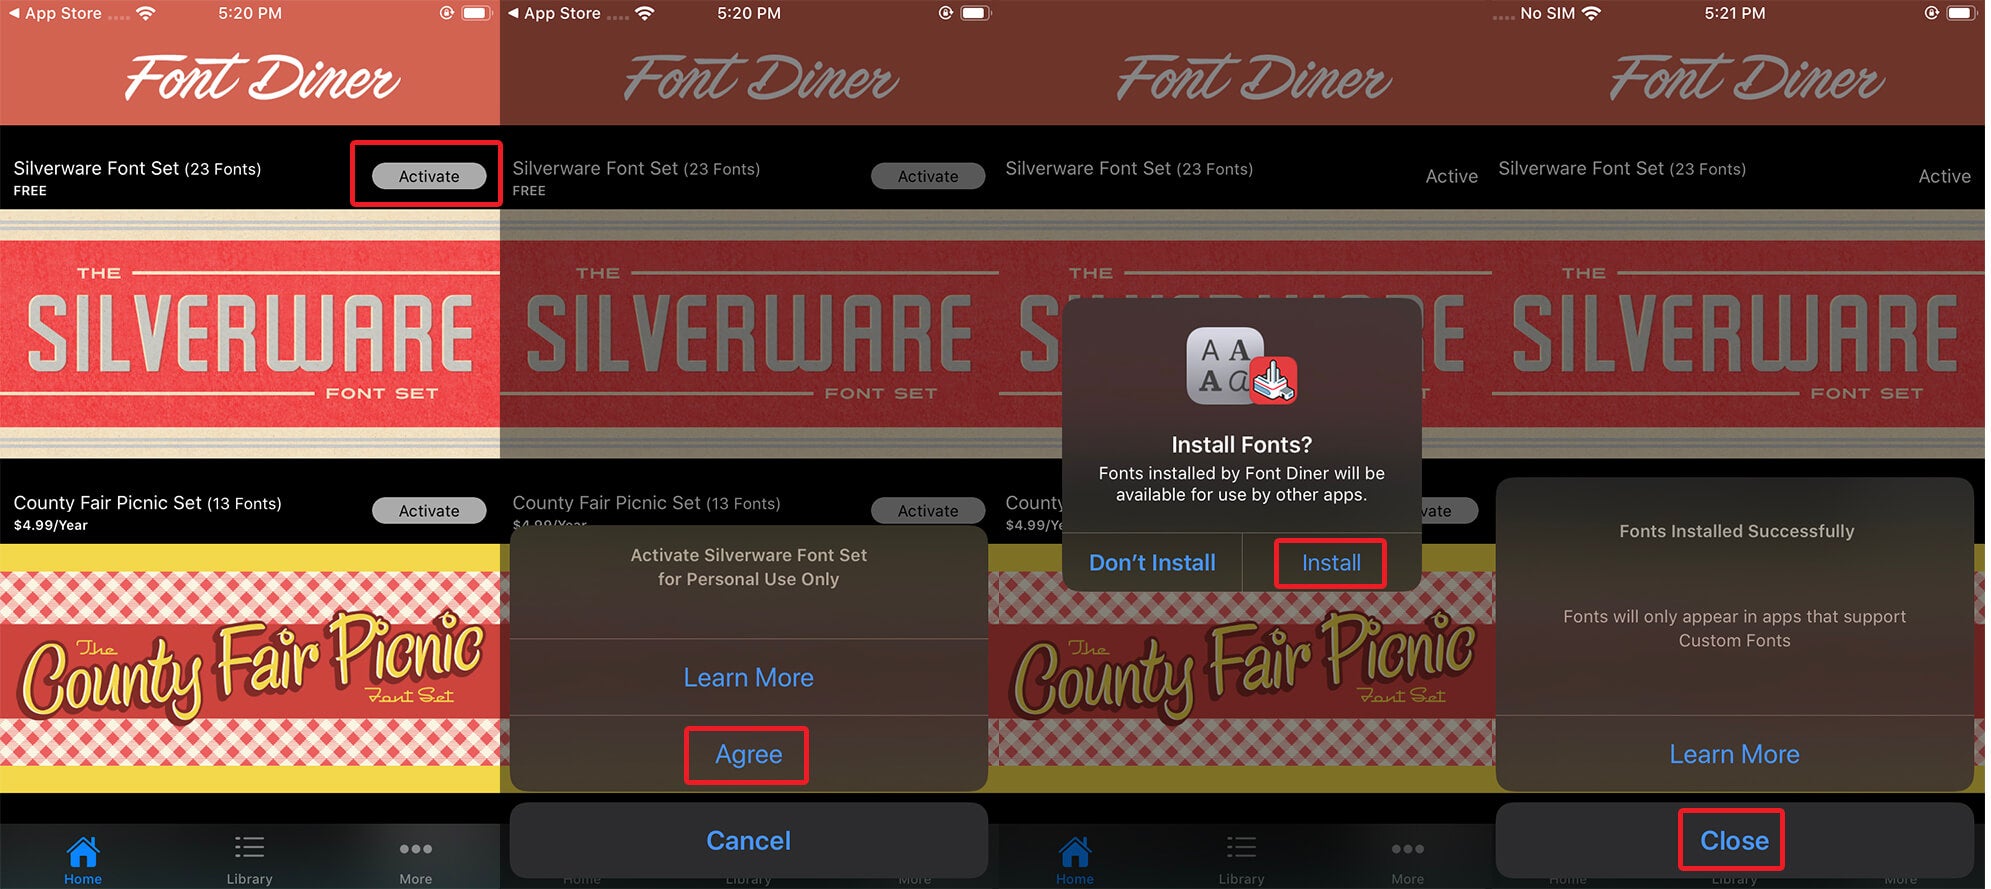
Font Diner is one of the few early adopter apps that are compatible with iOS 13, and it’s essentially free to use. After installing and launching the app, you will be brought to a page that shows all the available font sets for download. Most of the options need to be purchased for a premium, but the price is low enough (less than $5 a year per set) that it’s worth it, if you really like having lots of fonts to choose from. There is, however, a set called Silverware Font Set that contains 23 fonts, and it’s free. Tap Activate and then Agree to begin installing the set. Tap Install and Close once it’s done.
To check if the fonts are ready to use, go to your home screen and then Settings > General > Fonts. In our screenshots below, fonts from both Adobe Creative Cloud and Font Diner are on the list.
Test-driving custom iOS 13 fonts
To check out your just-downloaded fonts in action, launch either Pages, Keynote, Numbers, or Mail and type out a test sentence. Double-tap on the sentence to pull up the highlighting tool. Drag the tool until the entire sentence is selected.
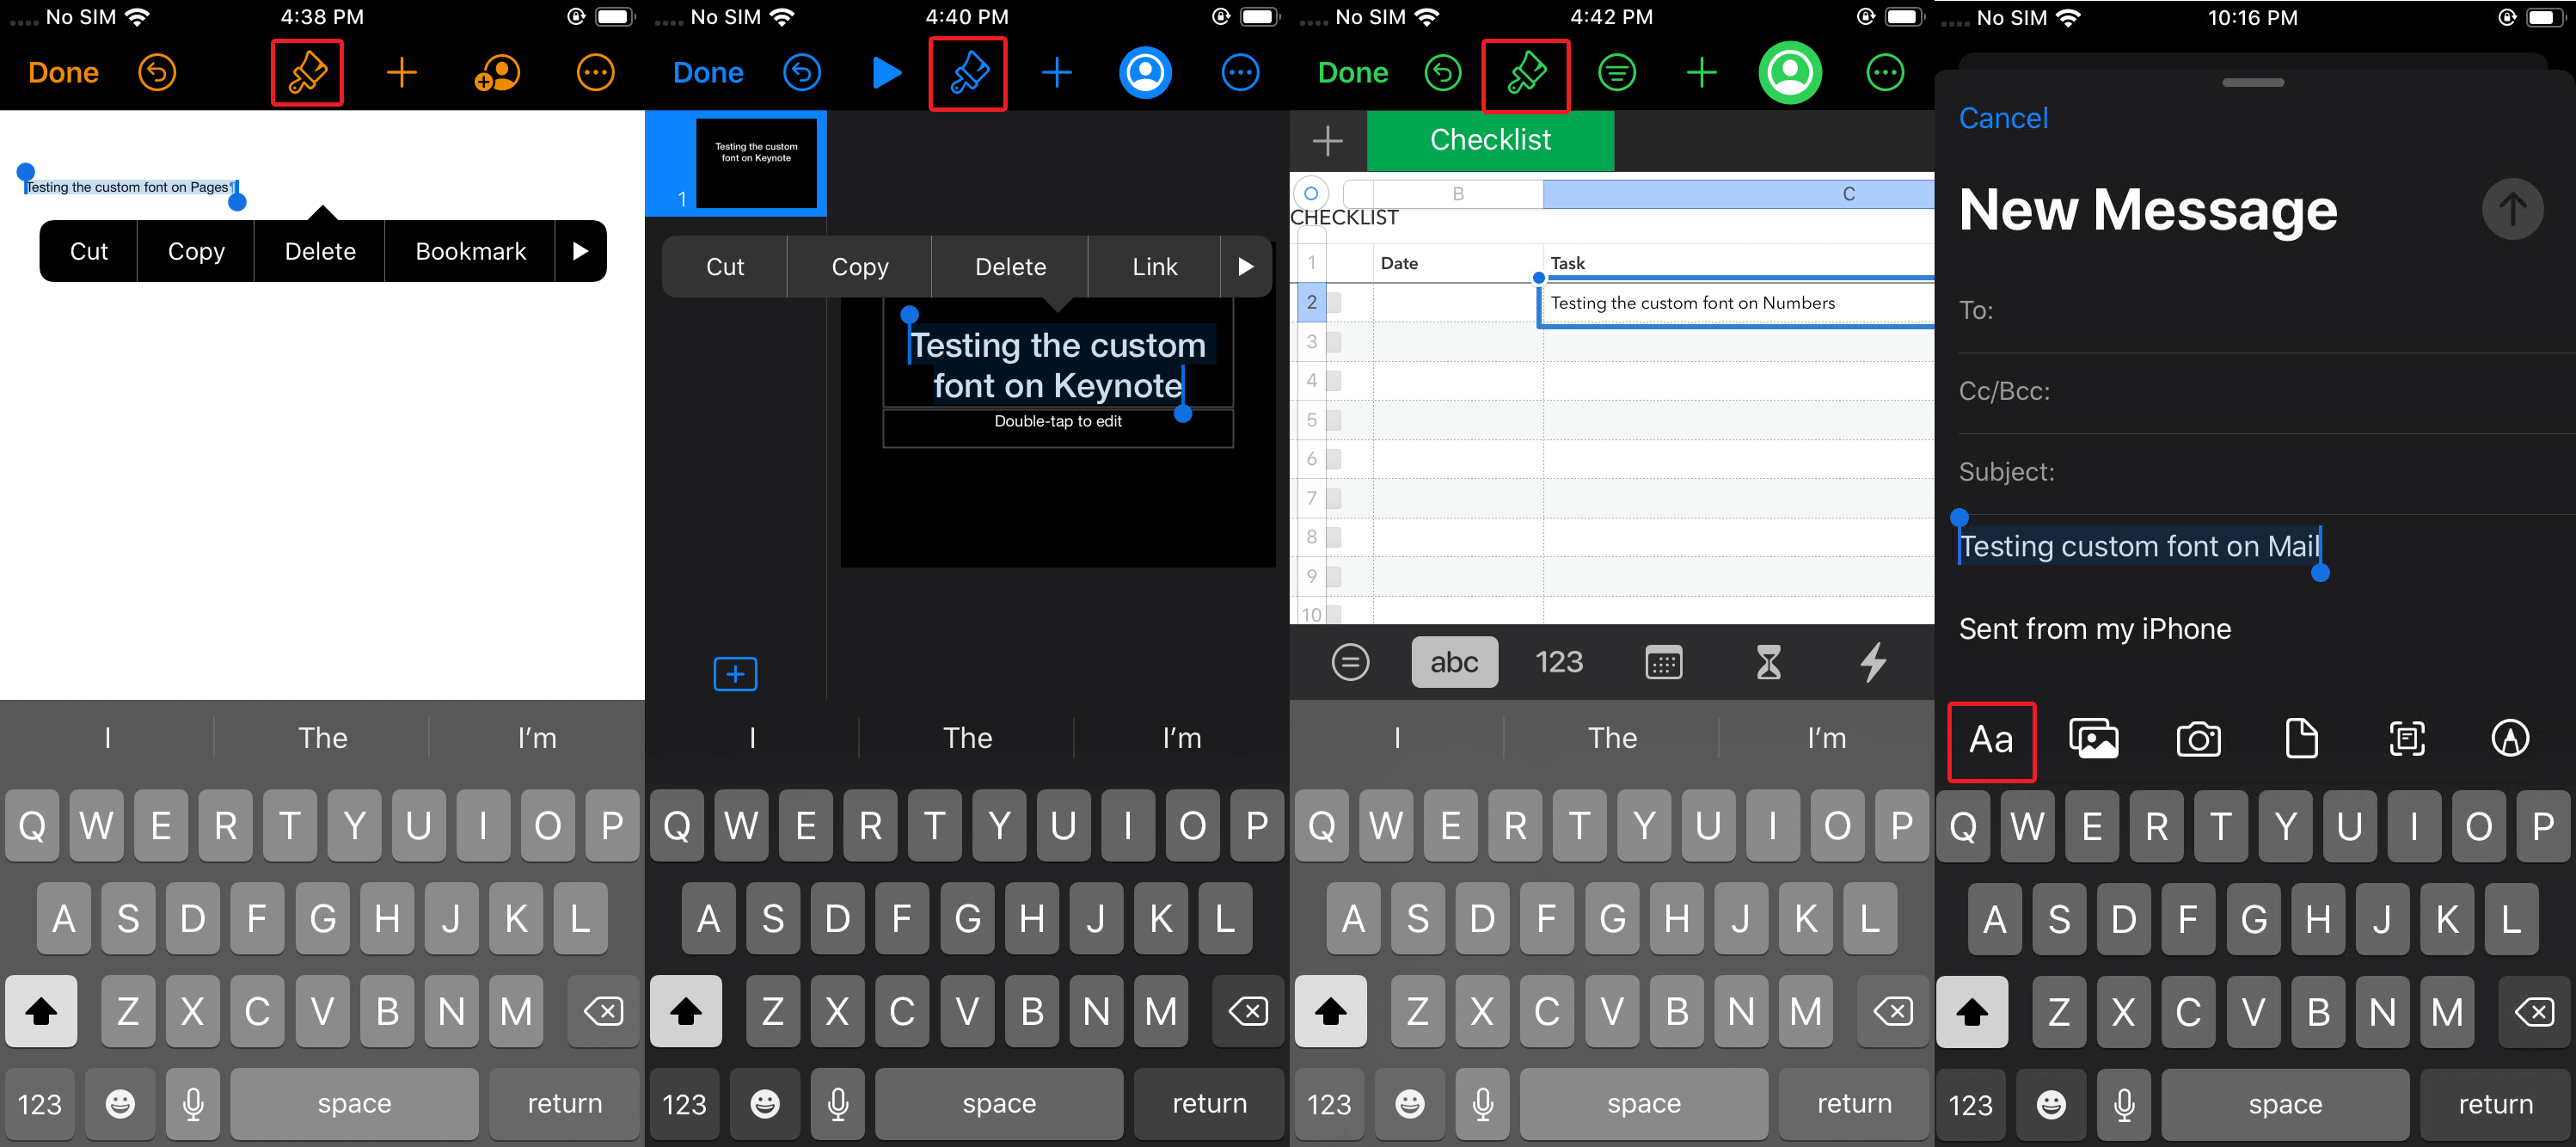
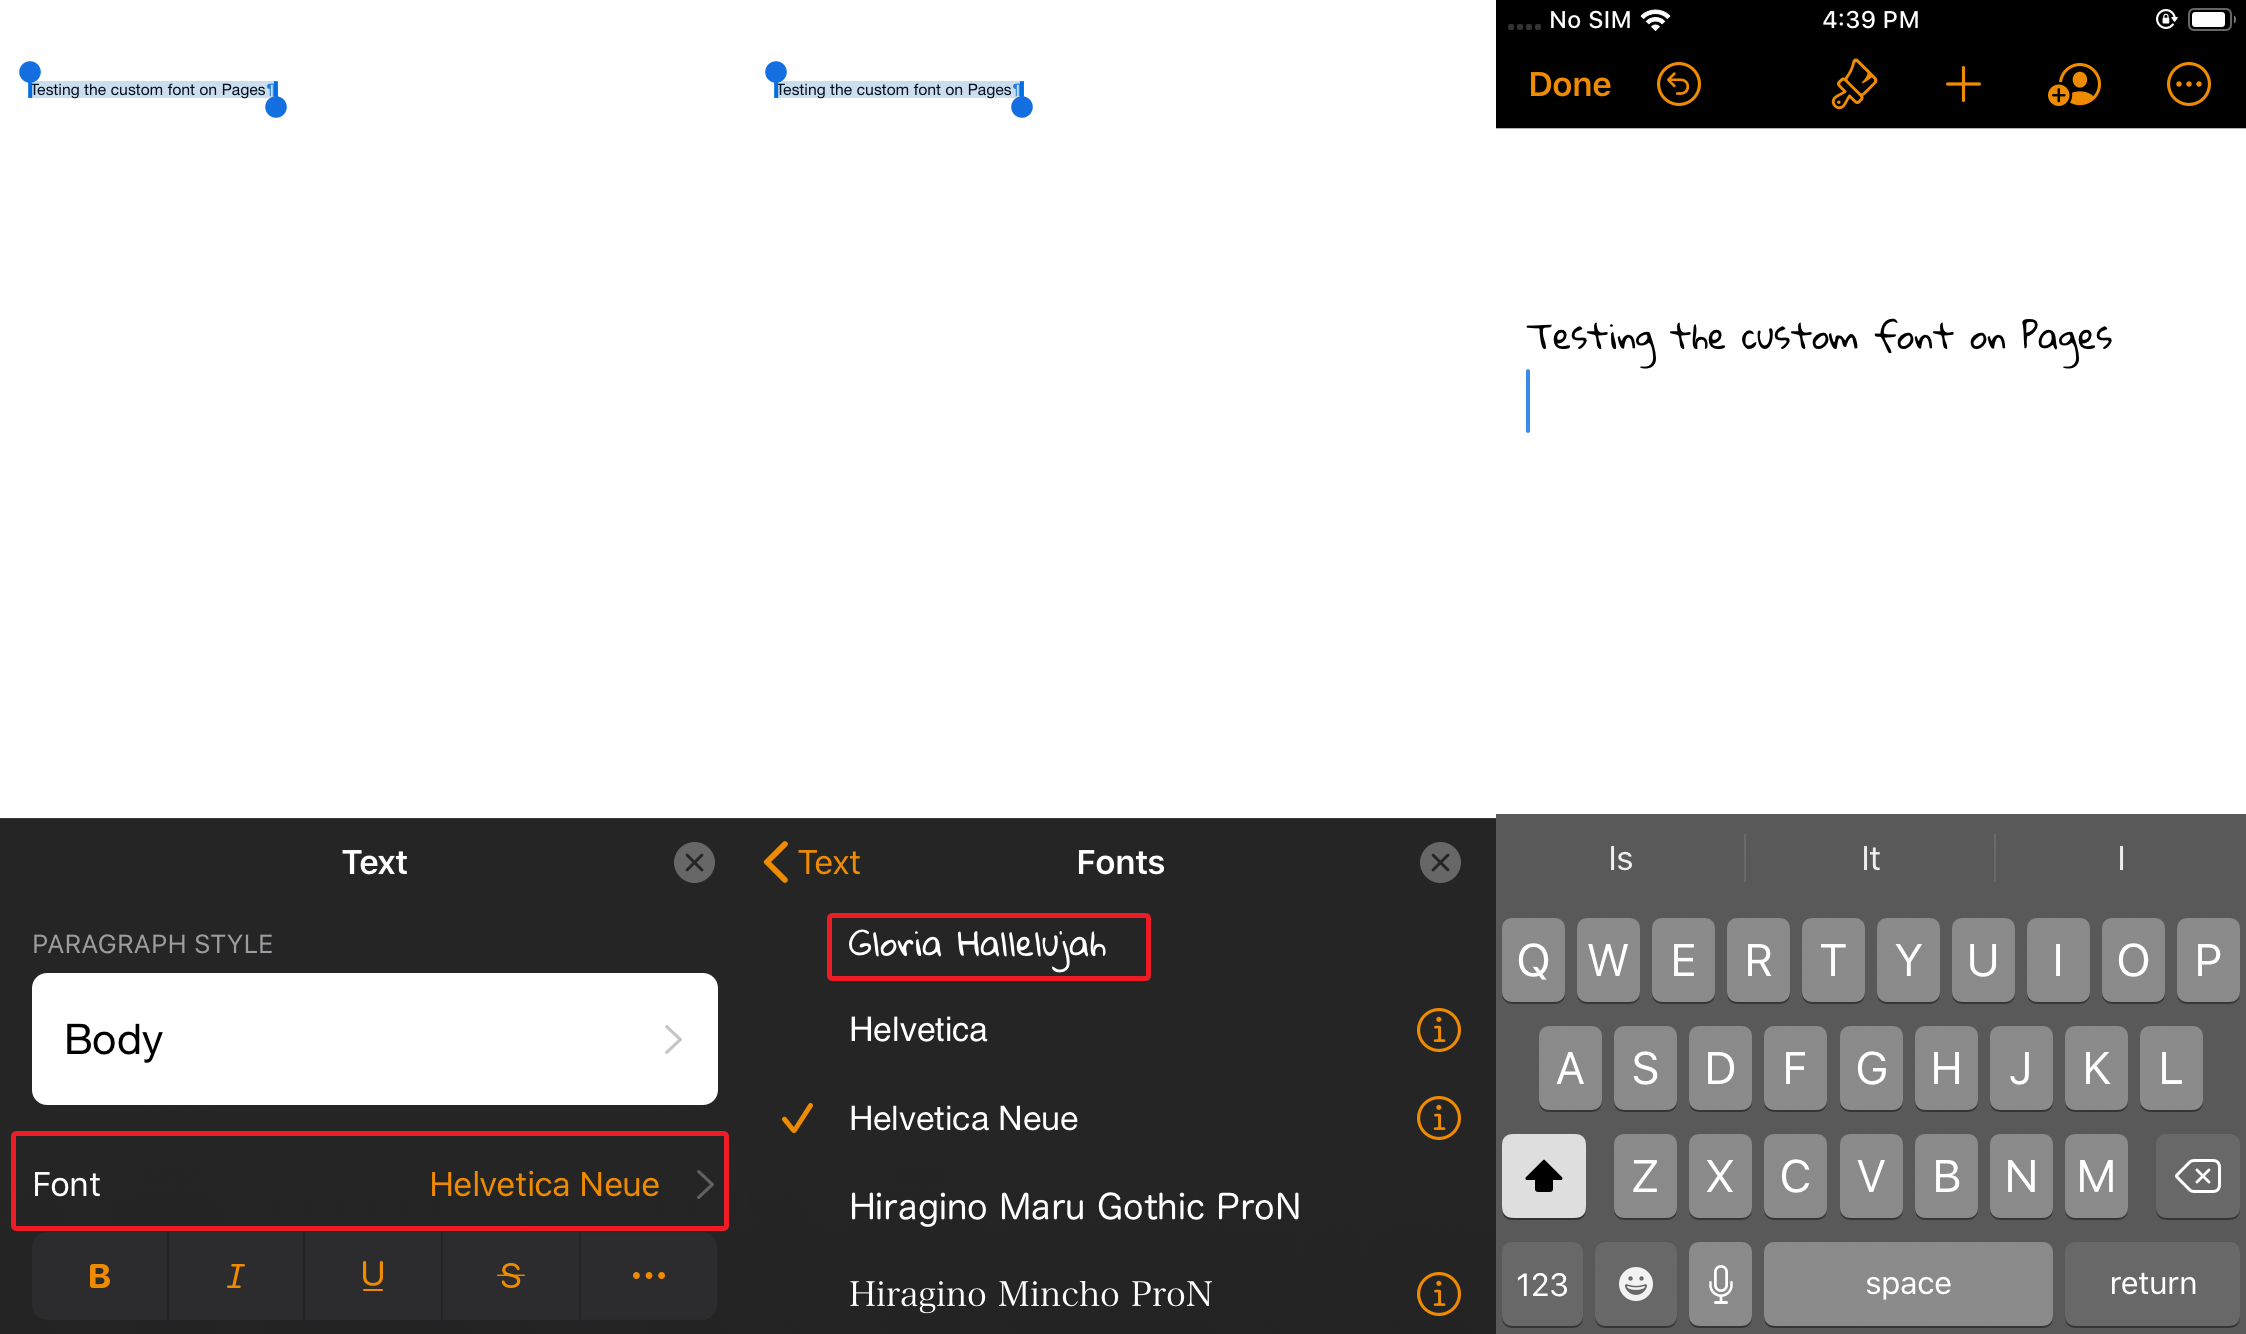
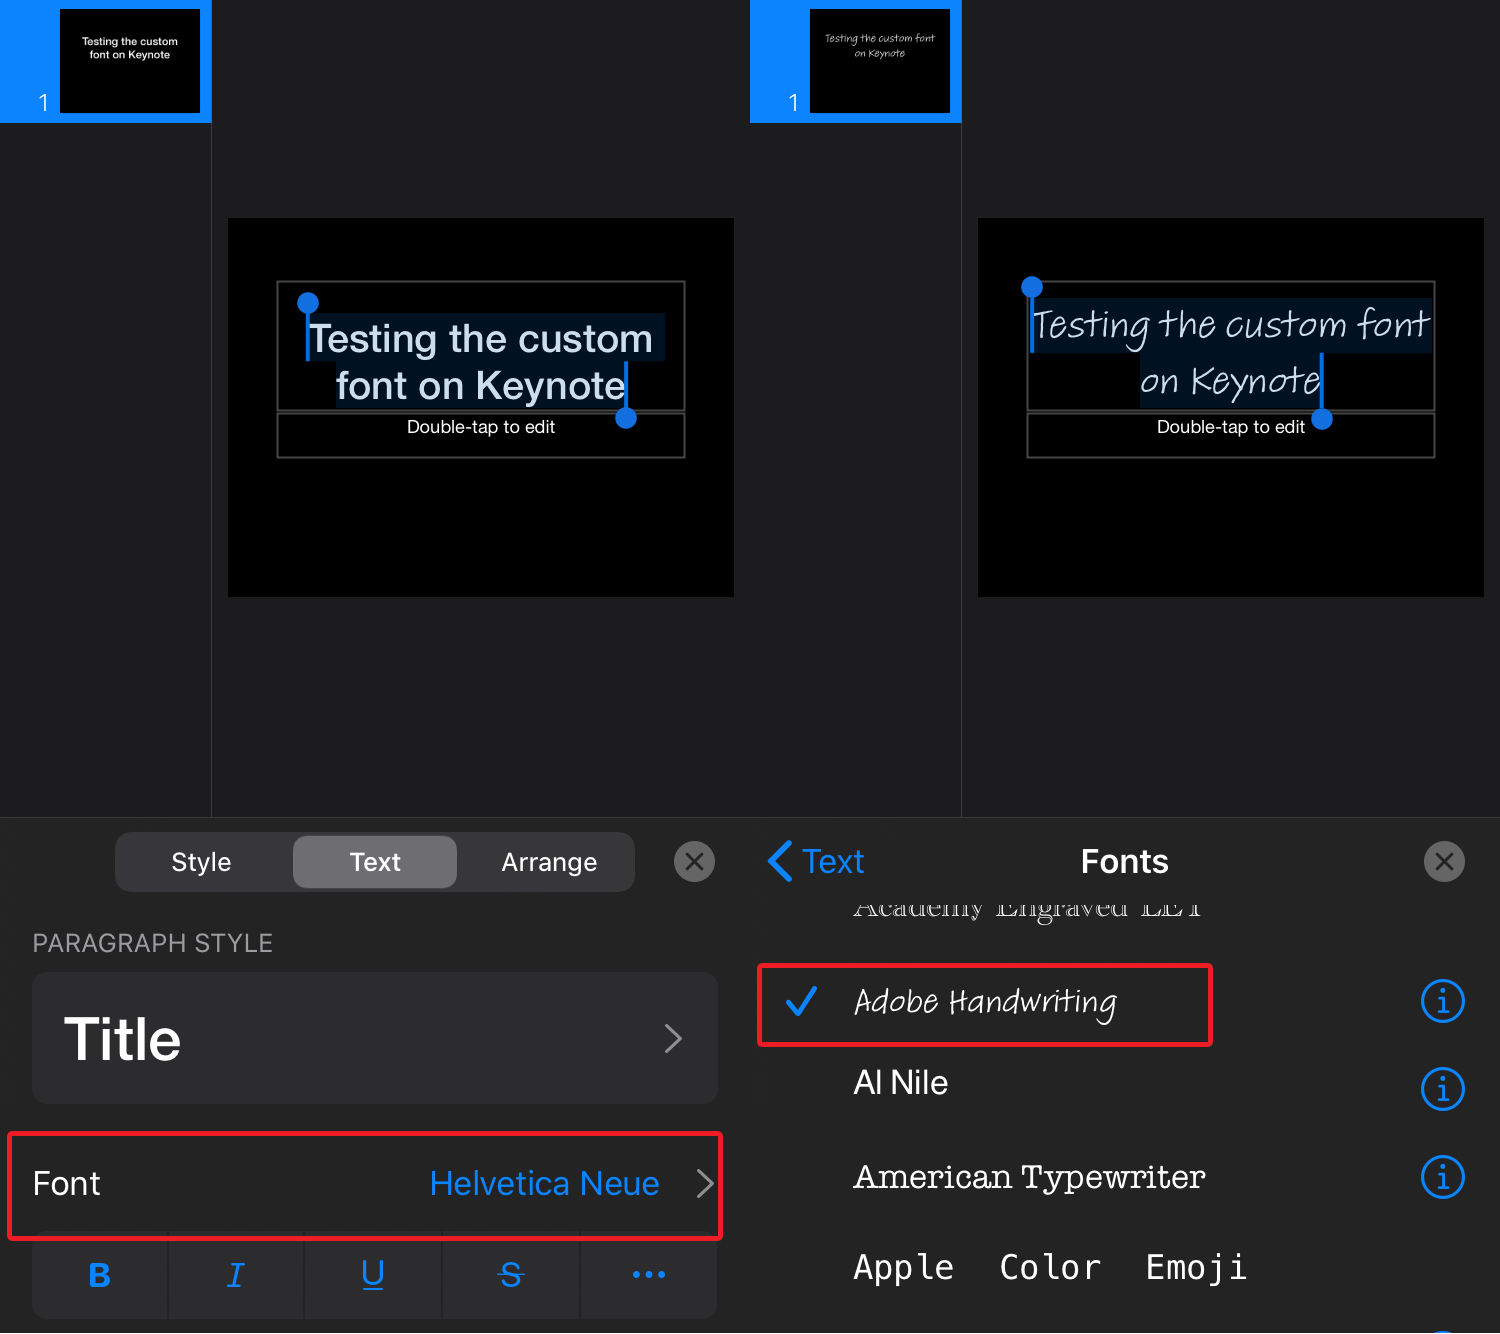
For Pages, Keynote, and Numbers, tap the paintbrush icon and scroll until you find the font selection field. Tap and select one of the fonts you downloaded from either of Creative Cloud or Font Diner.
For Mail, tap Aa to pull up the Format options. Tap Default Font > to pull up the list of available fonts you can use and choose one of the ones you downloaded. (Unfortunately, Mail was the only app that didn’t work during our testing of both Creative Cloud and Font Diner.)

