If you’re looking for a free file-hosting, sharing, and syncing service, Microsoft’s OneDrive is a strong option to consider.
Originally launched with the less-than-catchy name “Windows Live Folders,” the service has since evolved into OneDrive and currently gives users 5GB of free cloud storage.
Here’s a helpful guide on how to use OneDrive and get the most out of the platform.
How to use OneDrive
1) Getting started
To sign up for a free account, head to Microsoft’s OneDrive website and hit the “Sign up for free” option.
Next, create a Microsoft account. If you already use Outlook.com or Xbox Live, you already have a Microsoft account which you can use to sign in.
Once you’ve signed up or in, you’ll see the OneDrive homepage which gives you three basic folders: “Documents,” “Pictures,” and “Public.” On the left-hand side of the screen, you’ll see basic menu options to access your files, photos, shared content and recently accessed items.
2) Adding files to Microsoft OneDrive
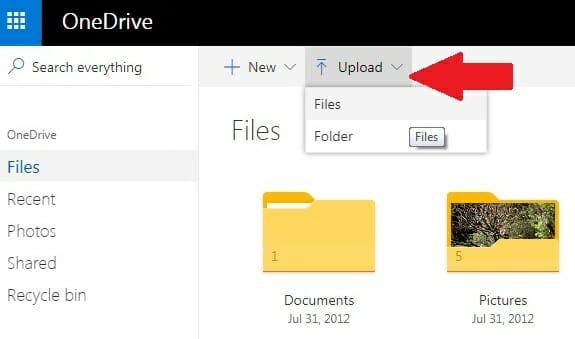
To add files to the folders, simply drag and drop the content you want to upload, or click on the “Upload” option at the top left of the screen. From here you can upload items from your computer.
As well as the ability to upload individual files, you can import entire folders too. When you click “Upload,” you will see an option to load folders as well.
3) Creating documents in Microsoft OneDrive
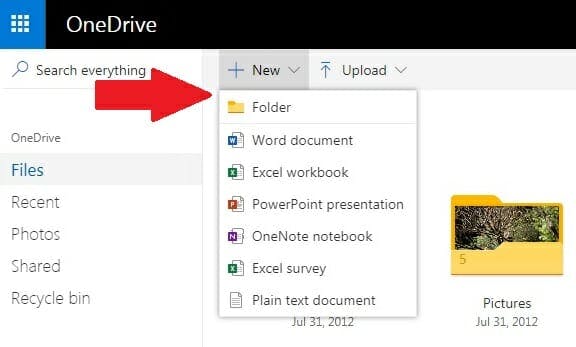
OneDrive isn’t solely focused on storage. OneDrive’s online service also lets you can create Word documents, Excel workbooks, PowerPoint presentations, OneNote notebooks, Excel surveys, and plain text docs.
To create a new file of any sort, simply click “New” and chose the type of document you want from the menu that appears. New documents will open in a new browser window and will automatically appear on your OneDrive homepage. From here you can drag them into folders.
4) Creating photo albums in Microsoft OneDrive
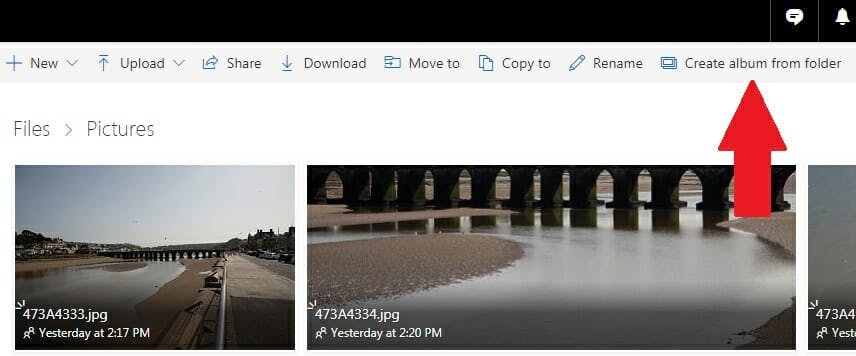
A useful OneDrive tool is the ability to create photo albums from the images you have uploaded. To do this, go to the folder your photos are in and select the “Create album from folder” option towards the top right of your screen.
5) Sharing content in Microsoft OneDrive
It’s super simple to share files or photographs from your OneDrive account, and there are various ways to do it.
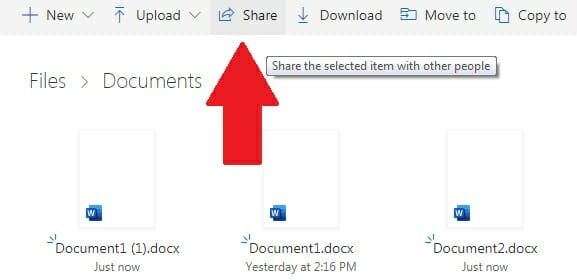
From the OneDrive homepage, go into the “Documents” folder to find options for sharing.
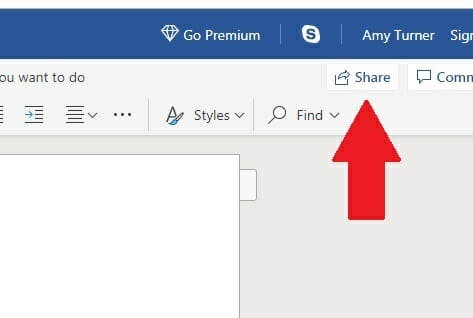
If you’re editing or viewing a document, the share option is at the top right of your screen.
There are similar options to share individual photos or entire albums. Once you hit the share button, you can add an email address, or if you’re an Outlook user, OneDrive will automatically pull the email address from your contacts once you start typing.
6) Using OneDrive on mobile devices
You can download the OneDrive sync client to access and sync your files anywhere. This means if you’re offline, OneDrive will automatically sync once you’re connected again.
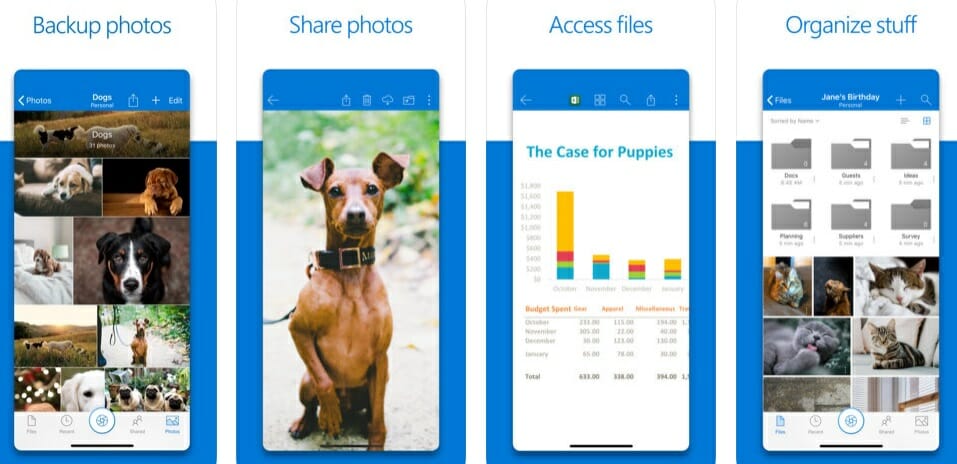
OneDrive has free apps for Android, Apple and Windows Phone devices that allow you to access your files on the go.
Xbox One owners can also download the Microsoft OneDrive app to view their photos and videos on the big screen.
READ MORE:
- How to use Google Photos to upload, edit, and backup all your photos
- How to access iCloud on iPhone, Mac, and Windows
- How to scan multiple pages into one PDF document (and for free)
Premium versions of Microsoft OneDrive
If you’re enjoying the Microsoft OneDrive experience but are nearing the free 5GB limit, you can upgrade to a paid premium option.
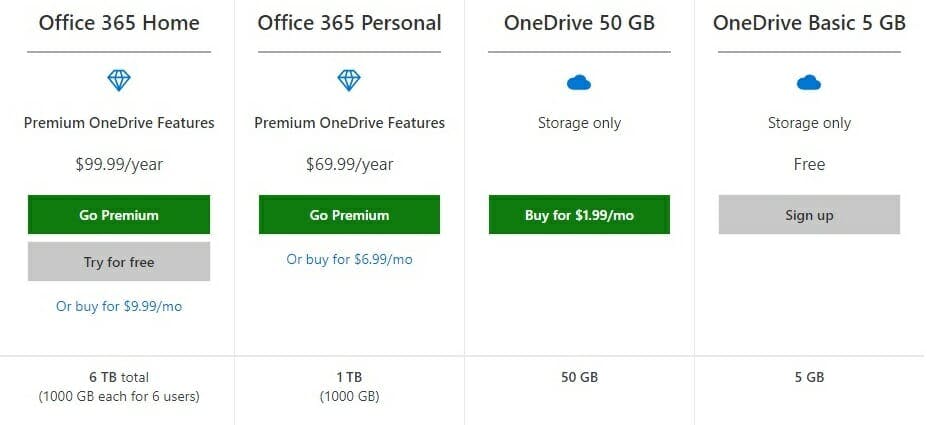
You can pay as little as $1.99 a month for up to 50GB of storage, or go all out and get the whole Office 365 suite with the “Personal” option currently costing $69.99 a year, or the “Home” plan which comes in at $99.99.


