Need to know how to share a Google Calendar?
Most people use Google Calendar to set reminders for important personal or professional events and invite others to attend. What makes Calendar so useful is its Gmail integration, allowing you to quickly turn a virtual conversation into a physical meetup.
In a business setting, a shared calendar makes organizing events and submitting days off a breeze, allowing coworkers to know what to expect and when to prepare in advance. There are also some reasons everyday consumers would want to create a shared calendar. For example, parents may want to keep a running list of chores for their children or couples may want to stay up-to-date with each other’s busy schedules. Whatever the reason, a shared Google calendar that updates in real-time will help you, and the people around you, stay on top of things.
Here is how to share your Google Calendar so people can keep up-to-date with your schedule.
How to share a Google Calendar
How to share a Google Calendar with individuals and multiple people
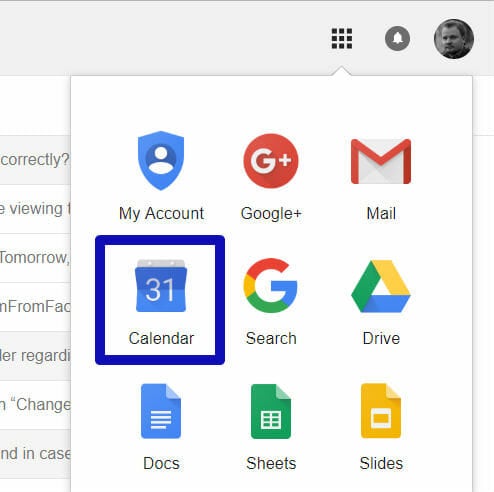
The first step to sharing a calendar is opening the Google Calendar desktop app. If you’re already logged into your Gmail account, press on the app drawer icon—a 3×3 grid of tiny squares—and select “Calendar.” You can also use this link.
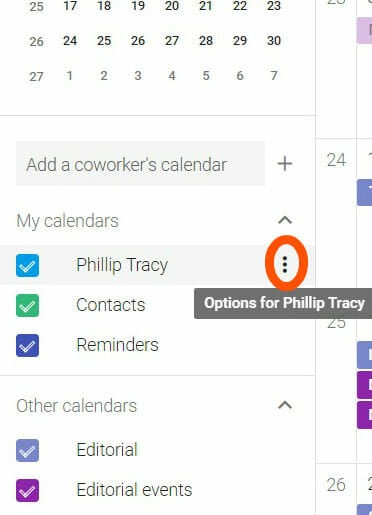
Once the Calendar app is open, you’ll need to find the “My Calendars” section on the left panel of the main page. You may see a list with “Contacts,” “Family,” “[Your Name]”, or “Tasks,” to name a few examples. If you don’t initially see any calendars, tap the arrow to expand the drop-down list.
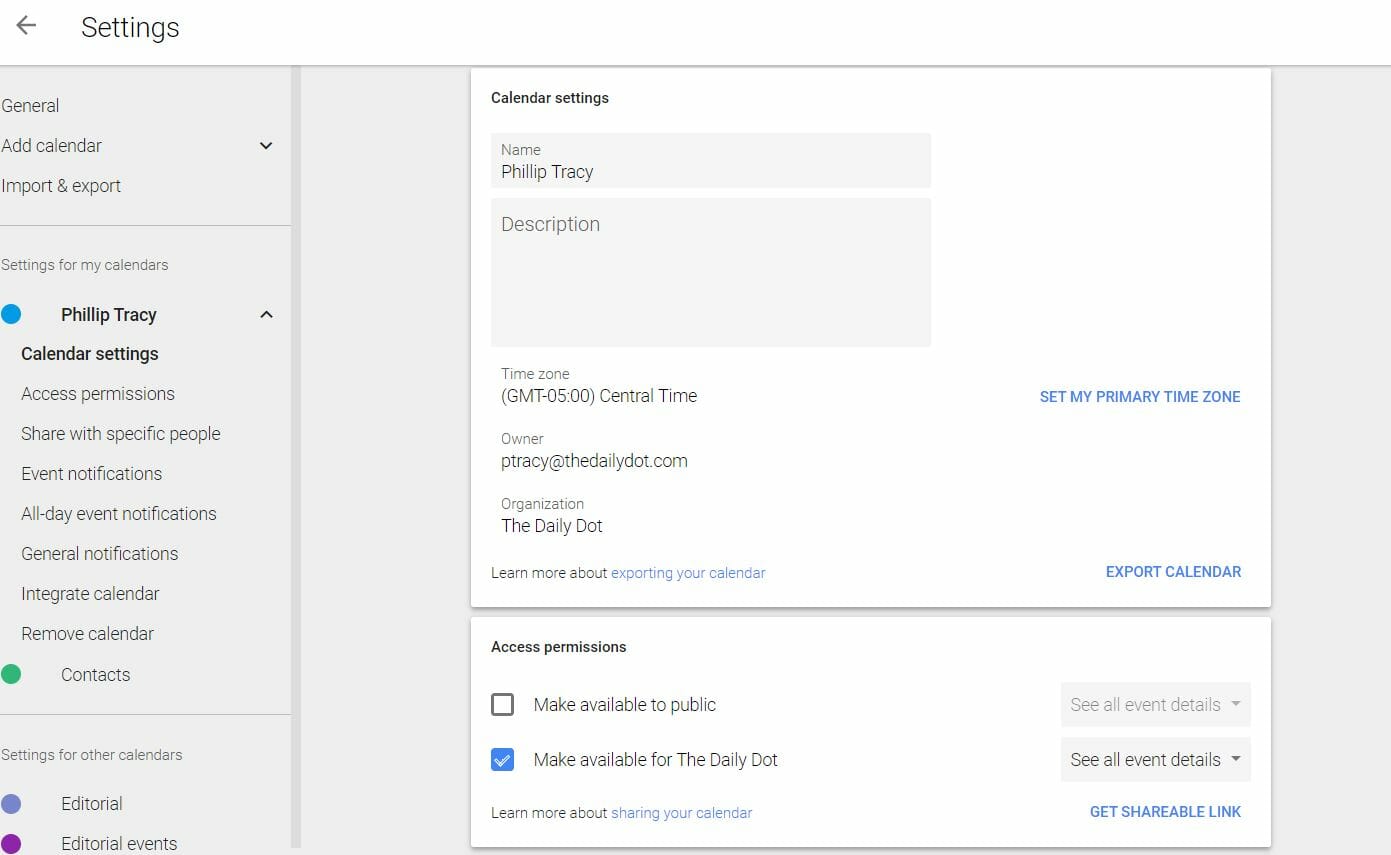
Next, you’ll need to decide which calendar you want to share with others. Really think about what you’re sharing and with who because they will have visibility into each of your Calendar entries. Once you’ve made your decision, hover over the calendar you wish to share, select the three vertical options dots, and choose “Settings and sharing.” This will take you to the calendar settings page where you can change who has permission to see your schedule. Another way to get here is by pressing on the gear icon at the top right, going to “Settings,” and selecting the calendar from the left side panel under “Settings for my calendars.”
Just below the main calendar settings, under “Access permissions,” is the option to make your calendar public. As Google warns, doing so will make all events visible to the world. We strongly suggest using this option with caution.
Instead, direct your attention to the section below titled “Share with specific people.” Here, you’ll see your name and email address listed as the owner of the calendar. Below is an “add people” button. Once you select it, a search box will appear where you can add the email address or name of the people you want to share your calendar with. You can add as many accounts as you’d like from this menu to share with multiple people.
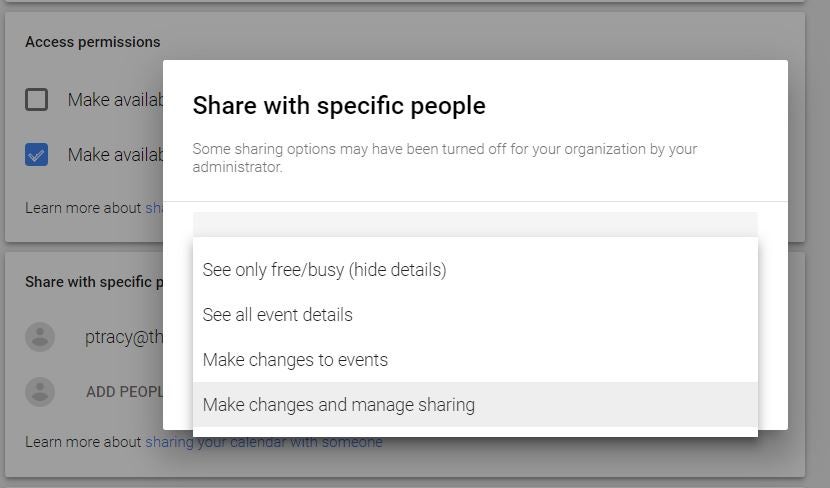
The next step after adding all your contacts is to determine what permissions they’ll have. Use the drop-down menu under the names you added to change your privacy options. Note: If you use Calendar through your work, school, or another organization, you may not see these sharing options if your admin turned them off.
Here is a quick rundown of your four choices:
See only free/busy (hide details) – Your contacts can only see if your calendar is booked or free. They cannot see the name or details of your events.
See all event details – Shows contacts the name and details of events except those set to private.
Make changes to events – Your contacts can add and edit events on the calendar, see details for all events including private ones, and restore or permanently delete events from Trash.
Make changes and manage sharing – You get all the permissions above and the ability to change the calendar settings or delete it entirely.
Once you’ve added everyone you want to share with and set permissions, press “Send.” If you shared your calendar with a group of people, each individual will see your calendar in their “Other calendars” list. Note: You cannot create or share calendars from the mobile app; it must be done on the desktop site.
How to share a Google Calendar
To quickly recap:
- Open the Google Calendar app on desktop.
- Go to My Calendars
- Select the three vertical options dots next to the calendar you wish to share and choose “Settings and sharing.”
- Scroll down to “Share with specific people” and select “add people”
- Enter the email address for accounts you’d like to add
- Edit permissions for that account’s access to your Google Calendar as necessary
READ MORE:
- 5 reasons why I’m glad I switched from iOS to Android
- Google’s Project Fi is the best cellphone plan you’re not using
- The best Project Fi phones, ranked
How to share a Google Calendar with a group
If you want to share a calendar with a large group of people, it might be easier to first make a Google Group. What’s nice about this method is that the calendar sharing permissions will adjust to the group’s membership. If a member leaves, they will automatically lose access to the calendar. You will not have to manually change the settings for that individual.
Sharing a calendar with everyone in a Google Group is straightforward. Just follow the steps listed above for sharing your Google calendar, except instead of putting in someone’s name or email address, enter the Google Group title.
If you have a Google account linked to an organization, school, or company, you’ll see an option to “Share this calendar with everyone in the organization.” If you choose to, people in the organization can see the details of your calendar events unless you make them private.
Can I share a Google Calendar with someone who doesn’t have a Gmail account?
Sadly, no. You cannot share a Google Calendar with someone who doesn’t have a Google (Gmail) account. The only way they can see your calendar is if you make it public.
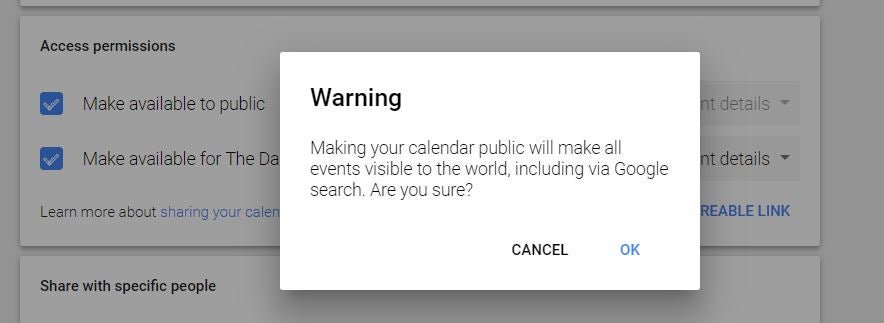
We describe how to make a calendar public above but as a quick refresher: Open the calendar app and press the options icon next to the calendar you want to make public. Then under “Access permissions” select the “Make available to public” box. When you make a calendar public, people can see it on a website and sync it with other applications.
How to share a specific calendar event
If you don’t want to give people as much visibility into your schedule, you can choose to share a single calendar event. This is all done from the event’s page. Go to your calendar and either select an already scheduled event or create a new one by pressing the + logo in the bottom right or on a date and time.
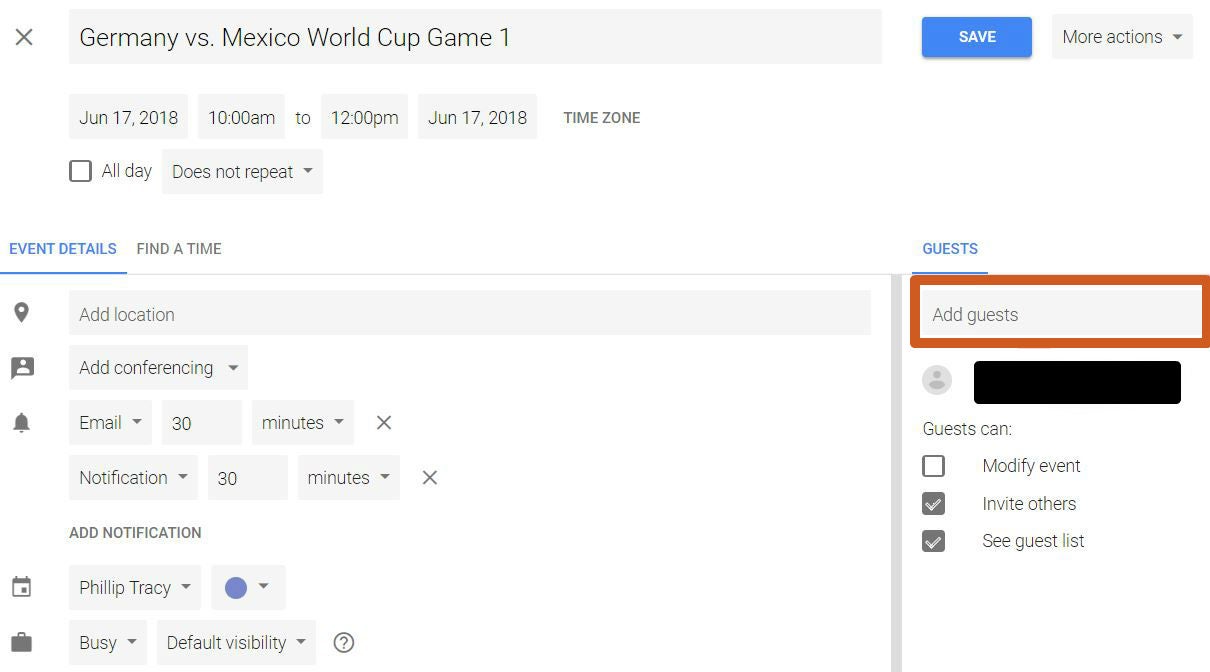
On the right side of the page is an “Add guests” blank. Input the name or email of the person you want to add as a guest. Under the search blank are a few permission boxes: modify event, invite others, see guest list. Adjust those as you wish.
READ MORE:
- How to use Google Photos to upload, edit, and backup all your photos
- How to set up a Gmail account like a pro
- 16 essential Android apps that everyone should own
How to remove people from shared calendars
The steps required to remove someone’s sharing credentials are almost exactly the same as permitting them. Go to the Calendar app and hover over the calendar you want to make changes to. Press the more options icon and choose “Settings and sharing.”
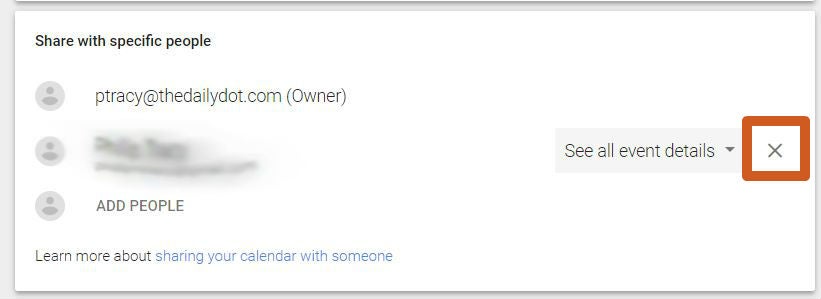
This time, under “Access permission” click the remove (X) button next to the name of the person you no longer want to share the calendar with. This will remove them from the list. To stop sharing a calendar publically, uncheck the “Make available to public” box.

