Snapchat‘s admissions process for its community geofilters was once a highly competitive and mysterious game.
Geofilters, which usually appear in the form of a sticker or a badge you can stick on your snap before you send it, are relatively simple to create on Photoshop or Illustrator. But they seemed just as easy to mess up. Artists would vent on Reddit about having dozens of their geofilter designs rejected by the merciless review team at Snapchat.
https://twitter.com/AmandaWeyhrich/status/674295148147183616
Luckily, those days are over. By rolling out its paid, on-demand geofilter program earlier this year, Snapchat has opted to #freethegeofilter to the masses. Now, anyone with a rough idea of how Photoshop works can pay $5 to troll their friends on Snapchat.
Read more from the Daily Dot:
- The best Snapchat hacks, tips, and tricks
- How to get Snapchat’s selfie lenses
- How to flirt on Snapchat
People have deployed on-demand Snapchat geofilters to ask out prom dates and commemorate their own birthdays. One enterprising student even created a geofilter to score a job. No purpose is too small or trite.
https://twitter.com/nick__auger/status/670717127666495488
But since it’s your time and money, you’ll want to create a design that is attractive and attention-grabbing. Here are the steps you’ll need to follow to create an on-demand geofilter, along with some additional tips and advice to help you nail the perfect design.
You’ll need the following:
- Adobe Photoshop or Illustrator or a free Web-based alternative like Canva.
- A free Snapchat account, which you’ll use to log-in to Snapchat’s On-Demand Geofilters page. Note: If you already have the Snapchat app, you already have a Snapchat account. Just make sure your email address is verified through the mobile version of Snapchat (you can do this under “Settings”) before you log-in on the Web-based application.
1) Come up with a geofilter concept
Before you can get to designing your geofilter, you’ll need to come up with the right concept. You’ll have the option of working with one of Snapchat’s 12 templates or coming up with your own design. For inspiration, check out the Snapchat Geofilters Tumblr, r/Snapchatgeofilters, or do a search for “Snapchat Geofilters” on Pinterest, Twitter, or Google Images.
Thank you so much @Snapchat for accpeting my Community Geofilters,U guys are the best #LoveSnapchat #happysnapping pic.twitter.com/3ZWlNU7ZOS
— Anish Pereira (@VKV_anish) May 20, 2016
Don’t forget to join us all wknd on @Snapchat! Follow our Host @HodanTV LIVE @HalalFoodFestTO #GeoFilters #HFFTO16 pic.twitter.com/nHX1ypejJn
— Integration TV (@IntegrationTV) May 19, 2016
In Edinburgh, Glasgow, Aberdeen or Dundee today? Use our #EURchoice Snapchat geofilters! https://t.co/lI2nkzKRQn pic.twitter.com/8d2he0c30Z
— SYP (@OfficialSYP) May 25, 2016
You’ll need to make sure your design fits the following Snapchat guidelines for personal geofilters:
- No branding, business marks, names, or logos
- No photographs of people, URLs, phone numbers, or e-mails
- No drug-related content
- Don’t take up too much of the screen (it should remain on the upper or lower third of the screen)
- Screen dimensions should be set to 1080px wide by 1920px
- The image should be in PNG format and the file size should be under 300 KB
- Transparent background
2) Design the actual geofilter
You can download Snapchat’s on-demand geofilter templates here. They cover weddings, birthdays, generic events, the whole shebang. Using any graphic design program, you can easily play around with colors, text, and add additional images to the templates. Given that it’ll ensure you stay within Snapchat’s strict sizing requirements, the templates aren’t a bad way to go.
Note that Snapchat’s templates are only accessible as Photoshop and Illustrator files. If you don’t have either and are using a free Web design platform like Canva, make sure your dimensions are set to 1080 x 1920. Remember that your image must have a transparent background.
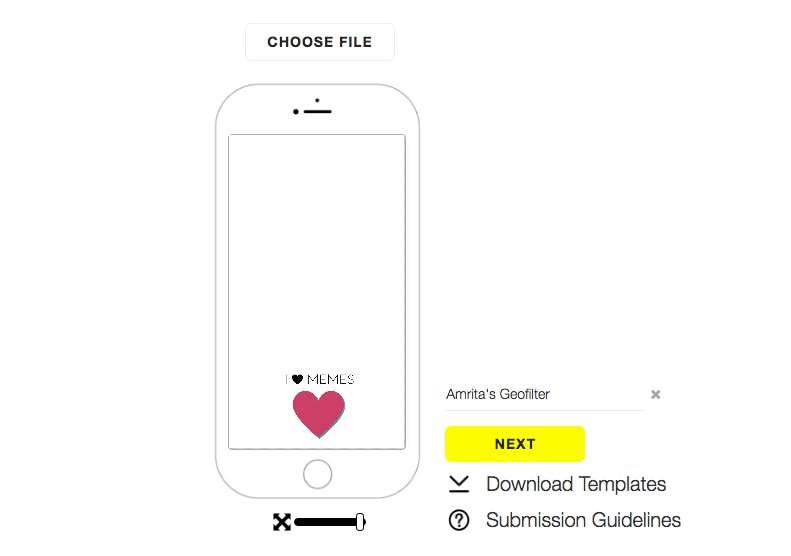
Once you have the image set and ready to go, save as a PNG and upload to Snapchat’s on-demand geofilter page.
You’ll get a preview of what your geofilter will look like:
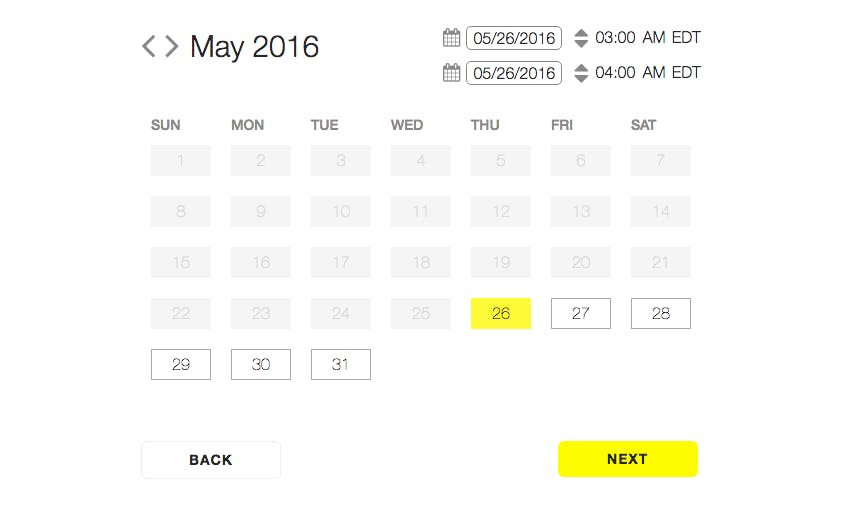
3) Set the time and date
You’ll now be able to select the date and time you want your Snapchat geofilter to run. You can have your geofilter set to run for as little as an hour and for as long as around a month.
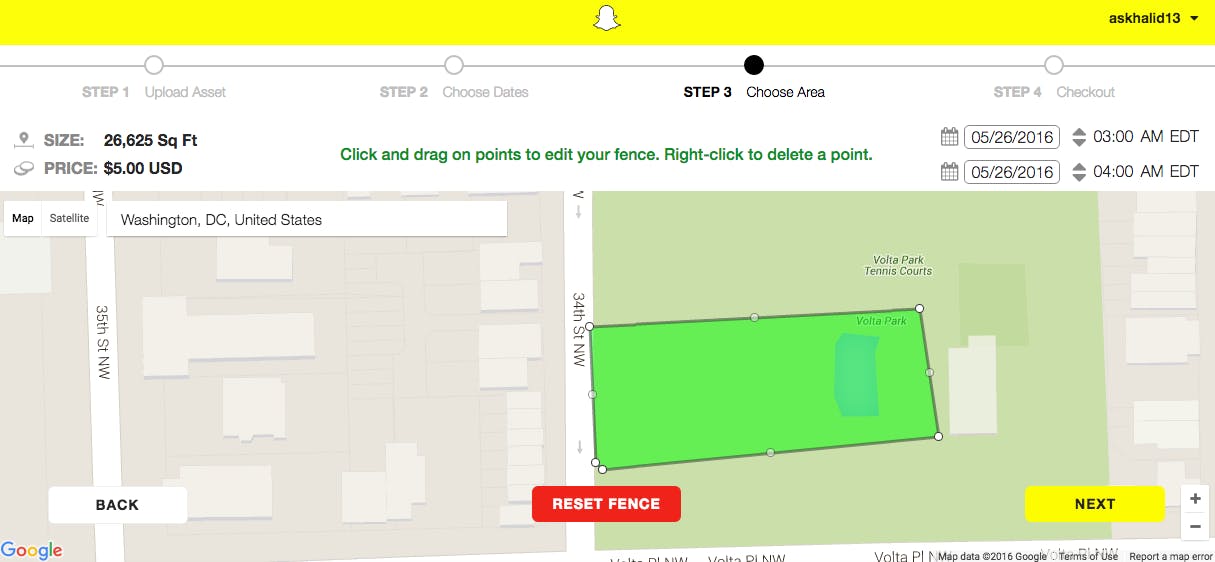
When it’s time to draw your geofence, make sure it is under 5 million square feet. Note the price of your geofilter will go up the longer its duration and the larger its geofence. If you’re trying to save money, shoot for as small of a geofence as possible. If you’re designing a geofilter for a wedding, for example, fit the geofence around the venue itself instead of the neighborhood it surrounds. Also, if you’re designing a geofilter for a large-scale event like a concert, or even at a peak time like Spring Break or graduation, be ready for steep prices. Snapchat told Marketing Land that it limits its geofilters to seven per area, and further limits them in high-traffic areas where there are concerts or events.
4) Wait to be approved
Once you’ve submitted and paid for your geofilter, the hard part is done. Wait for an email from Snapchat with the news that your geofilter is approved, which can take as little as a few minutes. You’ll receive another email from Snapchat when your geofilter goes live.
Finally, spread the news to your friends and snap to your heart’s content!


