While iOS can be considered a finely manicured sanctuary for a simple user experience, Google’s Android is a sandbox that allows developers and enthusiasts to customize to their needs. For some, Android’s extensive settings are its biggest allure, but even its die-hard fans may not know about the hidden functions in the System UI Tuner and Developer options settings.
Here’s a step-by-step guide on how to access those settings and some of its best features.
Enabling System UI Tuner
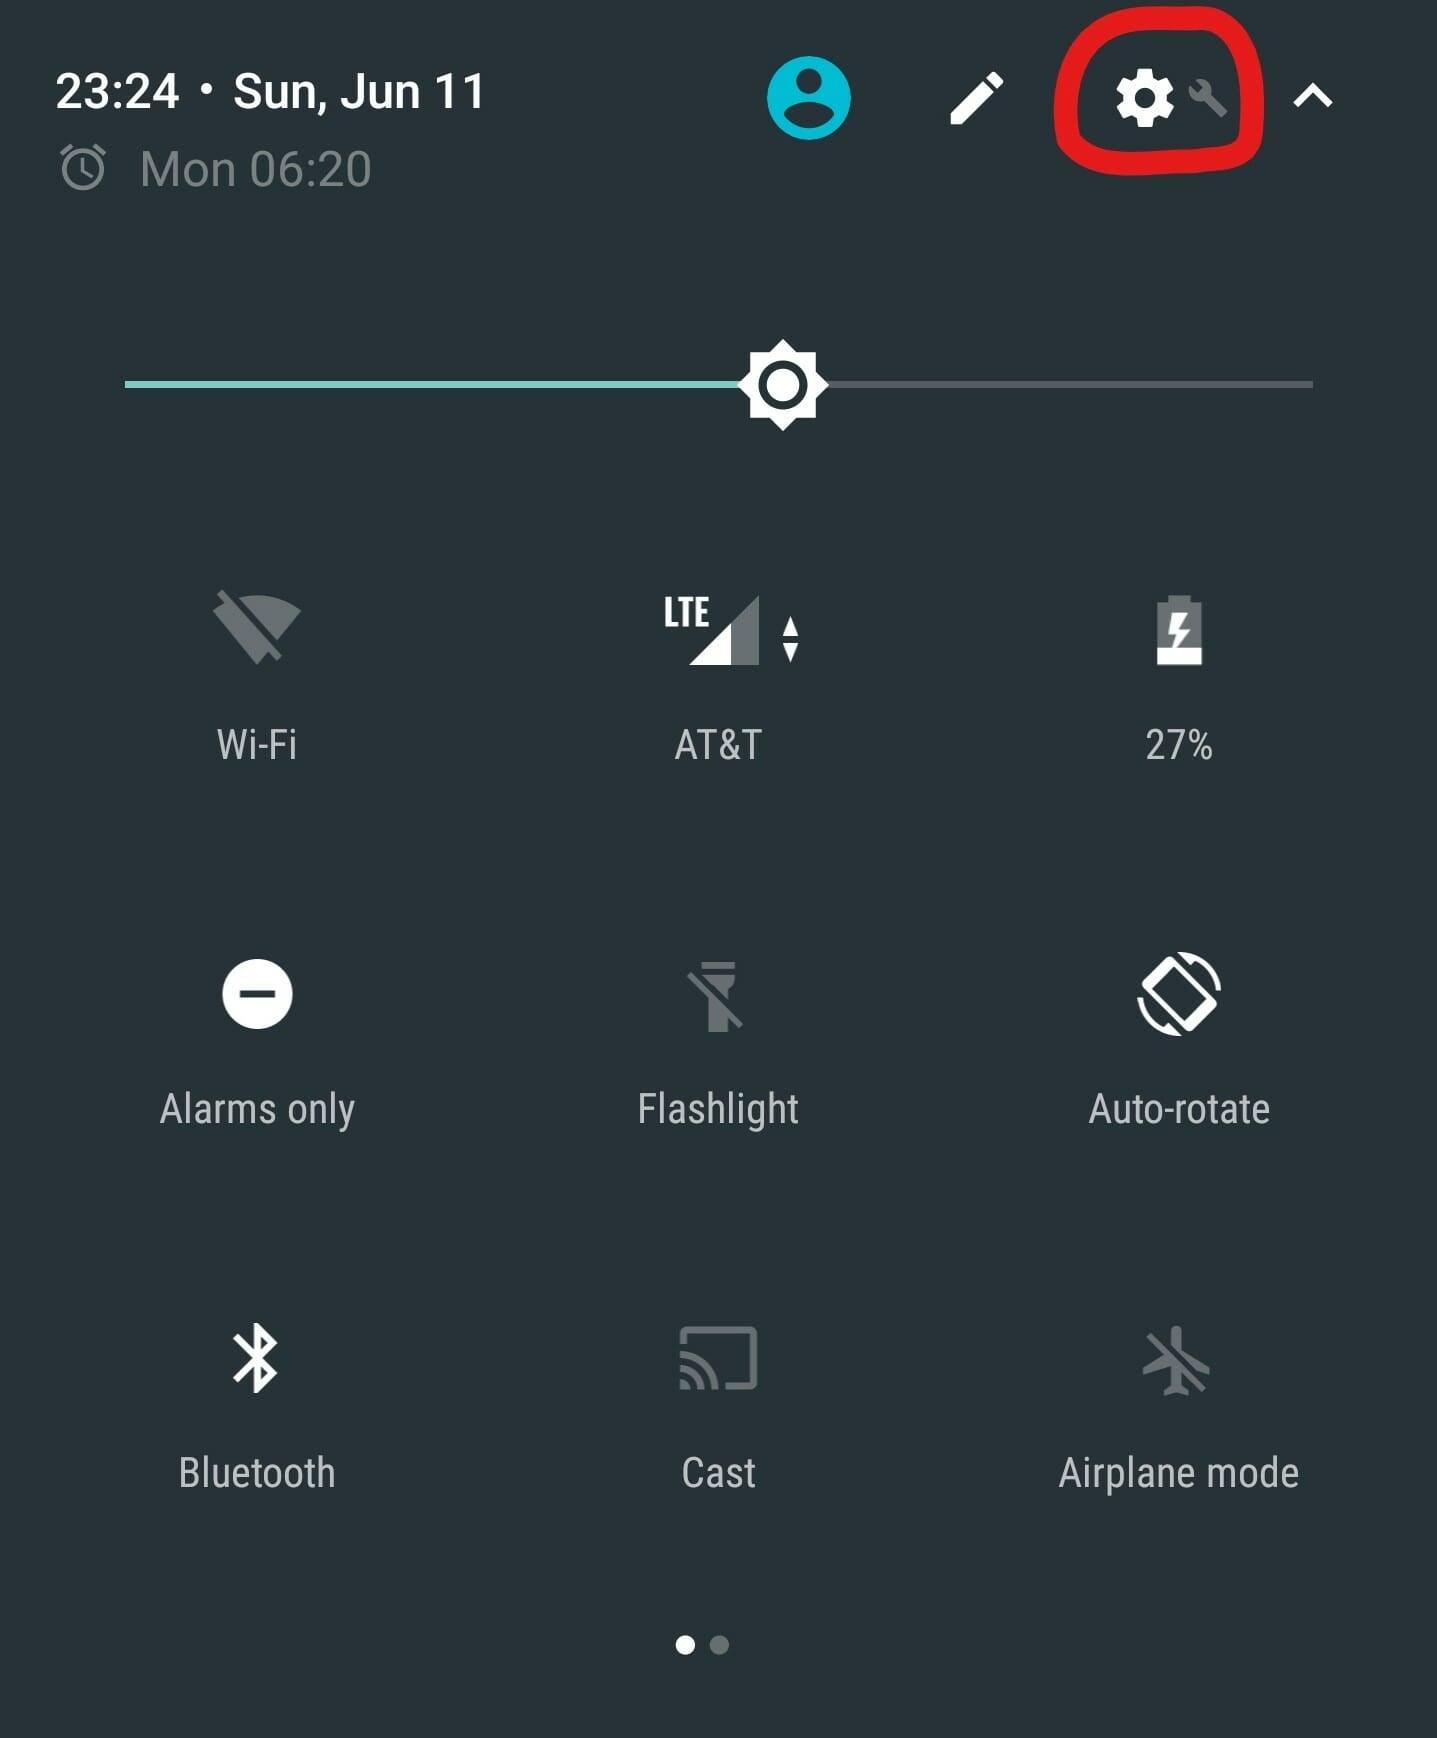
First, you will need a phone running Android Marshmallow or newer, so any device purchased after 2015 should do just fine. To open up System UI Tuner, pull down the notification tab from the top of your screen. On the top-right corner, you should see a tiny settings gear. Press and hold that little icon for about five seconds to reveal the System UI Tuner. You will get a notification that says the hidden feature has been added to your settings once you let go of the gear icon.
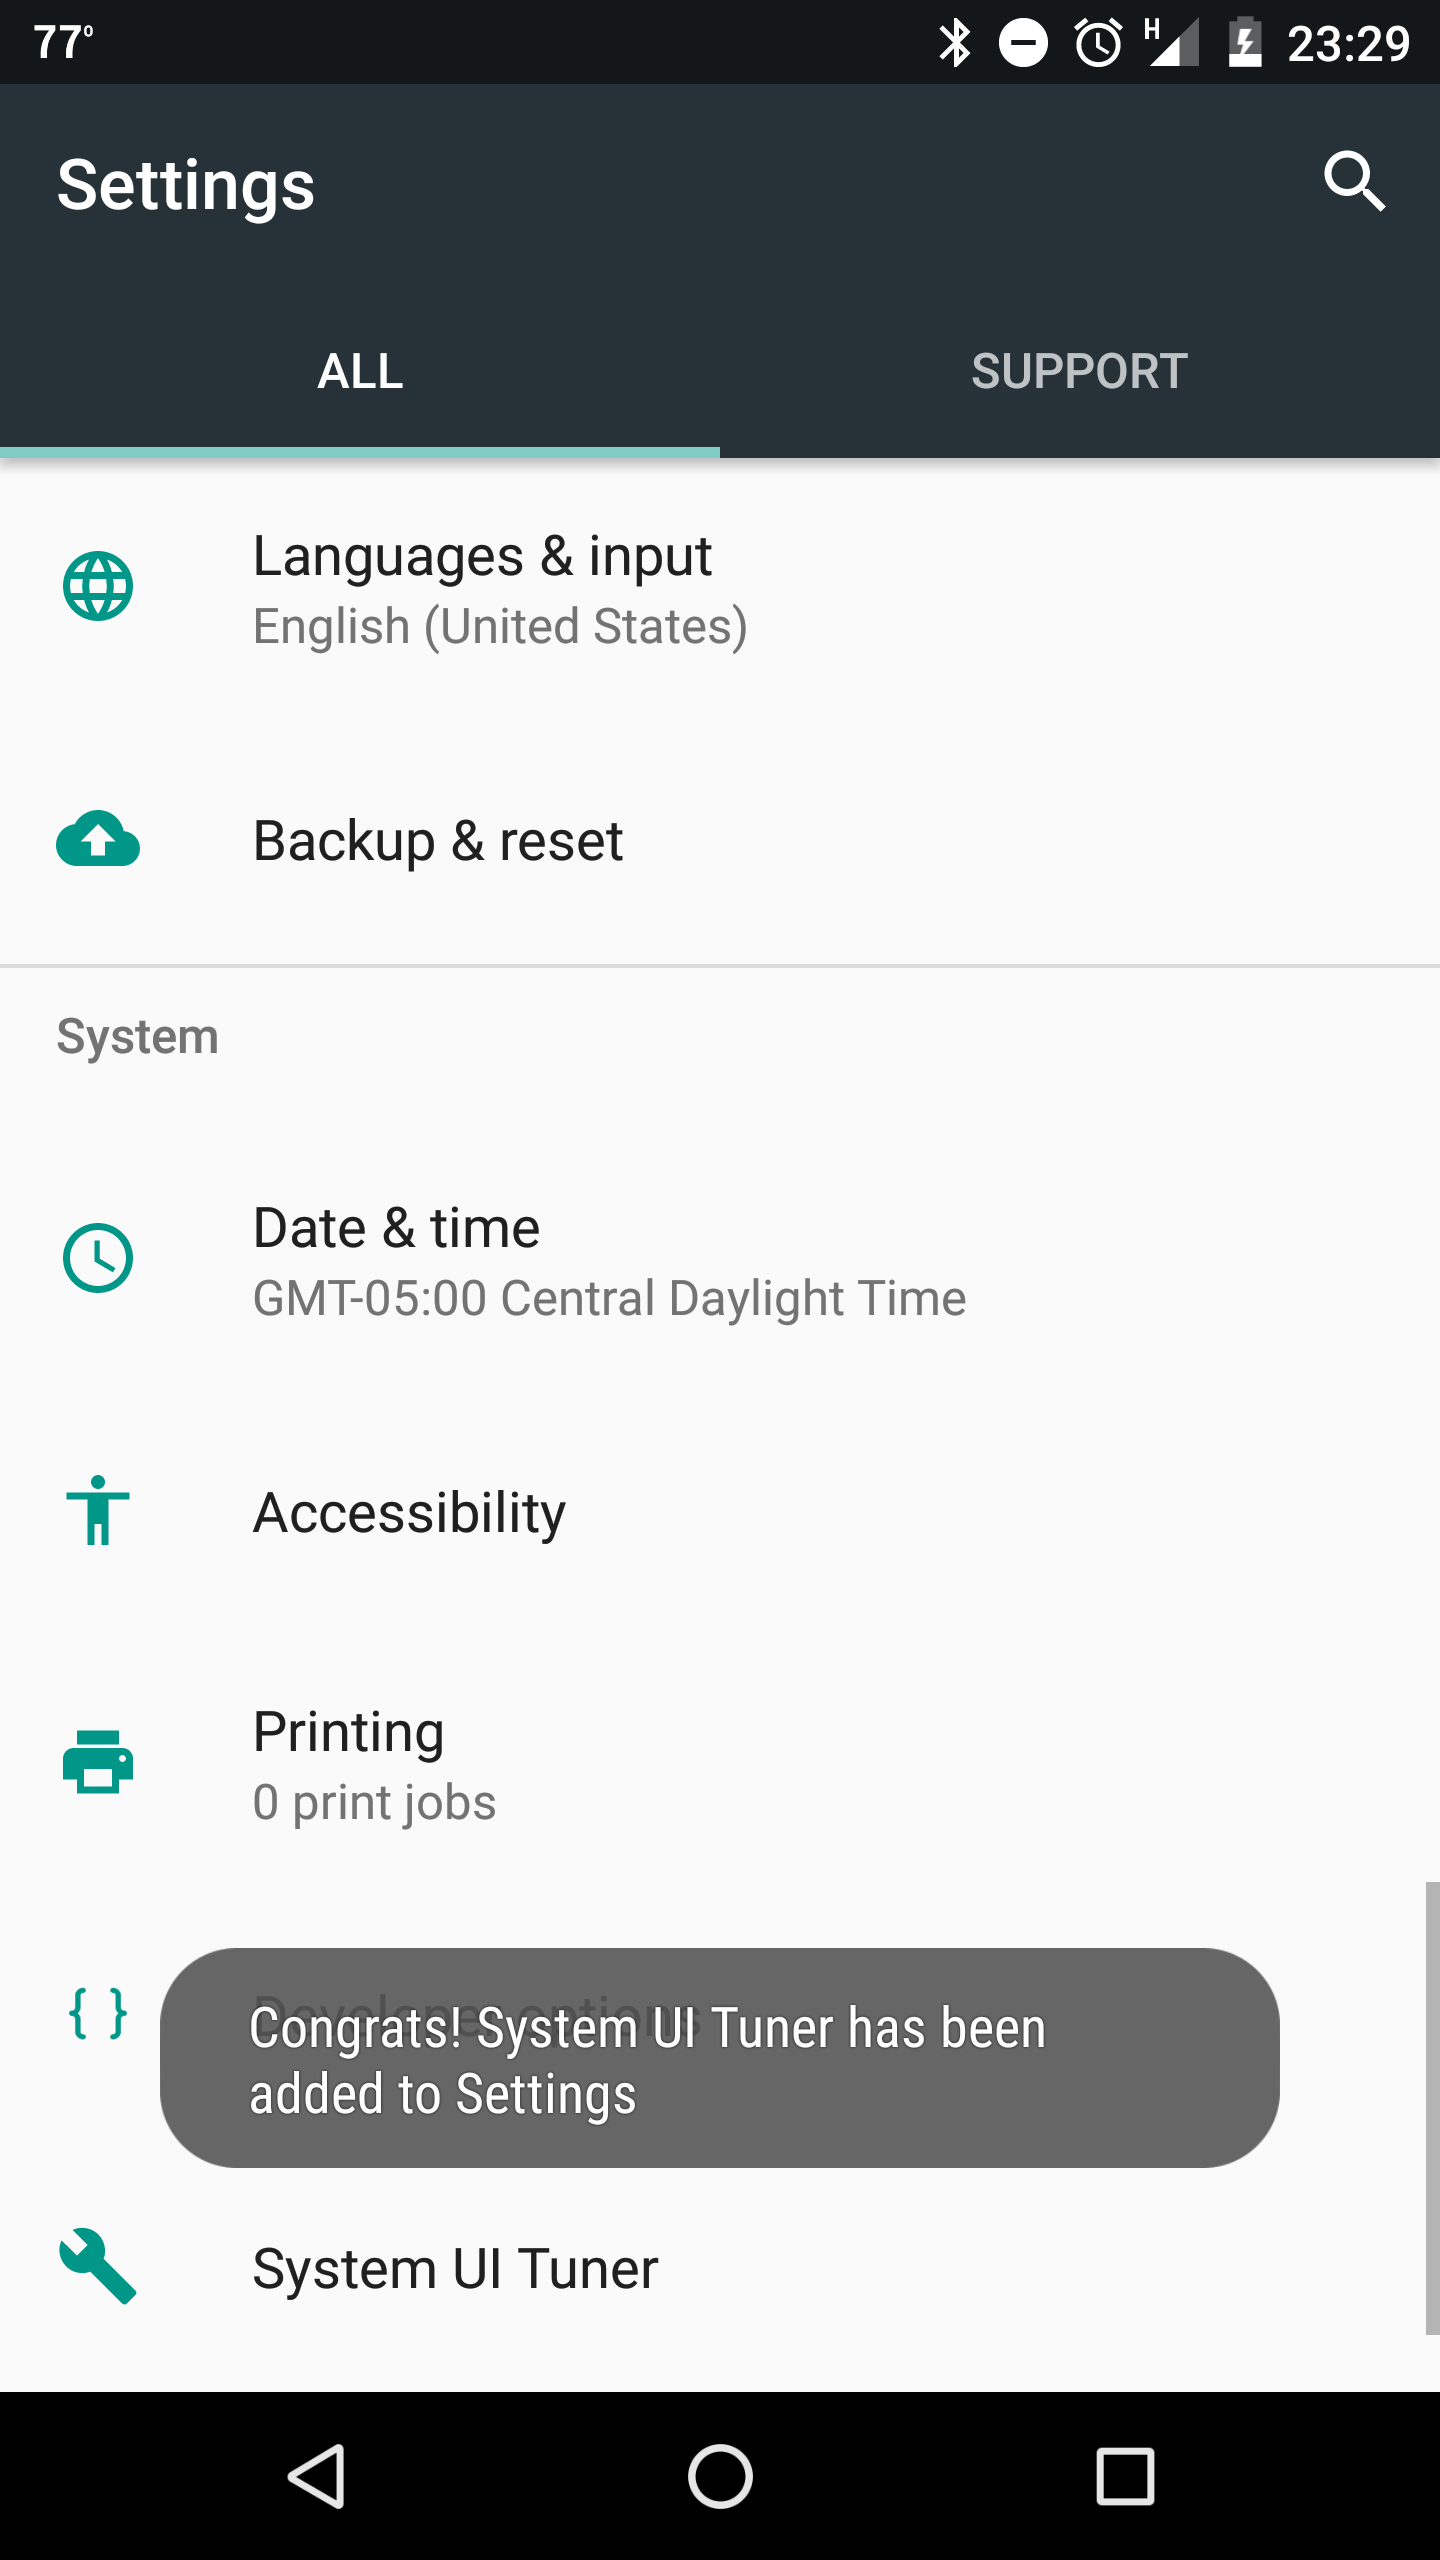
Now you just need to head on over to your full settings by either pressing the gear icon once or going to Settings in your app drawer. In your settings, scroll all the way to the bottom and find System UI Tuner right above the last setting, “About phone.”
Now it’s time to figure out how you can use these hidden features to improve your smartphone. We’re going to break things down by showing the most useful features in each of the tuner’s three tabs.
READ MORE:
- The best printer apps for Android when you’re on the go
- 16 essential Android apps that everyone should own
- 5 reasons why I’m glad I switched from iOS to Android
Android’s hidden features
Status bar
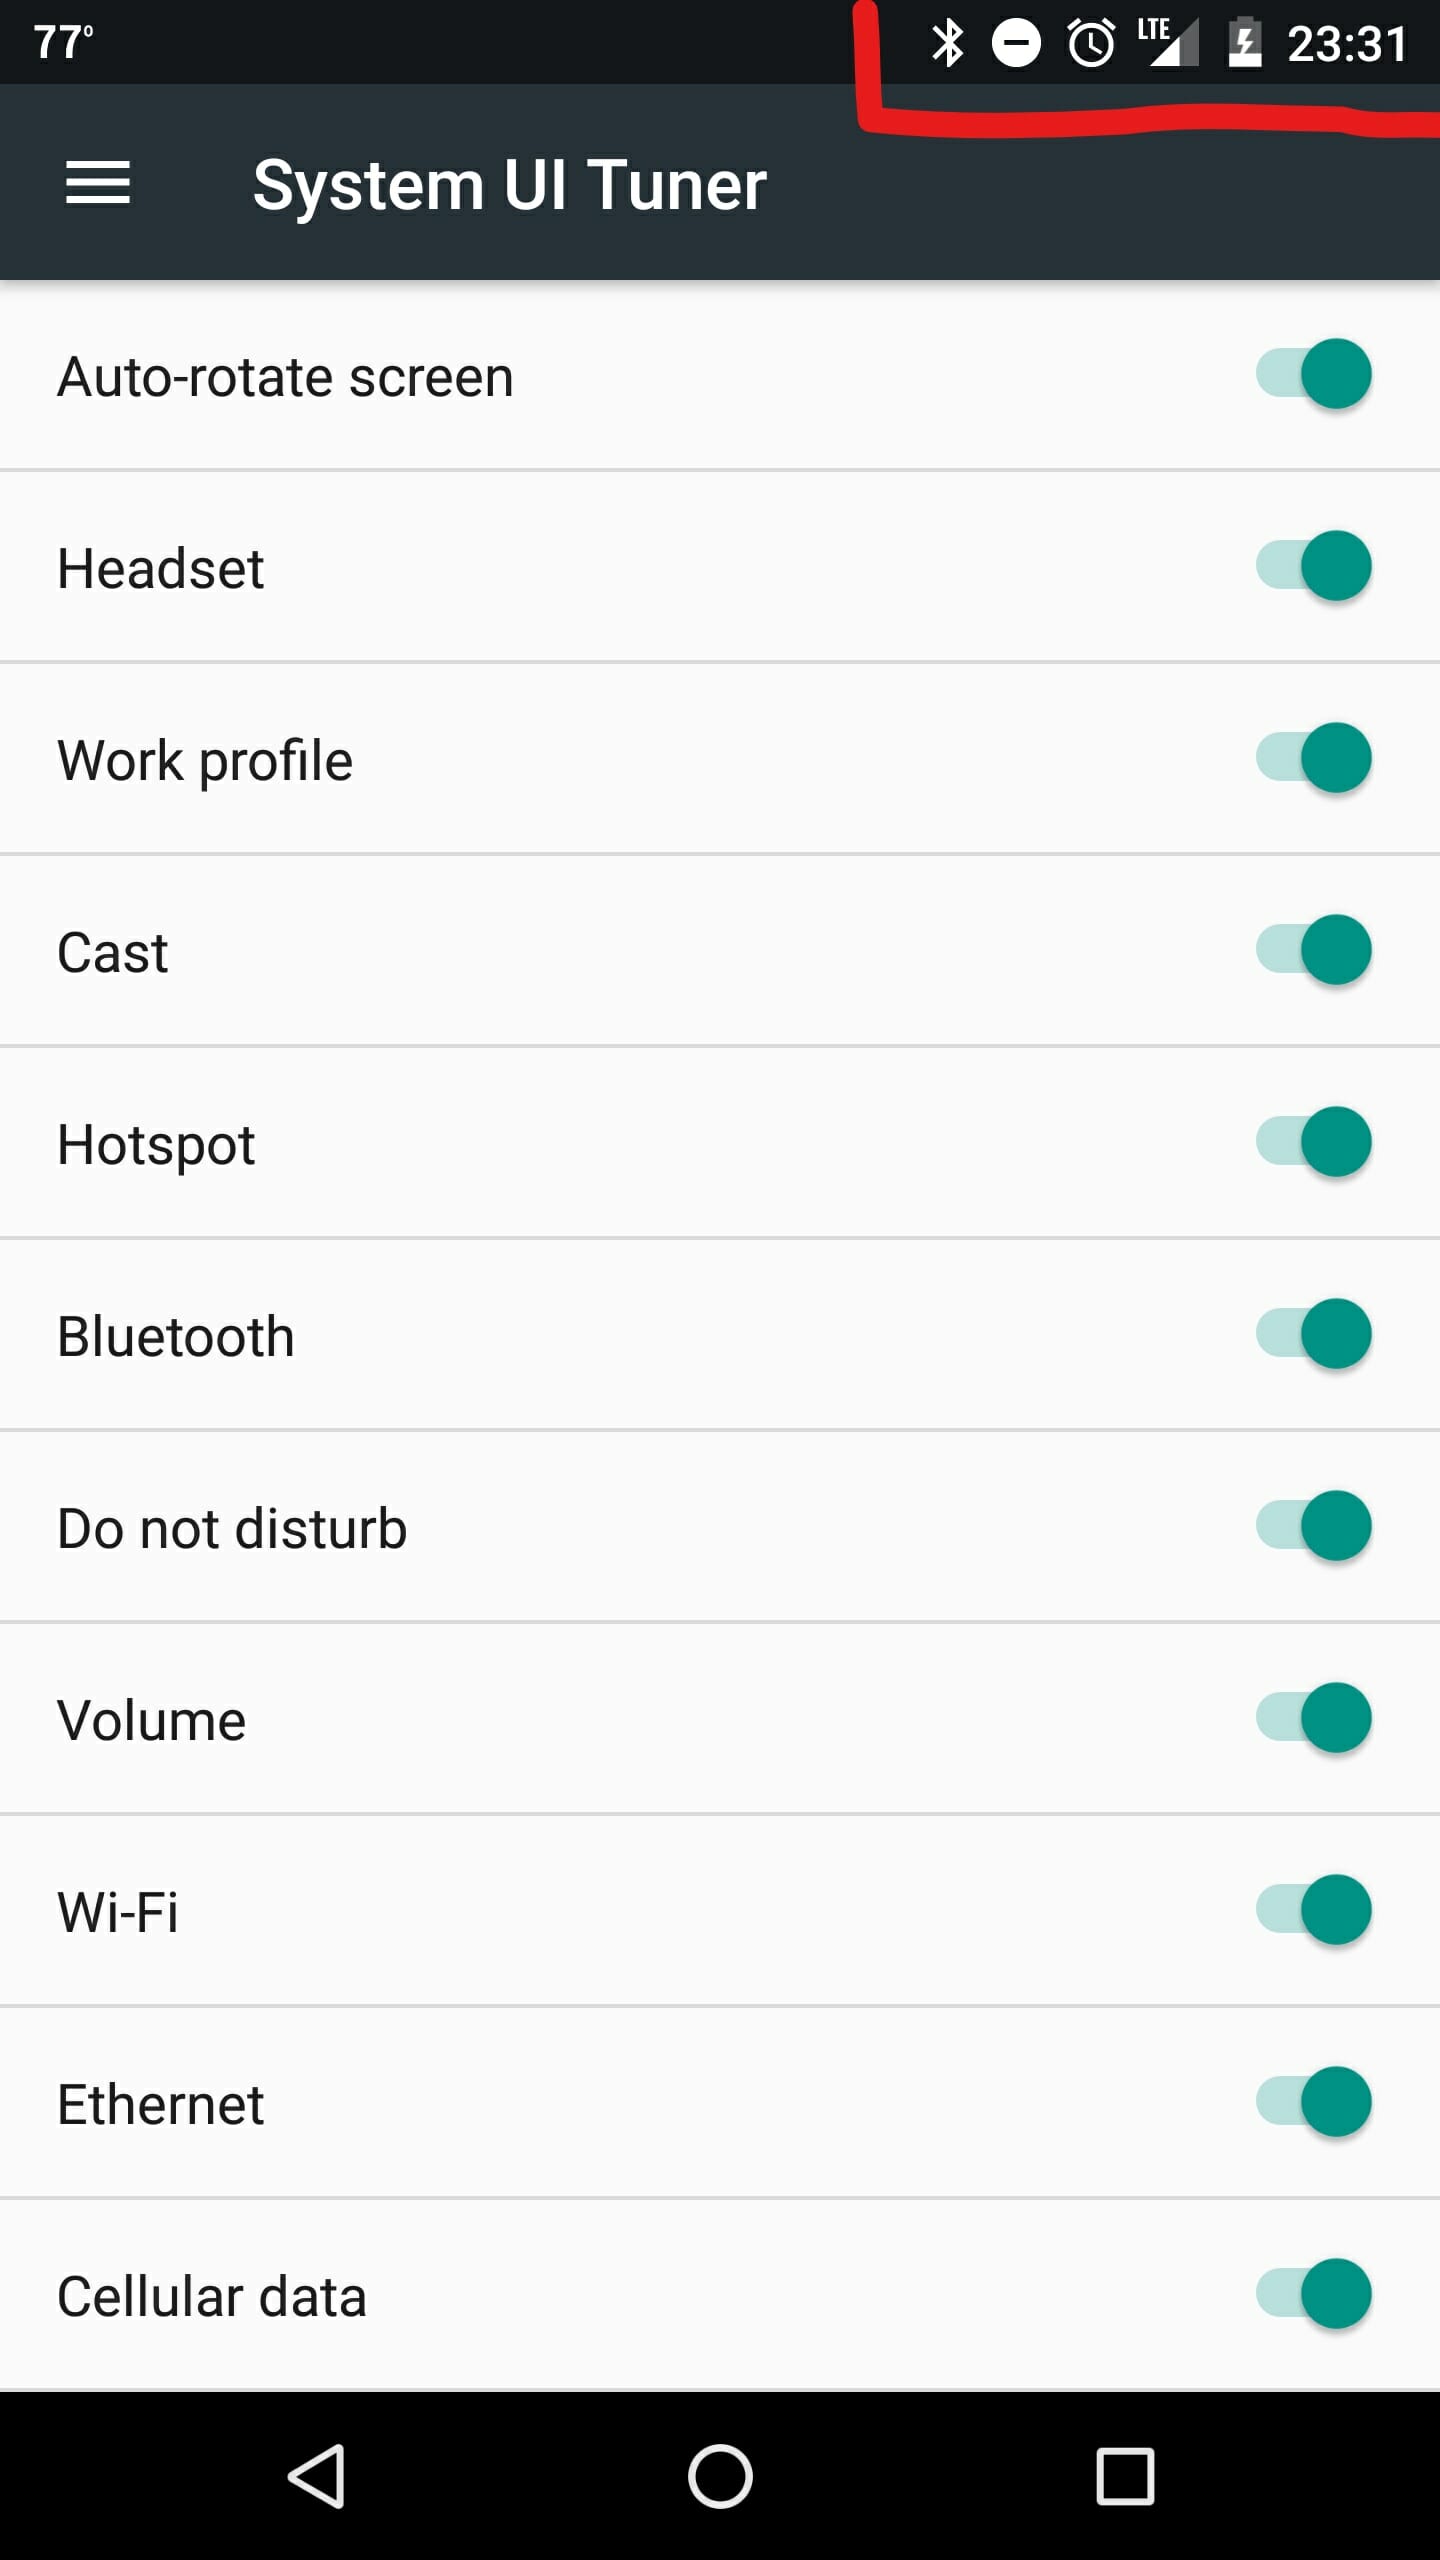
The status bar feature lets you decide which icons appear on the top right of your display. If things are looking cluttered, you can permanently hide the icons you don’t use often. For example, if you don’t need to know which volume setting your phone is in (or just don’t understand the icons), you can choose to remove it from the bar.
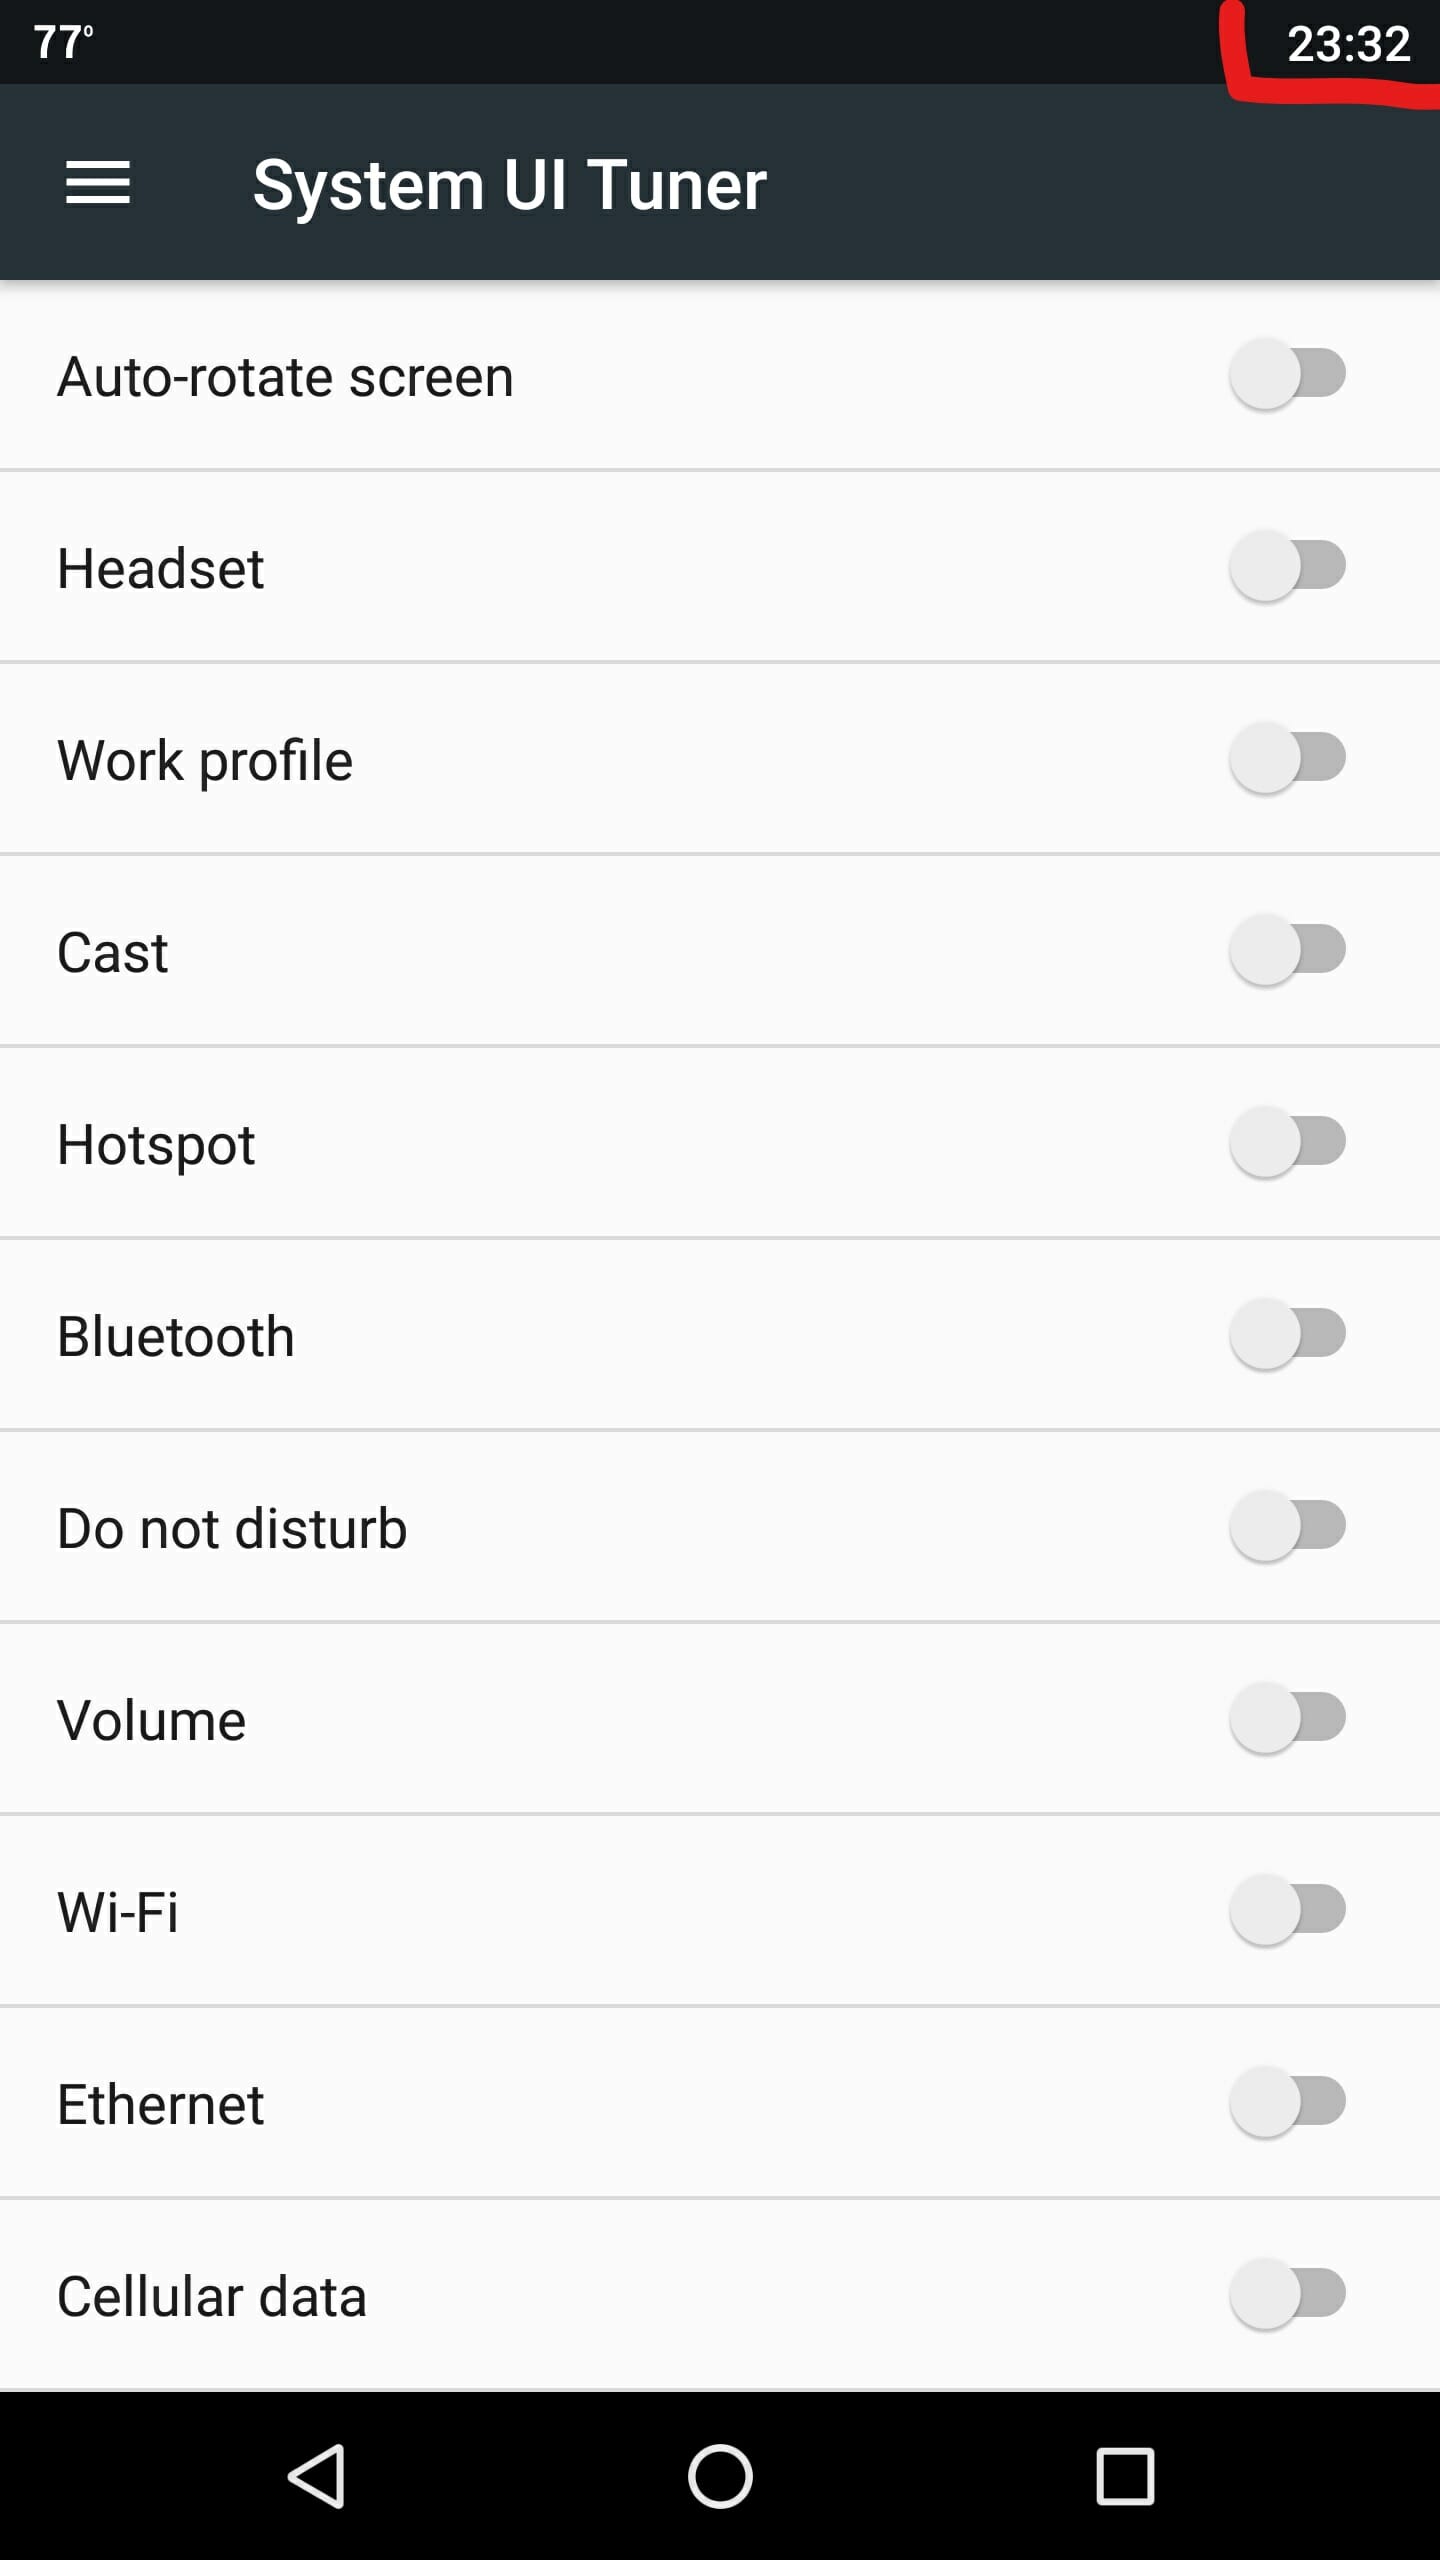
You can also choose to add or adjust icons. This leads us to a savior for anyone who finds themselves low on battery at the end of a day: the battery percentage indicator. To enable this game-changer, press on the “battery” tab (make sure you’re still in the Status bar settings) and choose “always show percentage.”

Glance up at your status icons. Notice anything different? You should now see the exact percentage of battery life remaining overlayed on top of the battery indicator. This will help take the guess work out of determining when your phone is about to shut off.
Do not disturb
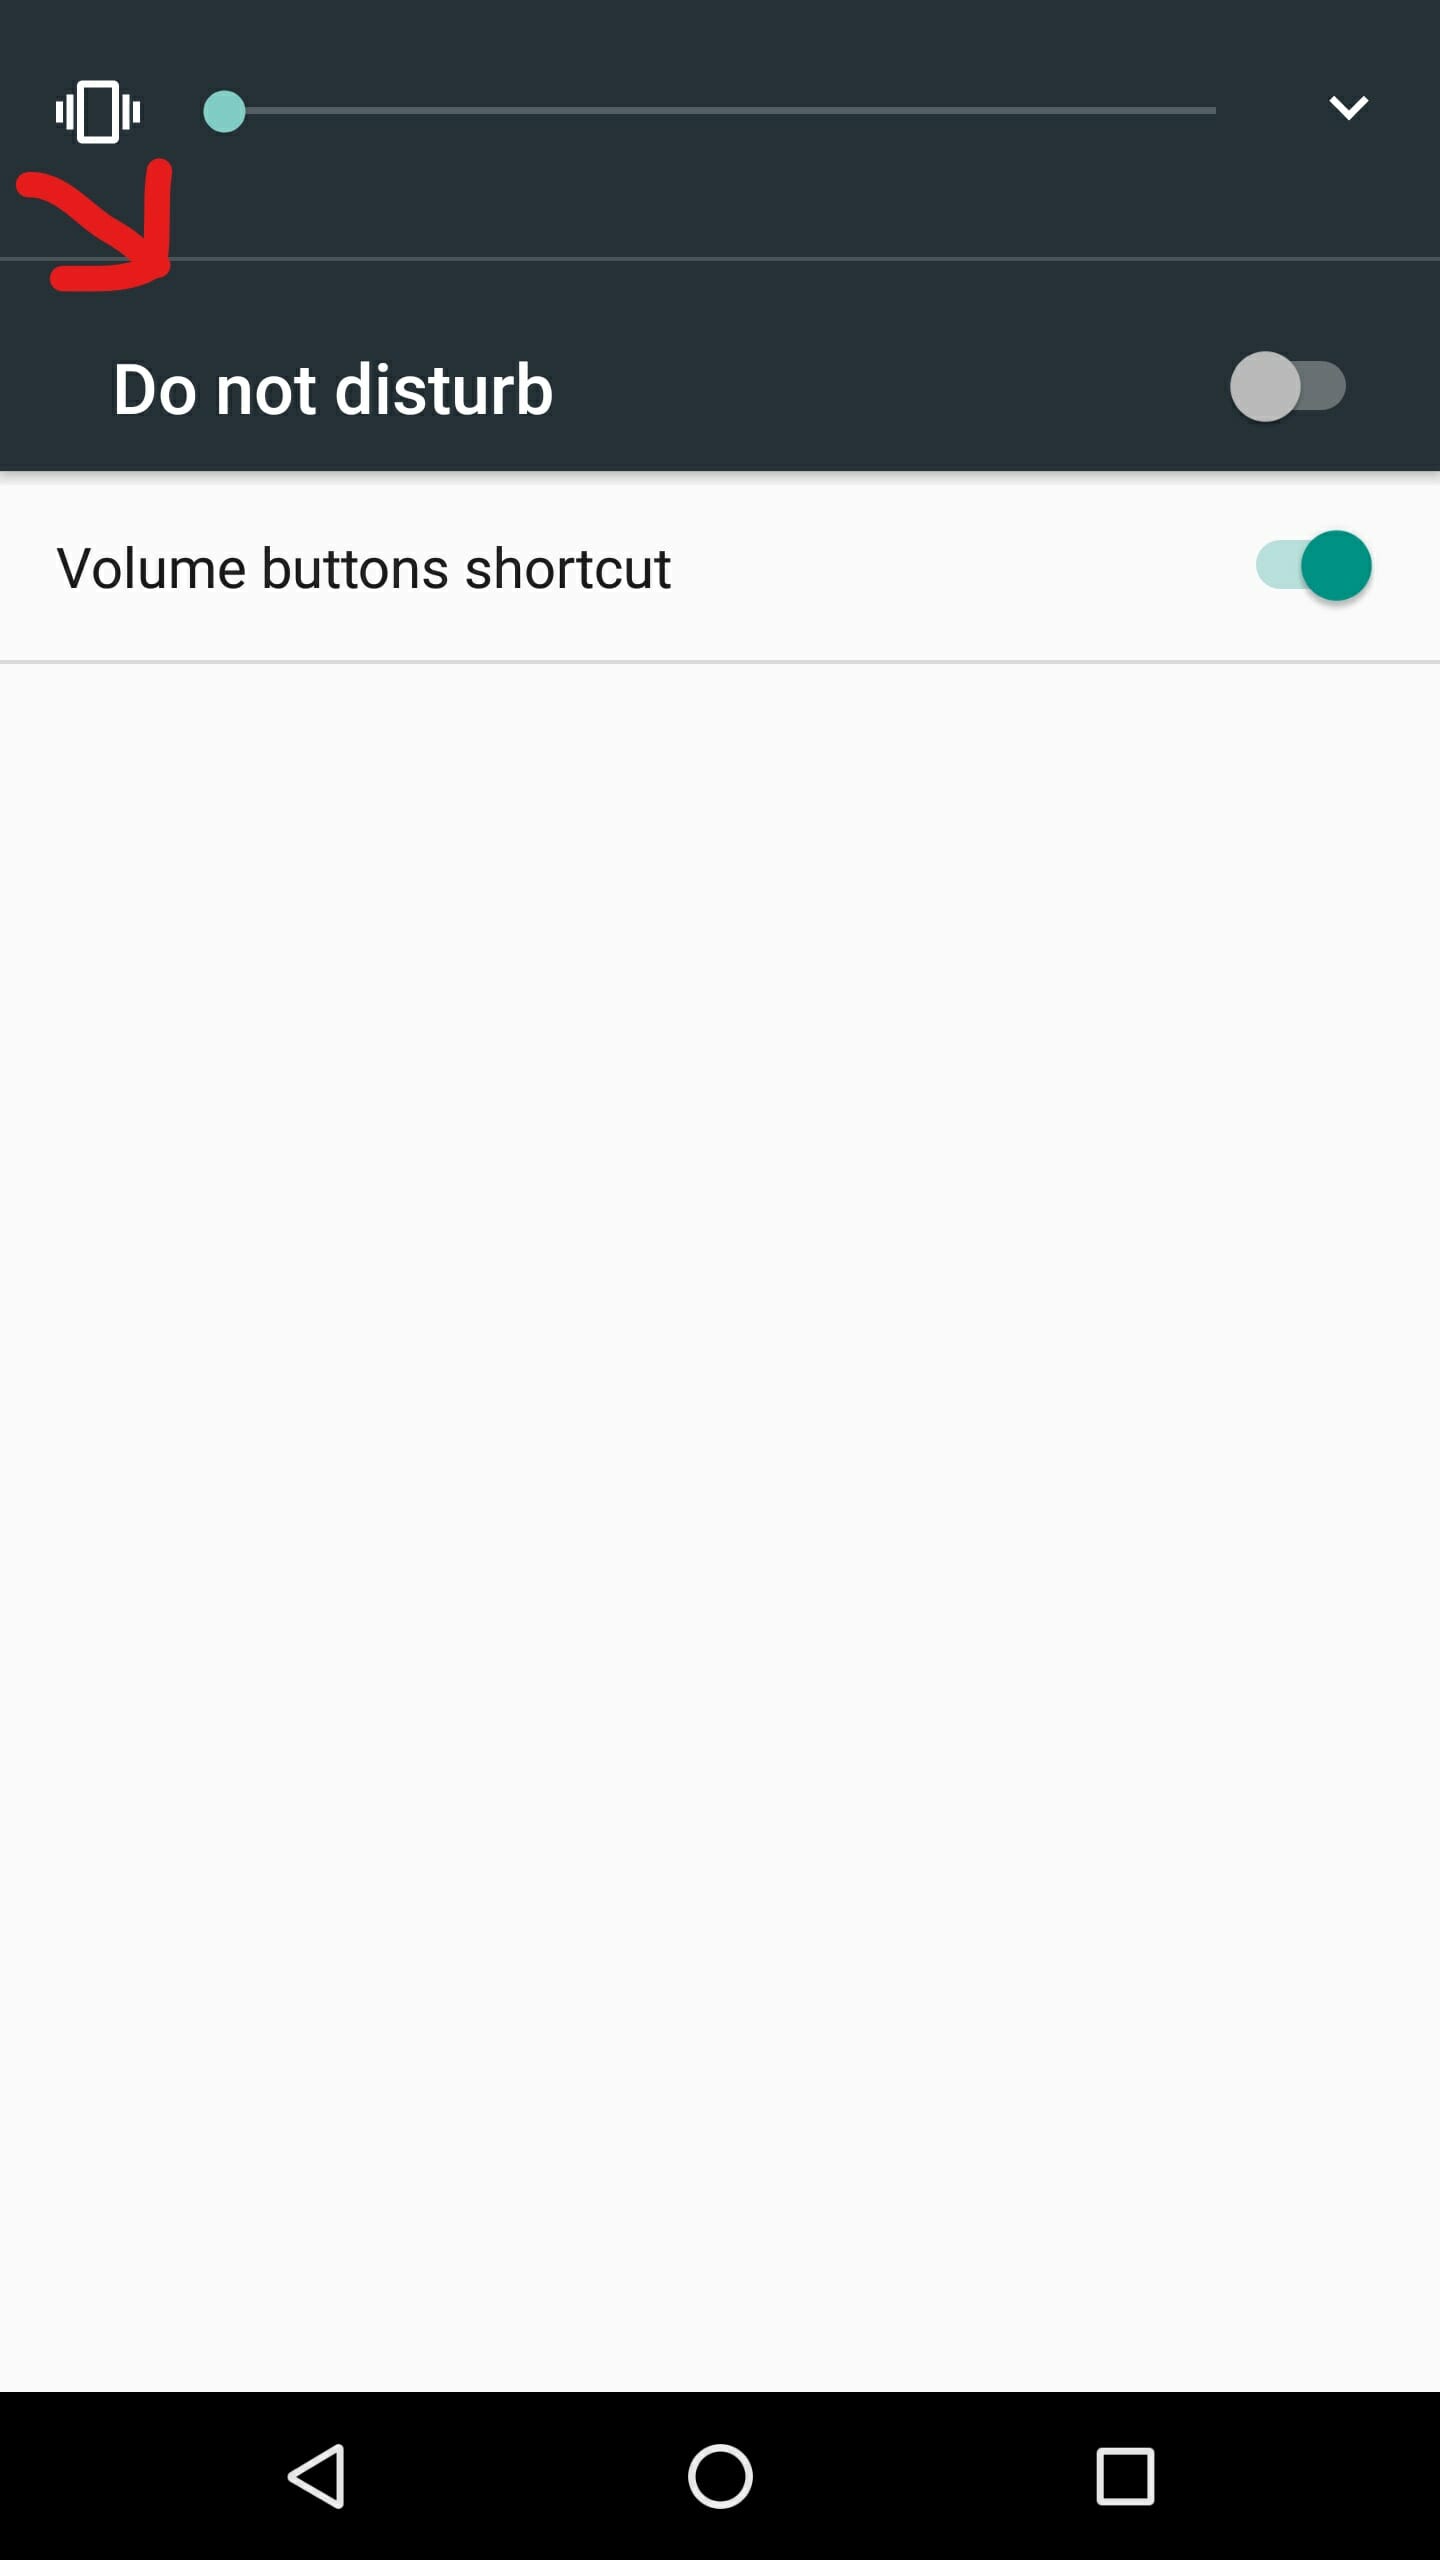
There are two poorly explained functions in the “Do not disturb” tab that could be of use to a lot of Android users. The first is “show with volume controls,” which lets you turn the “Do not disturb” function on or off straight from the on-screen volume control panel. When disabled, “Do not disturb” disappears from the volume control bar, and you’ll be required to go into the full settings menu to adjust it.
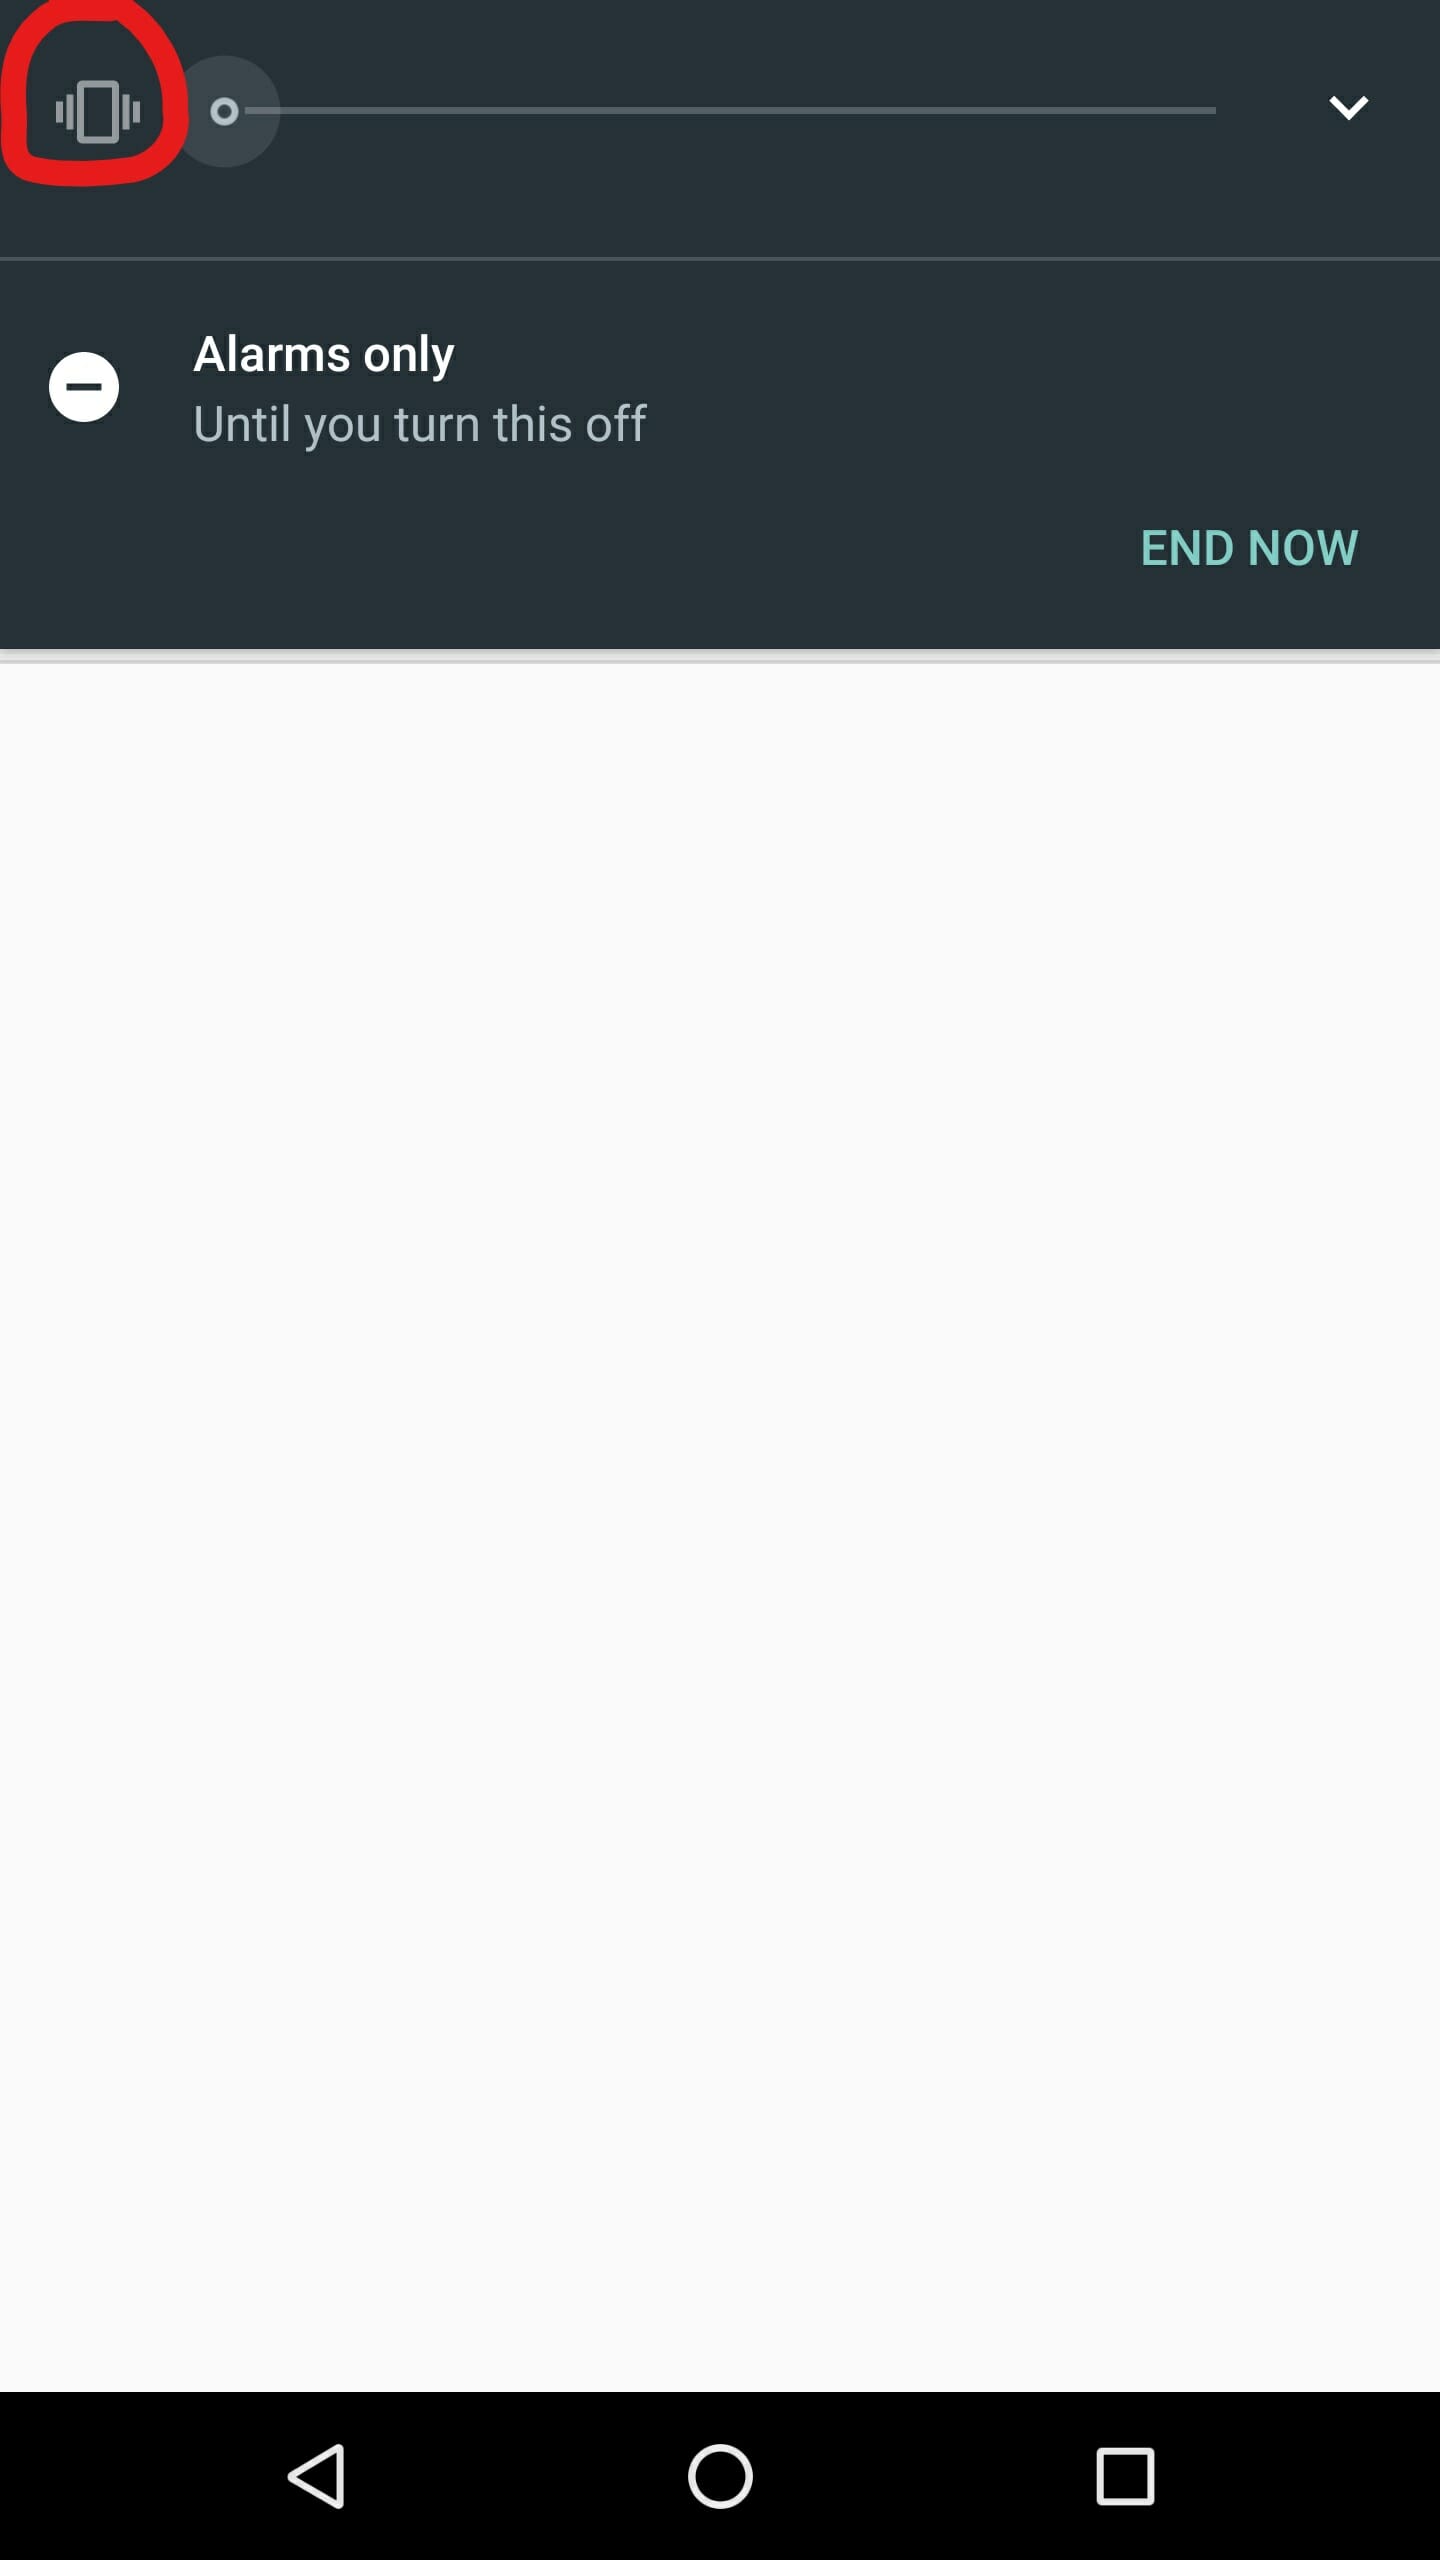
The second setting is the “Volume buttons shortcut,” which makes it possible to turn “do not disturb” mode on by pressing your volume rocker one notch lower than the lowest volume setting. This is not possible when the hidden setting is turned off. Instead, whichever sound setting you have chosen (vibrate or ring) will remain no matter how many times you press the down volume button.
Power notification controls (Other)
To get to the last feature, press the third tab in System UI Tuner called “other” and choose the only option: Power notification controls.
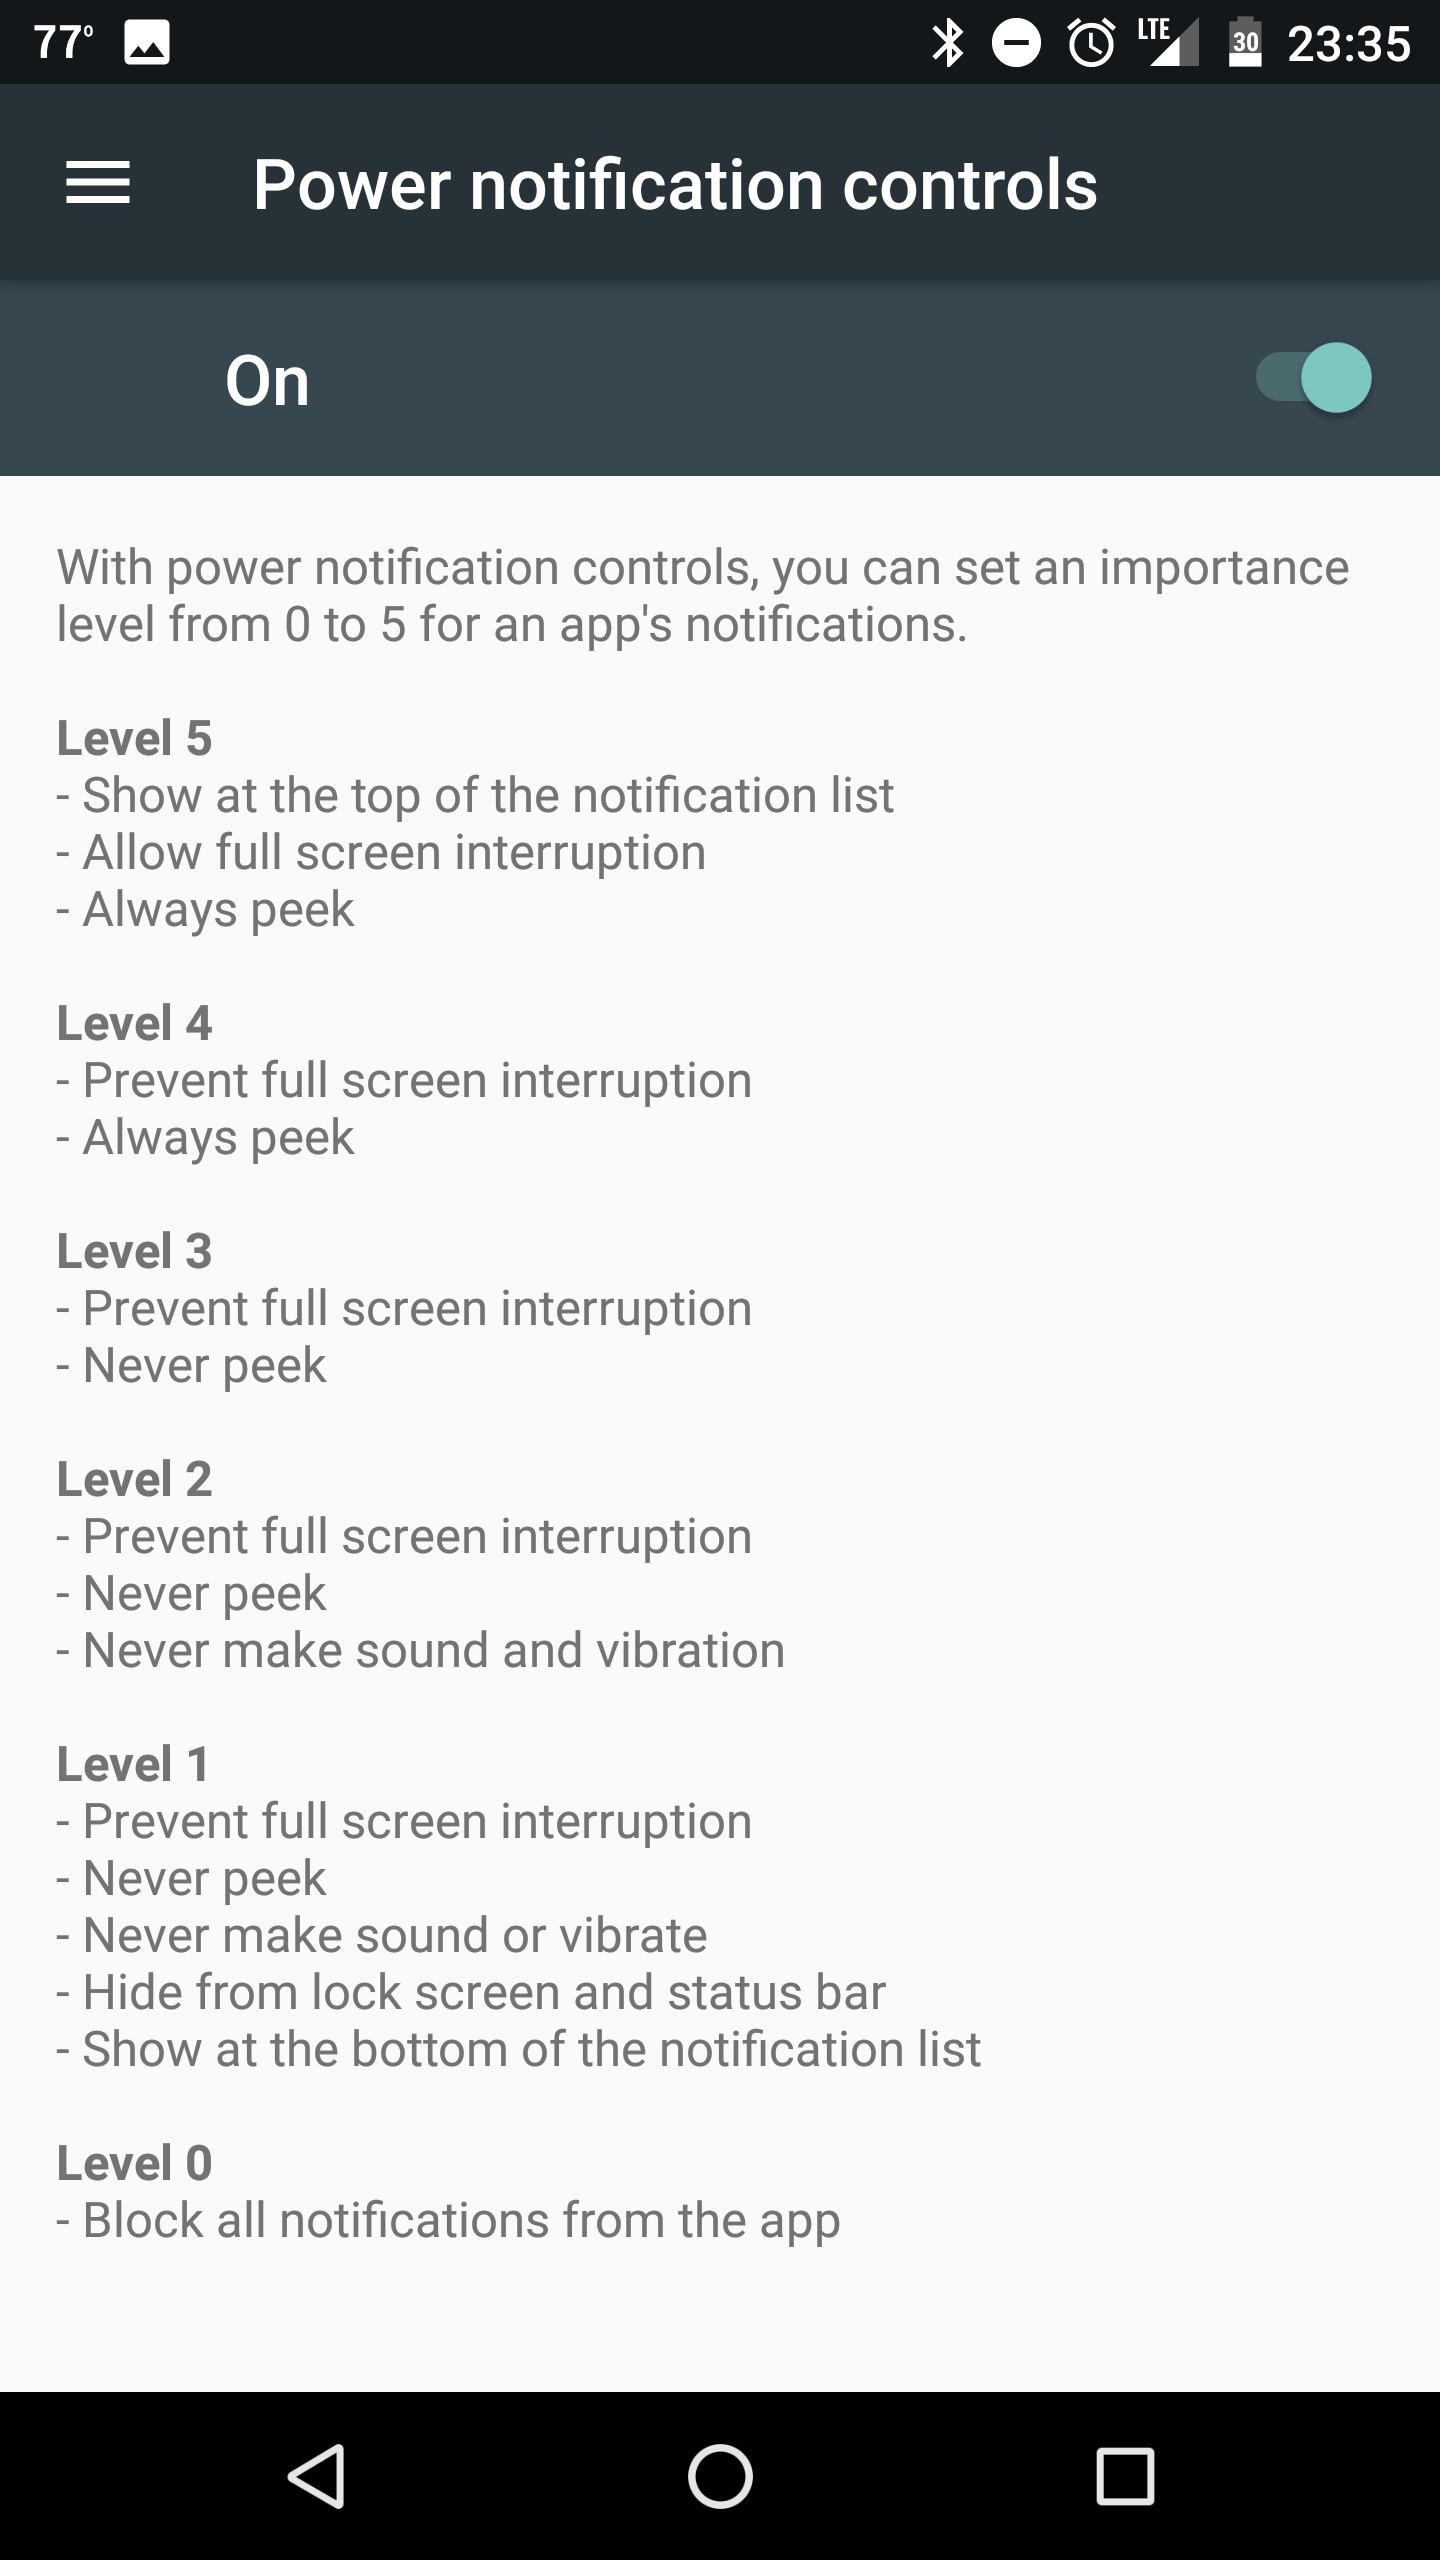
Here, you will see a guideline for setting the importance level of your app’s notifications. For example, level 0 means you block all notifications from an app, while level 5 means notifications for that app will show up at the top of your notifications list.
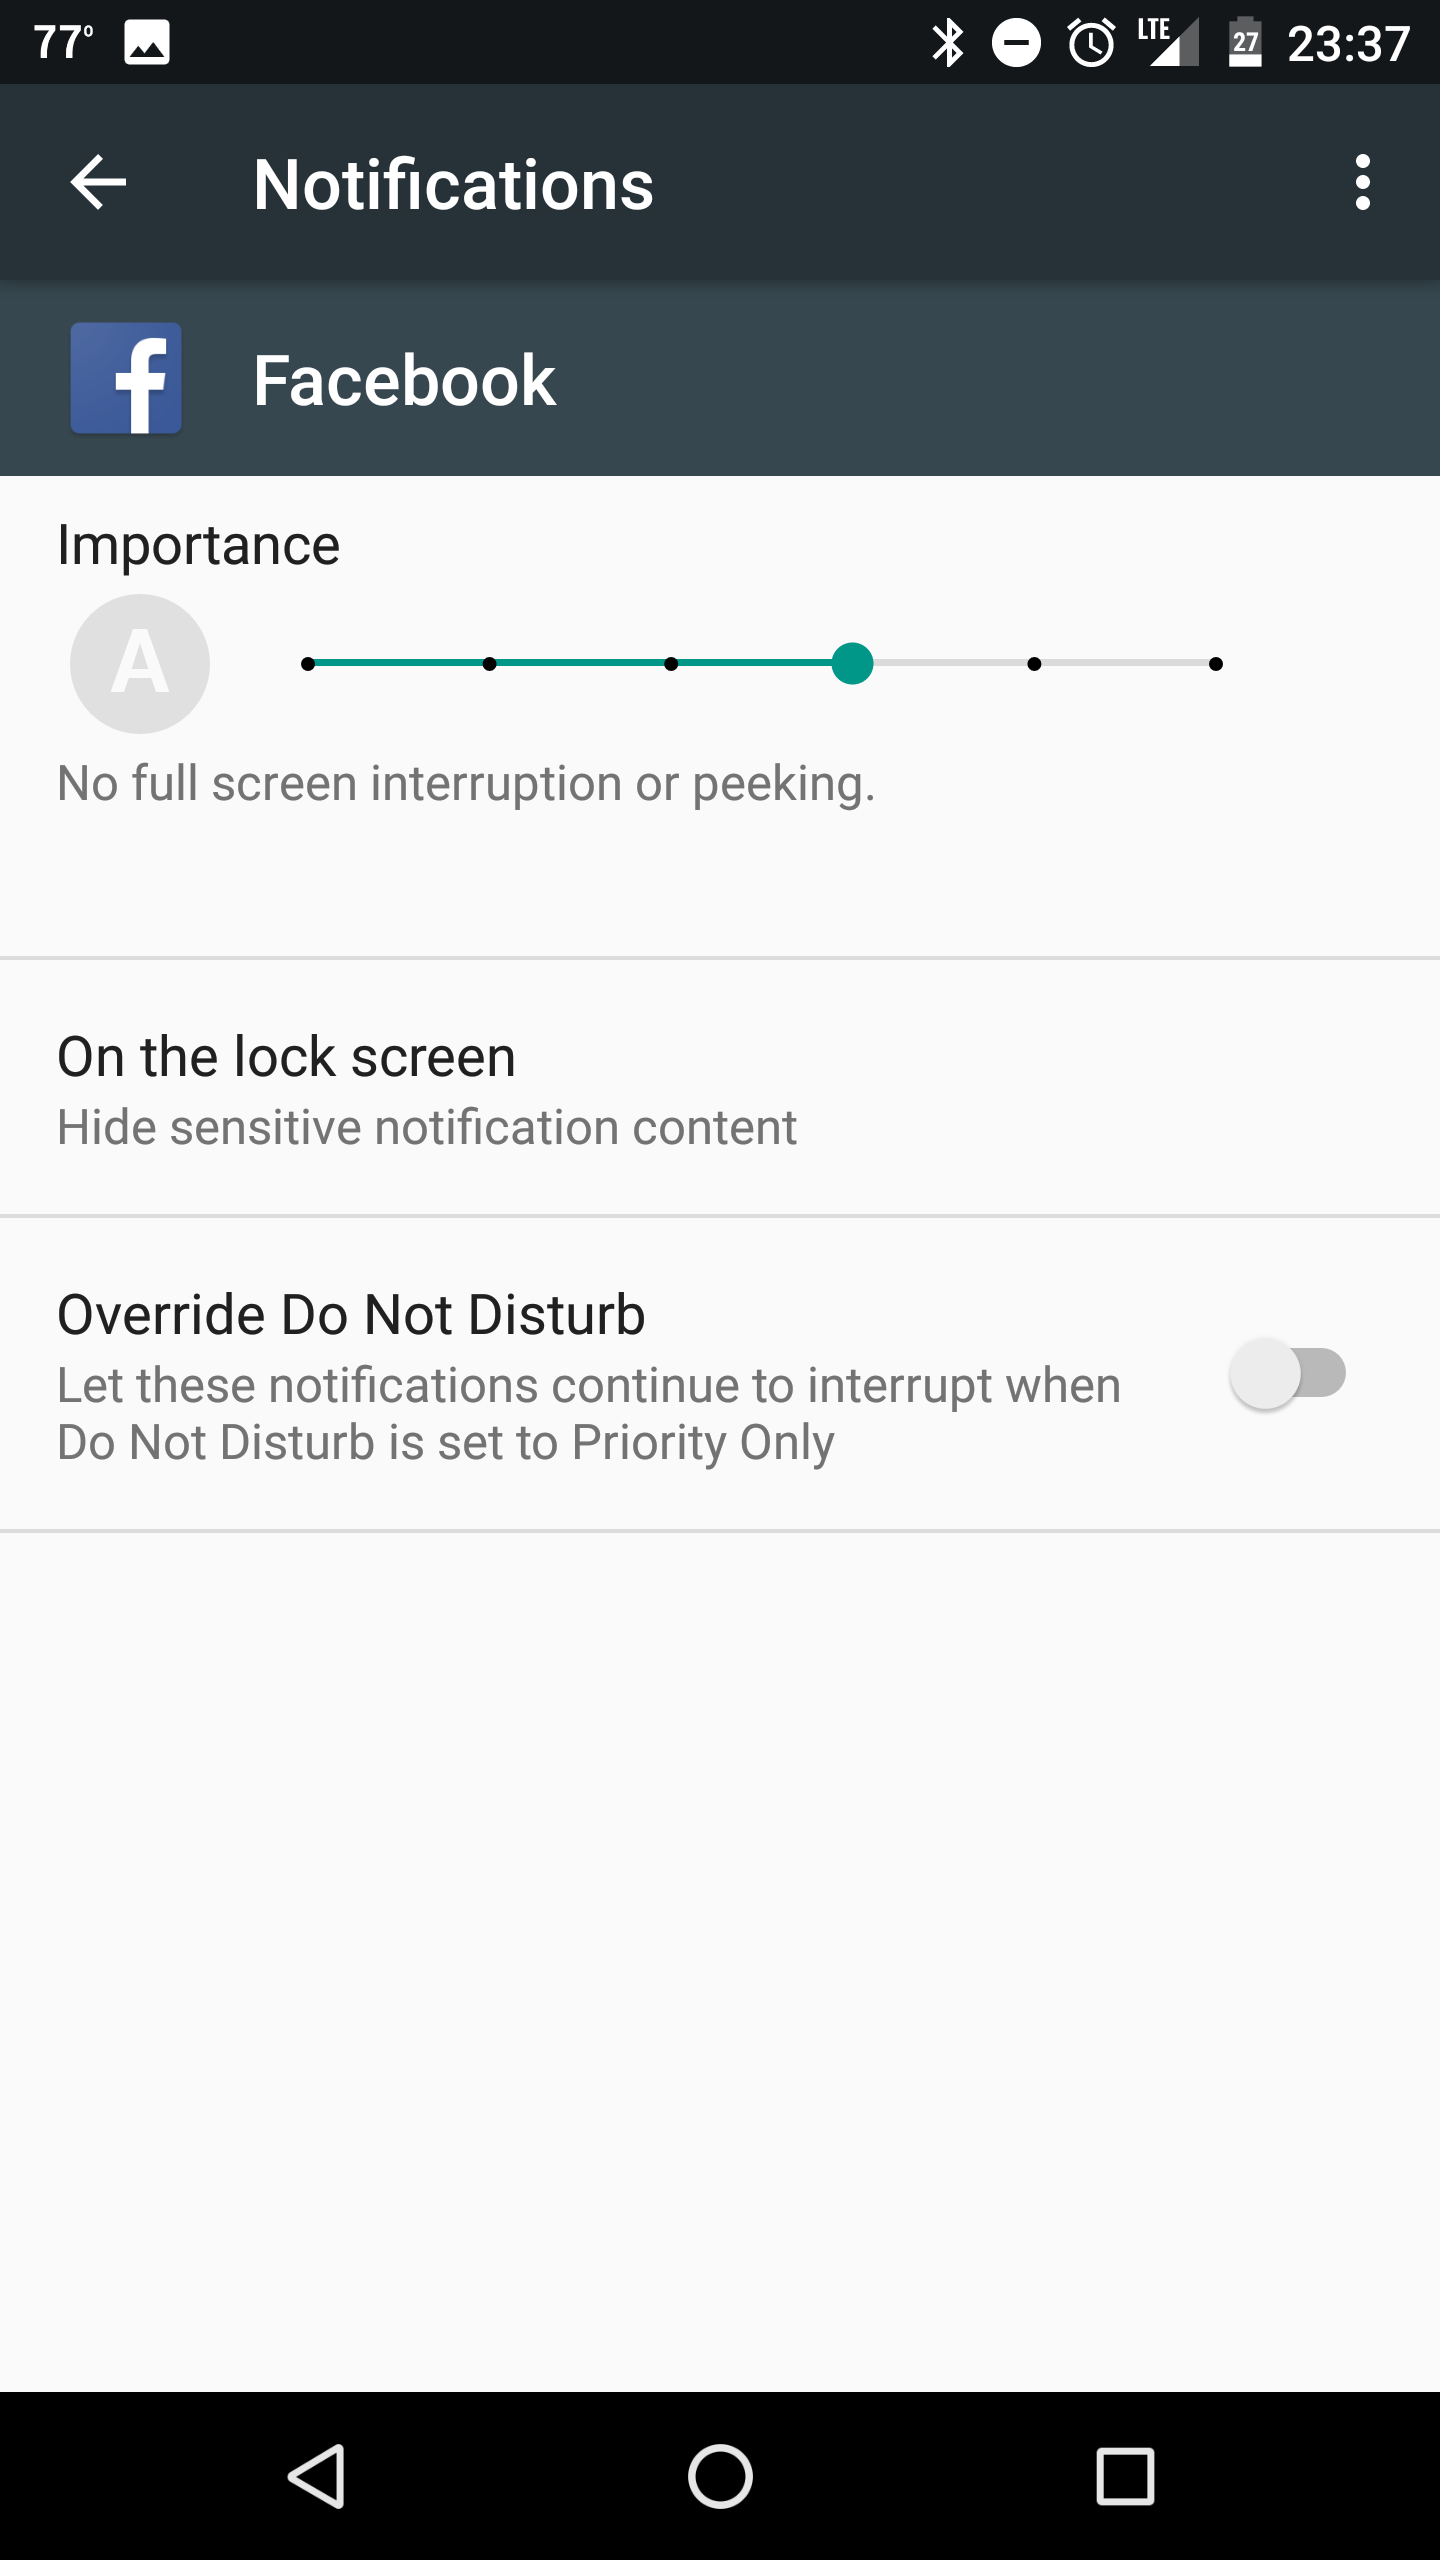
You won’t notice any changes to Android after enabling Power notification controls until you go into the “apps” setting on your phone. Once there, press on whichever app you’d like to adjust notifications for and tap the Notifications tab. Because “Power notifications controls” is enabled, you should see a slider under the title “Importance.” The default is for an app to determine the importance of each of its notifications automatically. To set the importance manually, just press the big green “A,” and move the slider over. You will see a description of how your phone will handle the app’s notifications just under the slider.
Enabling Developer options
You will need to find the “build number” tab on your phone to enable Developer options. For stock Android, navigate to the bottom of your settings and press on “About phone.” You will see “Build number” at the bottom of this setting. Press on it five times (seriously) to enable Developer options.
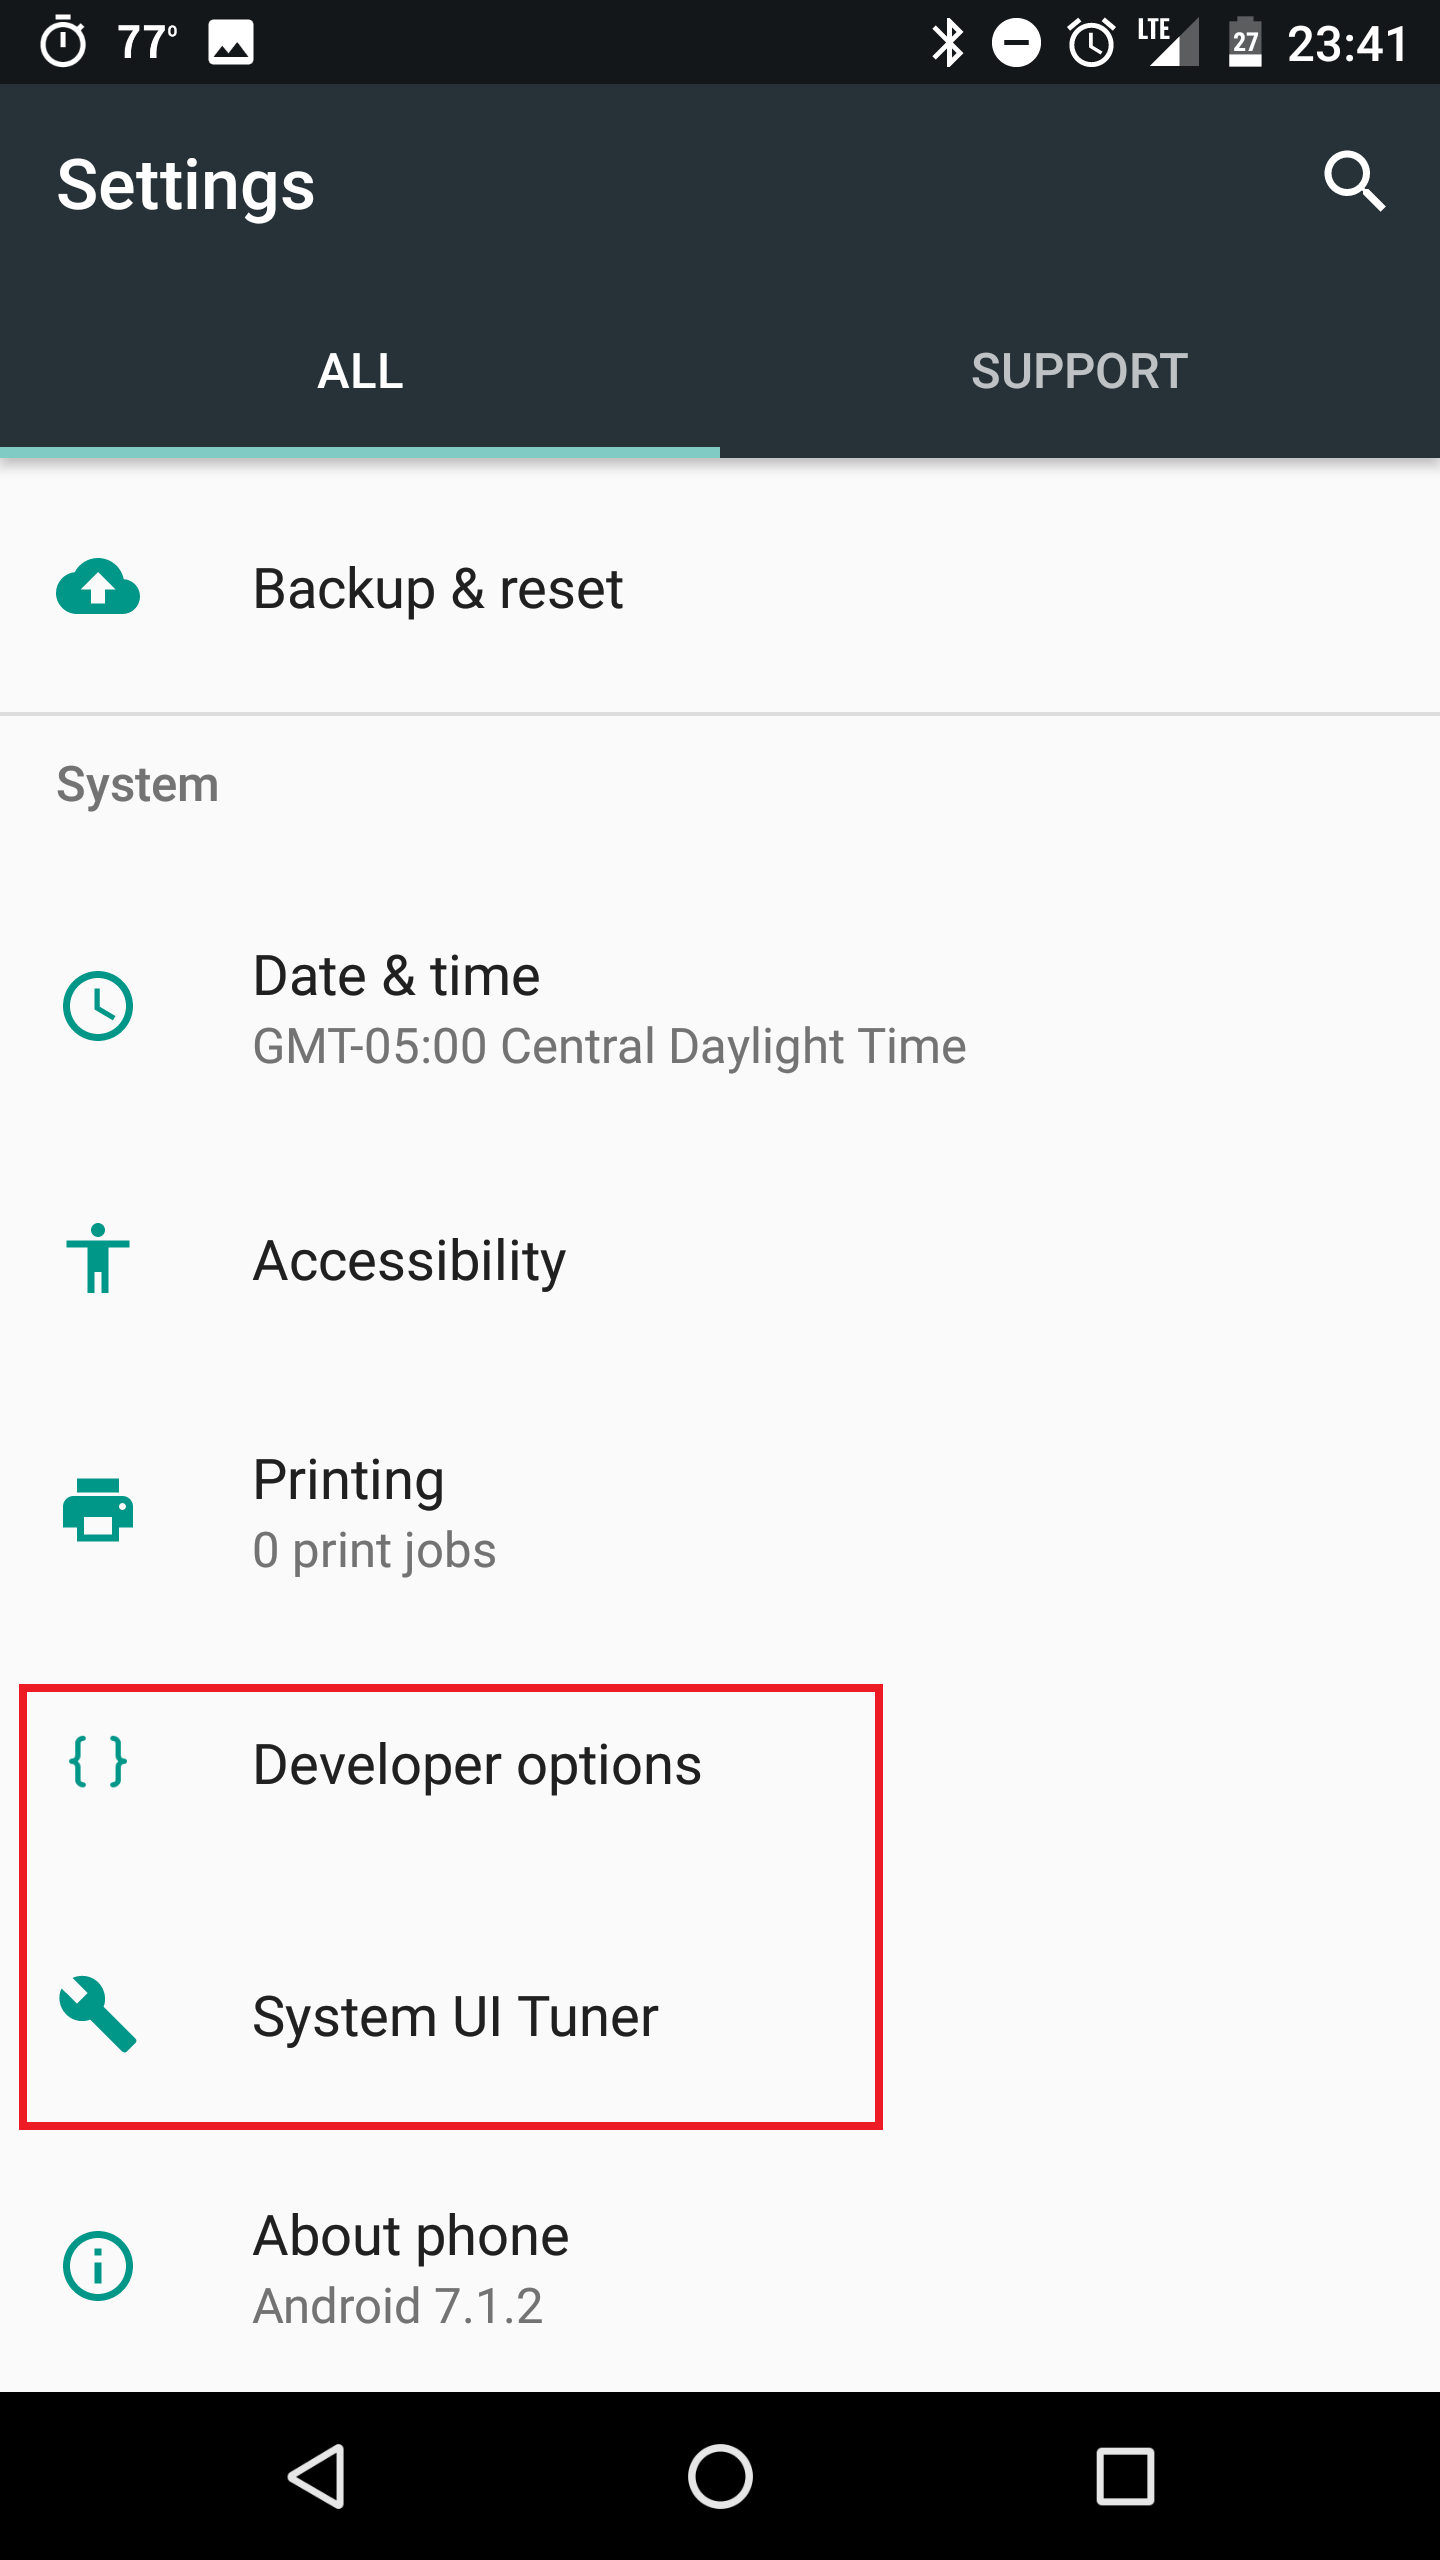
Once you’ve done that, back out of “About phone.” You should now see “Developer options” in your main settings menu. If you didn’t see the “Build number” tab after pressing “About phone,” and try navigating “Software information.”
Developer options has one main menu packed with tons of different options. A lot of them are geared toward developers, but we’re going to highlight a few that most users would find useful.
Stay awake
This setting makes it so your screen doesn’t turn off when the phone is charging.
Picture color mode
This turns sRGB technology on, which will make your display colors more muted. It’s great for anyone who isn’t a fan of oversaturation.
Automatic system updates
The default (and our recommendation) is for this setting to be turned on, but feel free to turn it off if you prefer to update your device manually. Just know the longer your device goes without an update, the longer it remains vulnerable to potential cyberattacks.
Running services
This setting will show you everything currently running on your device. It can be useful if you are experiencing performance hiccups.
Keep cellular data active
This setting will keep your mobile data enabled even when you are on Wi-Fi. Your phone will switch to the source that provides faster and more reliable speeds. Great if you have unlimited data but expensive otherwise.
Select USB Configuration
Your phone defaults to charging mode when you plug a new device into its USB port. If you want to let that device transfer files to your phone, you’ll have to change your USB configuration setting to either MTP (Media Tranfer Protocol) or PTP (Picture Transfer Protocol) from this menu or the notification bar.
There you have it, a look at Android’s two hidden settings that are loaded with features. Obviously, there are a ton of options you won’t want to use, and we advise against testing them all out. But now you know how to find System UI Tuner and Developer options and can take advantage of their extensive features.

